December 29:
Its been a rough day, I am not feeling to well; but with that comes the small moments today, that I am so thankful for. My oldest, almost 3 years old, held the gate open, at the bottom of the stairs today, while my youngest and myself walked through. After, he closed it. He helped me with breakfast, even closed the gate to the kitchen, while letting me know "gate needs to stay closed". He even listened to me when I said that cereal bowls stay on the table, and he returned the bowl back to the table. I guess this new technique might actually be working. Crossing my fingers that being a kind and caring person, means that my kids will be too.
December 30:
Thankful to finally see some of my military friends again. I missed them all while I was away. Its always so easy to slip right back into life with them. Its like we all just pick right back up where we left off, like we saw each other yesterday!
December 31:
Thankful that today is the last day of this project, and all that I have learned to be thankful for. Its not always the big obvious things (as some days are too rough), but sometimes its the small things that matter the most. I am so thankful for everyone who supported me through this year, and reminding what I can be, should be, and am thankful for. One month of giving thanks in November just is not enough to learn anything from. A full year, a journey of sitting down each night and thinking about the great, wonderful moments of the day and the almost impossible decent moments in the hard, uneventful days. I have been reminded that each hug, kiss, and word that someone gives time to you should be something you are thankful for. Those people are giving you the time that they value, and in that time they are sharing a piece of themselves with you. Don't forget to smile, keep your chin up while walking, and work hard for each and every goal you want to succeed in the day, month, year, or lifetime.
Thank you for joining me on this year long journey. I can't believe I am done. Is it really over? I guess it is.... until next year. Happy New Year Everyone!
Give Thanks,
Sarah
Showing posts with label kid. Show all posts
Showing posts with label kid. Show all posts
Thursday, January 1, 2015

Saturday, August 9, 2014
Mother's Day and Aerospace Museum
Mother's Day this year, I wanted to go to the zoo and hangout in Sacramento. However, while driving down the 70/99 highway towards Sacramento, we came to a traffic stop. Absolutely no cars were moving in either direction and it was almost impossible to get around, as everyone was trying to. Later that day I found a small snippet about a semi that over turned and smashed into a bridge and broke apart on both sides of the highway. It looked like a horrible mess, but thankfully everyone survived.
When we started to try and head around the traffic jam, we ended up heading inland towards Roseville/Lincoln area. Before we knew it we were in the area. We decided that we wasted too much time trying to get around the mess that it would be pointless to go to the zoo. Instead we traveled over to the Aerospace Museum in McClellan, Ca area. It is free for kids under 5 and military ID holders are free as well. I was excited because this meant we still could get out and enjoy our day, but we wouldn't have to pay for anything.
We had not been yet, and so we were shocked with how much of a variety of airplanes and other internal parts. I was blown away with how much hands on and educational items their were for the kids. They also had a great room upstairs for the kids to color, and play with toys. It was a nice break after running around to all the different airplanes.
Take a look and see:

 |
| Sitting in a real pilots seat! |

 |
| This was outside, look at all the airplanes! |
 |
| You could walk through a few. |
 |
| A small T-bird just right for the kids. |
 |
| This is the play room/coloring area. |
Overall, it wasn't the day I had in mind, but it turned out great. I really enjoyed the museum and it feels great to know that I can add one more unique place to see, to our list.
If you are in the area and want something fun to do, you should definitely check out the Aerospace Museum.
Discover Away,
Sarah
Thursday, July 17, 2014
DIY Kids Stove
As we all know, I am a huge DIY mom! If I can use something I have on hand, add a little elbow grease and a little bit of crafty paint, I will make it happen.With that being said, I was in love with all those cute kid stoves. Lets be honest though, I am not about to pay $100-$300 for some piece of plastic to just get beat up and have the stickers fall off. No thank you! I started doing some research, and clicked away for weeks. I finally decided I would use our old microwave stand and convert that into a mini stove/oven/refrigerator unit for our boys!
Heres the original stand:

It had doors on the front and a shelf in the middle, but my husband removed those as he was going to create a half door and more shelving units.

This is the unit with the hardware (purchased at ikea) and the new doors and hinges. My husband used piano/cabinet hinges that were pretty cheap. We used the old hardware for the "refrigerator" door (on the right), and used the old doors closing hardware (the black looking thing) to keep the "oven" door closed.

Step 1: If you have a unit that has a silky smooth fake varnish like feel then you will want to sand that sucker down. Get it rough and pull as much smooth surface off. Once thats done prime the entire thing. I used a primer that was for laminated furniture. It worked out perfect! Its pretty sticky so make sure you get extra rollers and brushes, as this was a prime and toss the brushes kind of primer.


Step two: Start painting the unit the way you want it to be! I did some 2nd priming in certain areas that needed it, so be sure to let your unit sit over night before you try to paint. I wanted the top left unit to be the oven. I used a flat black paint (purchased at a local craft store) and painted the inside and door, as well as a small window on the front (later on).

I then used painters tape to tape off the unwanted areas, and painted certain pieces of the unit in one color. I then let that dry over night and did a second coat. If you are going to paint the entire thing in one color then don't worry about the painters tape!


I then used the second color (orange) and painted the rest of the unit. I again waited over night and did some touch up spots to give it a nice thick layer of paint.


This is after the 2nd orange paint, and the black window for the oven.

For the hardware I used just small wood circles and Popsicle sticks that you can purchase at your local craft shop. I cut the Popsicle sticks to fit a small circle on the big circle (for the stove pieces). I then took one of the smaller circles and cut it in half for the dials (for the oven).
I then painted everything black. Waited a few hours, used wood glue and glued everything together.

I added some silver paint pen to the window and burners, as well as put the numbers on the oven knobs.

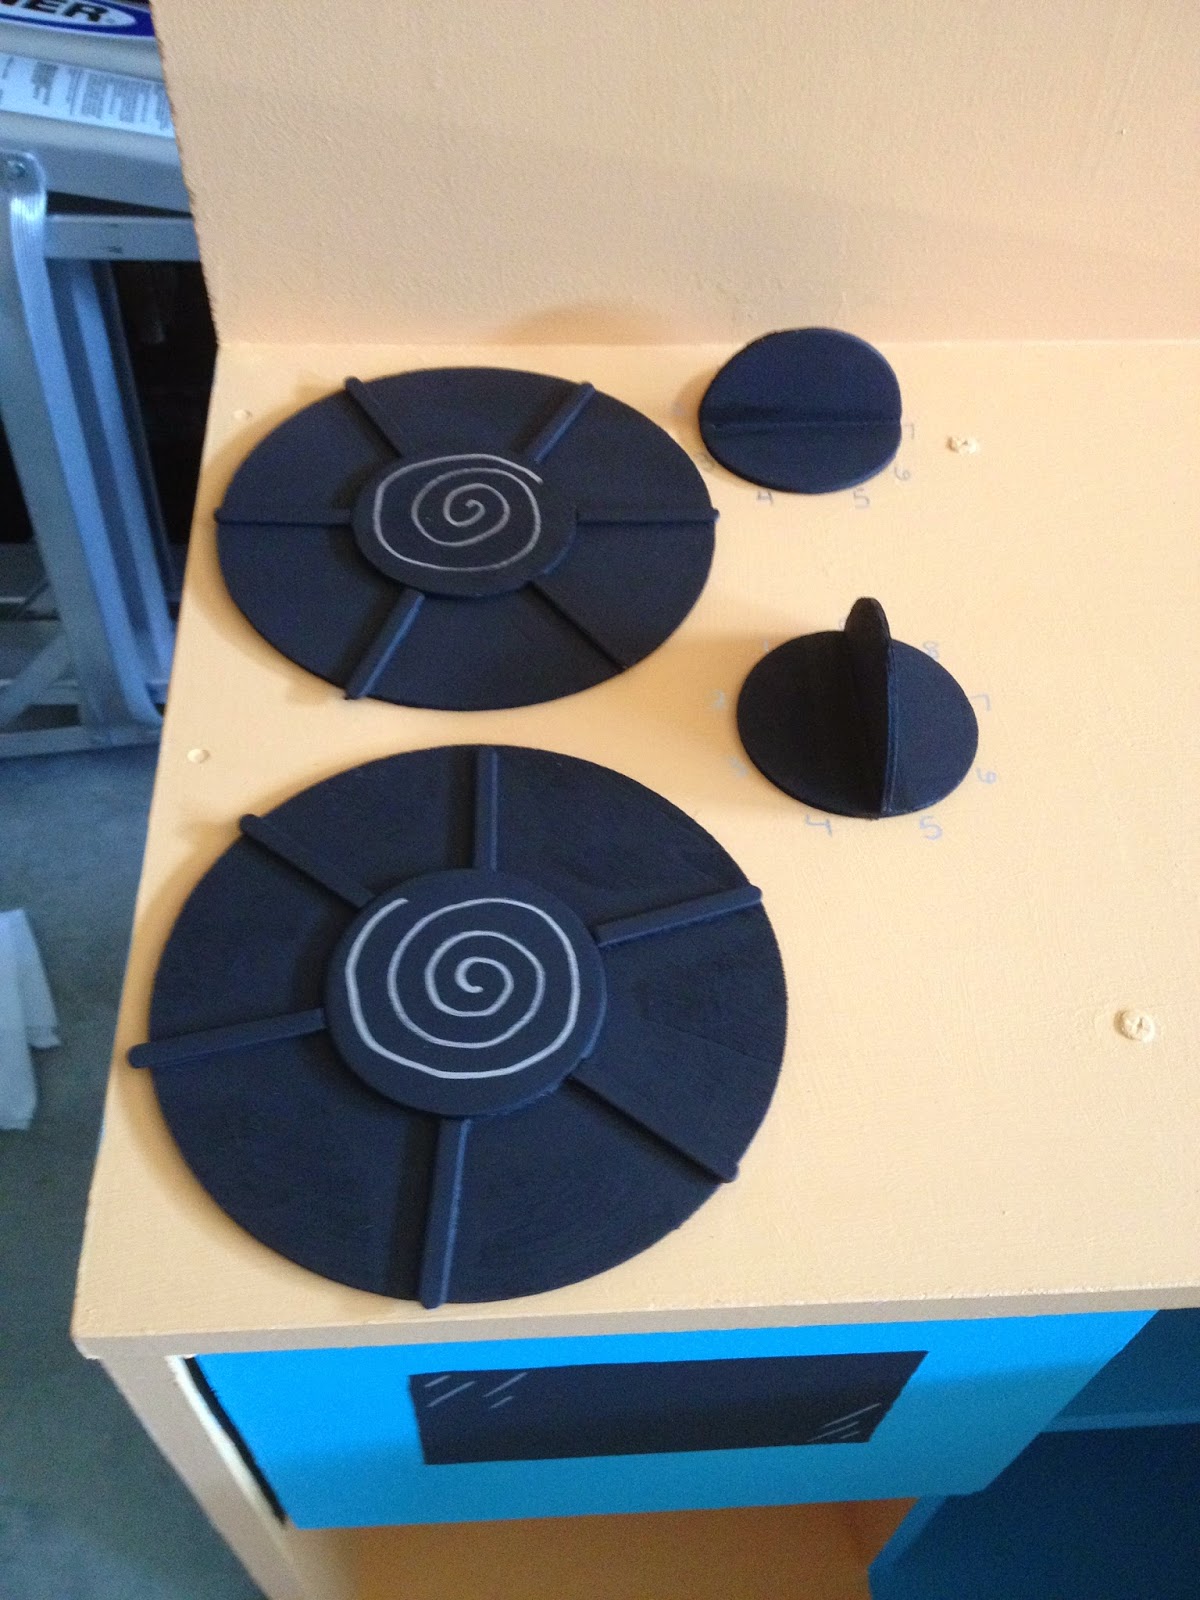
I then had my husband help me place the hardware (again purchased at ikea) and screw those in place. Super easy and simple. Its now done!!! I will more then likely add new things as I go, but for now they can play away!


I have not put a sealant on the paint, but plan to when I add the rest of the small projects to it. If I ever get around to it. With two kids, who knows when that will be.
In the end we bought the hardware, paint and primer, a few brushes and tape. I believe the grand total was under $50!!! I had the black paint, I had the a few brushes and the unit. It was a nice week long project that turned into a month long project because I slacked a little, but hey it got done and its now being used daily!!!
A Win For This DIY MOM,
Sarah
Heres the original stand:
It had doors on the front and a shelf in the middle, but my husband removed those as he was going to create a half door and more shelving units.
This is the unit with the hardware (purchased at ikea) and the new doors and hinges. My husband used piano/cabinet hinges that were pretty cheap. We used the old hardware for the "refrigerator" door (on the right), and used the old doors closing hardware (the black looking thing) to keep the "oven" door closed.
Step 1: If you have a unit that has a silky smooth fake varnish like feel then you will want to sand that sucker down. Get it rough and pull as much smooth surface off. Once thats done prime the entire thing. I used a primer that was for laminated furniture. It worked out perfect! Its pretty sticky so make sure you get extra rollers and brushes, as this was a prime and toss the brushes kind of primer.
Step two: Start painting the unit the way you want it to be! I did some 2nd priming in certain areas that needed it, so be sure to let your unit sit over night before you try to paint. I wanted the top left unit to be the oven. I used a flat black paint (purchased at a local craft store) and painted the inside and door, as well as a small window on the front (later on).
I then used painters tape to tape off the unwanted areas, and painted certain pieces of the unit in one color. I then let that dry over night and did a second coat. If you are going to paint the entire thing in one color then don't worry about the painters tape!
I then used the second color (orange) and painted the rest of the unit. I again waited over night and did some touch up spots to give it a nice thick layer of paint.
This is after the 2nd orange paint, and the black window for the oven.
For the hardware I used just small wood circles and Popsicle sticks that you can purchase at your local craft shop. I cut the Popsicle sticks to fit a small circle on the big circle (for the stove pieces). I then took one of the smaller circles and cut it in half for the dials (for the oven).
I then painted everything black. Waited a few hours, used wood glue and glued everything together.
 |
| Stove top. Small circle, glued onto a large circle, with Popsicle sticks as the burners. |
 |
| These are the oven knobs. Small circle, with half a small circle glued on top. |
I added some silver paint pen to the window and burners, as well as put the numbers on the oven knobs.
I then had my husband help me place the hardware (again purchased at ikea) and screw those in place. Super easy and simple. Its now done!!! I will more then likely add new things as I go, but for now they can play away!
I have not put a sealant on the paint, but plan to when I add the rest of the small projects to it. If I ever get around to it. With two kids, who knows when that will be.
In the end we bought the hardware, paint and primer, a few brushes and tape. I believe the grand total was under $50!!! I had the black paint, I had the a few brushes and the unit. It was a nice week long project that turned into a month long project because I slacked a little, but hey it got done and its now being used daily!!!
A Win For This DIY MOM,
Sarah
Saturday, May 17, 2014
May Give Thanks, Week 2
May 8:
Another day, another ER for my oldest son. Again, another hard day to find something to be thankful for, but while we spent our day at UC Davis ER, I have to say it was one of the most caring, nicest, updated, facility with amazingly kind and passionate nurses and doctors working hard to help find out whats going on with our son. It was an amazingly stressful day with such love and care from the entire ER unit. Thank you to all of them, for all they do.

May 9:
My husband is back at work today, after spending the past two days at the ERs with us, and I am thankful for his hard work, his dedication to both his family and career. He is an amazing husband and a beautiful soul inside and out. I can't thank him enough for all he does for us. I love you babe!
May 10:
A great day of relaxation, and thankful for all the cuddles and love from my wonderful boys, and wonderful husband.
May 11:
Its Mother's Day, so of course I am thankful for my amazing Mother! I love her and couldn't thank her enough for all she has done for myself and my brother and sister! Best mother ever!!

May 12:
Thankful to feel peace, calmness, and just simple happiness. Its been a great day.
May 13:
Feeling accomplished and thankful for a few minutes to finish up the boys stove/oven unit. Its pretty much done being painted, and all it needs now is the hardware! Feels good.

May14:
Thankful to find out that most of my families and friends houses (in southern California) are all safe from the wild fires raging right now. Stay safe southern California!
Give Thanks,
Sarah
Another day, another ER for my oldest son. Again, another hard day to find something to be thankful for, but while we spent our day at UC Davis ER, I have to say it was one of the most caring, nicest, updated, facility with amazingly kind and passionate nurses and doctors working hard to help find out whats going on with our son. It was an amazingly stressful day with such love and care from the entire ER unit. Thank you to all of them, for all they do.
May 9:
My husband is back at work today, after spending the past two days at the ERs with us, and I am thankful for his hard work, his dedication to both his family and career. He is an amazing husband and a beautiful soul inside and out. I can't thank him enough for all he does for us. I love you babe!
May 10:
A great day of relaxation, and thankful for all the cuddles and love from my wonderful boys, and wonderful husband.
May 11:
Its Mother's Day, so of course I am thankful for my amazing Mother! I love her and couldn't thank her enough for all she has done for myself and my brother and sister! Best mother ever!!
May 12:
Thankful to feel peace, calmness, and just simple happiness. Its been a great day.
May 13:
Feeling accomplished and thankful for a few minutes to finish up the boys stove/oven unit. Its pretty much done being painted, and all it needs now is the hardware! Feels good.
May14:
Thankful to find out that most of my families and friends houses (in southern California) are all safe from the wild fires raging right now. Stay safe southern California!
Give Thanks,
Sarah
Tuesday, April 15, 2014
April Giving Thanks, Week 2
April 8:
Excited and thankful to be working on a small hand sewn/quilted baby blanket, just for fun! Just working on my hand sewing techniques and practicing different stitches, which is making time for me. We all need that from time to time.

April 9:
Today was by far a rough day, so trying to find something to be positive and thankful for is extremely difficult. However, I am thankful for my loving and caring husband who just knows me so well, and knows when all we need is a little chocolate to lift our spirits! Yum.
April 10:
Thankful for a little motivation to get the house cleaned up and smelling like a clean house. When you have two kids who wear diapers, trust me this is the best thing ever.
April 11:
Thankful for the time with our neighbors and new friends. The kids had a blast in the pool, bounce house and all the toys. I enjoyed all the adult conversation too!

April 12:
So excited to have my mother here to visit. I am thankful for her safe drive and safe arrival!
April 13:
Thankful today for the amazingly fun and exciting day down in Sacramento, where theres a Train Museum and old style buildings and stores. It was a ton of wonderful fun!


April 14:
Thankful today for my wonderful mother being here and spoiling myself and the kids! Love my mother so much!
Give Thanks,
Sarah
Excited and thankful to be working on a small hand sewn/quilted baby blanket, just for fun! Just working on my hand sewing techniques and practicing different stitches, which is making time for me. We all need that from time to time.
April 9:
Today was by far a rough day, so trying to find something to be positive and thankful for is extremely difficult. However, I am thankful for my loving and caring husband who just knows me so well, and knows when all we need is a little chocolate to lift our spirits! Yum.
April 10:
Thankful for a little motivation to get the house cleaned up and smelling like a clean house. When you have two kids who wear diapers, trust me this is the best thing ever.
April 11:
Thankful for the time with our neighbors and new friends. The kids had a blast in the pool, bounce house and all the toys. I enjoyed all the adult conversation too!
April 12:
So excited to have my mother here to visit. I am thankful for her safe drive and safe arrival!
April 13:
Thankful today for the amazingly fun and exciting day down in Sacramento, where theres a Train Museum and old style buildings and stores. It was a ton of wonderful fun!
April 14:
Thankful today for my wonderful mother being here and spoiling myself and the kids! Love my mother so much!
Give Thanks,
Sarah
Saturday, April 5, 2014
Mickey Mouse Clubhouse Party Goody Bags
Do you have a Disney or Mickey Mouse themed party coming up? If so, this goody bag and favors are perfect in every way. Not only that but they are super easy to make! Check out the tutorial and photos below to find out how you can make these goodies.
First, is the favors. I went to Sams Club and purchased a HUGE box of animal crackers. You can purchase anything, but you might want something in bulk size. I then purchased 20 clear bags from a craft store. I filled each bag with about a cup of crackers.

I then purchased black foam from a craft store, and used a template to trace out mickey heads. I then cut them all out. 20 in total.

I then folded the clear bag and stapled the black mickey head cut outs to the bags. Make sure the staples go through the folds.

Then place them where all the little hands can grab them.


Next are the goody bags. Buy some red bags, and some black construction paper. Use the bag as a template and cut out a rectangle/square with the black construction paper, to cover the top half of the bag. Then cut out circles for the ears. You can do the ears any size, I went smaller as I was running out of black paper. To make the circles you can use a cup, a bottle, a bowl, anything circular.


Get Cutting,
Sarah
First, is the favors. I went to Sams Club and purchased a HUGE box of animal crackers. You can purchase anything, but you might want something in bulk size. I then purchased 20 clear bags from a craft store. I filled each bag with about a cup of crackers.
I then purchased black foam from a craft store, and used a template to trace out mickey heads. I then cut them all out. 20 in total.
I then folded the clear bag and stapled the black mickey head cut outs to the bags. Make sure the staples go through the folds.
Then place them where all the little hands can grab them.
Next are the goody bags. Buy some red bags, and some black construction paper. Use the bag as a template and cut out a rectangle/square with the black construction paper, to cover the top half of the bag. Then cut out circles for the ears. You can do the ears any size, I went smaller as I was running out of black paper. To make the circles you can use a cup, a bottle, a bowl, anything circular.
Then using an oval shaped object, cut out two yellow ovals and repeat for how many bags you have.
Add all the goody items you purchased for the kids to the bags. Note: you can add red bows with white dots to the top side of the bags for all the girls.
Get Cutting,
Sarah
Wednesday, March 5, 2014
DIY Mickey Mouse Birthday Shirt
If you saw the birthday post, you may have been waiting to see this post... How to make your own Birthday Shirt! I made a simple, step by step; with photos, tutorial. Its easy to follow, and easy to do. If you are a beginner, I would recommend maybe skipping the belt loops (on the suspenders), and just stitching the suspenders on by themselves. I hope you all enjoy this tutorial, and please leave any feedback or comments below!
First, you will need your typical sewing items.
1. Fabric
2. Heat N Bond (its the kind thats iron on, and double sided.)
3. Scissors, pencil, cutting board, iron, ironing board, pins, etc.
4. A shirt
5. Belt loops, silver D rings (1 Inch)
6. Matching thread.
7. Freezer paper
8. Your sewing machine, and all the usual items to sew.
To start you want to pick out fabric you like. I chose this red old classic like mickey and friends fabric as the tie. I then used the yellow in this fabric to match and purchased a small quarter of fabric. I also had black and white polka dot fabric on hand.

You will need to purchase these rings for the suspender piece, if you are advanced enough. If you are unsure you can sew these in, then skip this step. (in the photo it says 2inches, but I purchased a 1 inch ring).

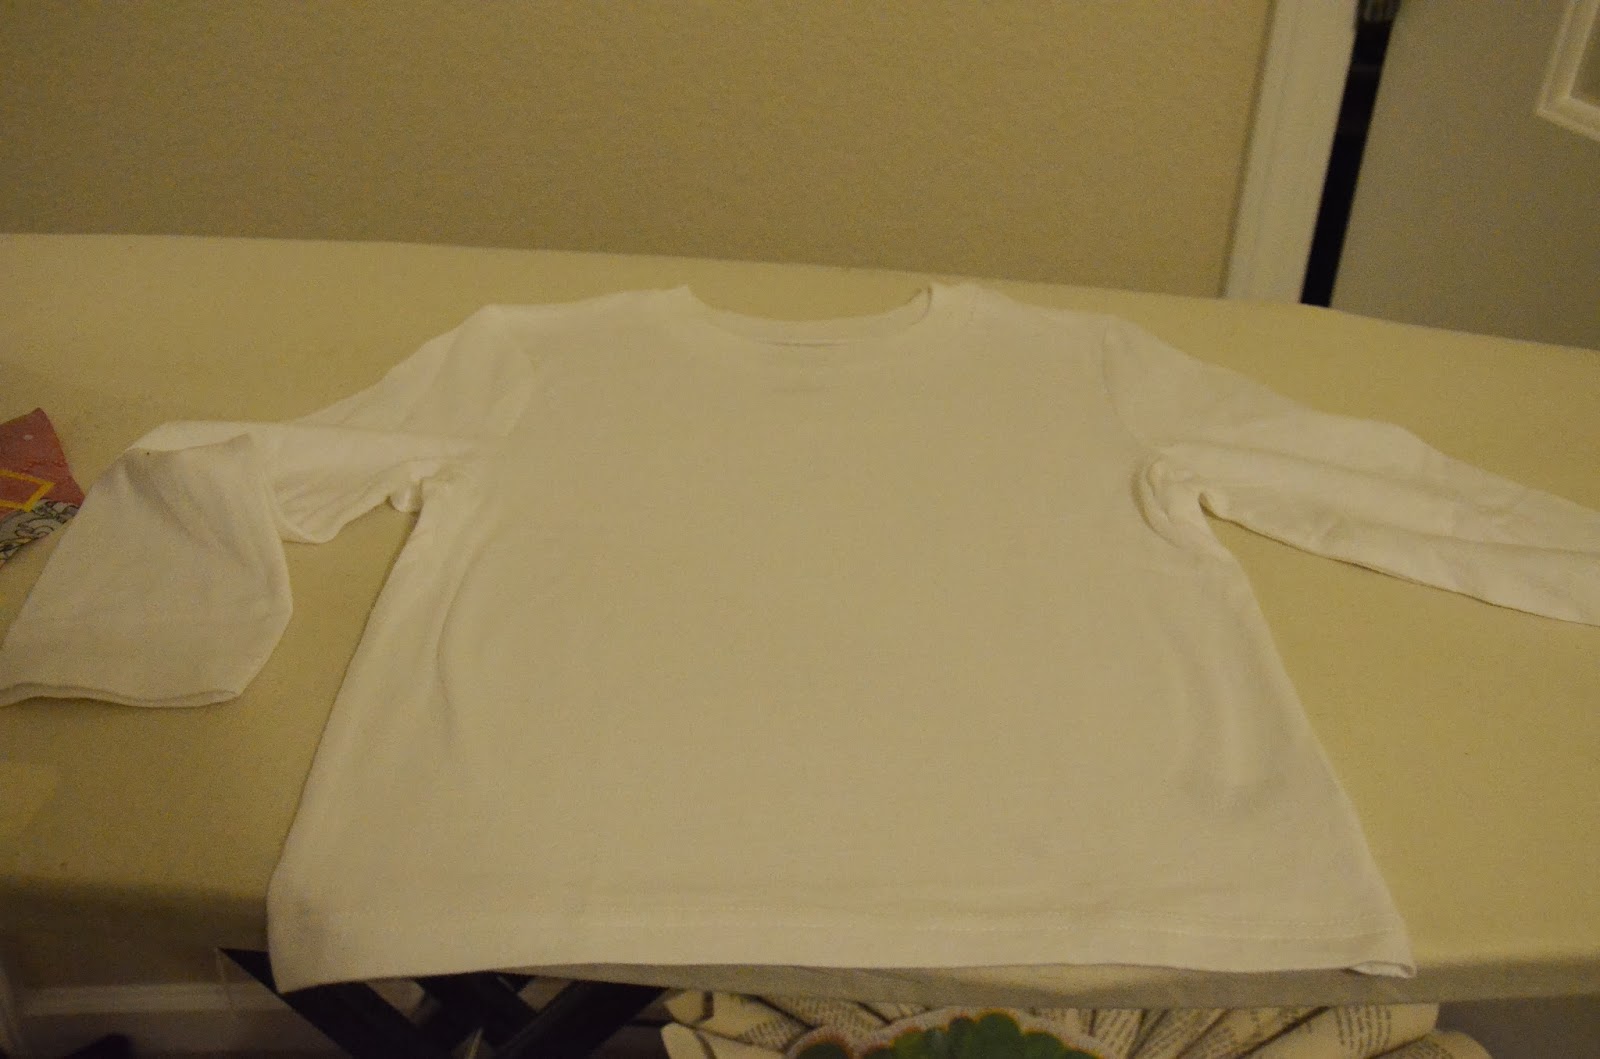
Now using your freezer paper, cut out a long piece of it to fit where the tie would go. I ironed the shirt first to help get a smooth surface to use.

Start drawing out the tie. I started by tracing the neck line, and working from their. Mark where the middle is and that will help you trace the tie in the center of the shirt. (Use the tag on the back if the shirt to help find the center).

I then fold the freezer paper at the center and cut the tie out on the lines that I liked.

Once cut out, you should have something like this.

Unfold it and place it in the center of the neck.

Double check to make sure it fits, but don't iron it down yet.

Use another freezer paper and trace the bottom of the tie. This freezer paper will give you the idea of how big your number needs to be.

Using that template I traced out this two.

I then double checked it with the tie.

Now I have all my pieces ready for their fabric.

I use the 2 and place it onto my yellow fabric. I then iron it down.

I back it with the heat and bond, iron that down and then cut all the pieces around the 2.

Carefully pull off the freezer paper from the front.

Move to the red fabric and using your freezer paper tie cut out, iron it down onto the red fabric.

Again back it with the heat n bond.

This is what you should now have after you cut it all out.

Pull the freezer paper off, again carefully.

Place the two where you want it and or like it. Take the backing off the 2 (heat n bond backing) and iron it into place.

Place all of it on the shirt, to double check placement, and trim anything that might need some trimming.

Move over to your sewing machine, set the stitch to a zig zag and decrease to width so the stitches are closer together. You will now have an applique stitch. If you have a hard time judging this, use a spare piece of fabric to test the widths and lengths. Once you stitch around the 2 your tie should look like this:

Iron your shirt if needed, I did this before hand and it was already flat.
Take the backing off the tie (heat n bond backing), careful when doing this as you have now stitched the 2 into place. Try not to pull any of those threads. Place the tie into place and iron it down.

Take your shirt over to the machine and again using your zig zag stitch with a smaller width, applique the tie down. Be careful and watch the back of your shirt, you don't want to accidentally sew it to the front. Reminder: Don't forget to change thread and bobbin to match the fabric. I used red for this, and yellow thread for the two.

Ta-da! You now have most of the work done!

Cut out your straps for the suspenders. I cut mine at 2 inches in width.

I then ironed the two sides in a half an inch. This gave the suspenders a clean edge to sew down.

You now need to sew the suspenders and belt rings into place.

I folded my bottom (fabric) pinned that at the hem of the shirt. I then pinned up half way, placed the D ring at that point and pinned the rest of the fabric. I cut the fabric about a half an inch from the top of the shirt. I then folded it down and pinned it into place.

When sewing the suspenders, start at the bottom of the shirt, stitch the bottom and then go up the shirt. Get as close to the D ring as possible. Carefully sew along the bottom of the D ring and then back down the other side of the suspenders. Continue sewing from the D ring and the top part of the suspenders. Make sure you sew both sides.

Do the same thing to the other side. Iron the hem, fold the fabric, pin onto the shirt, add the D ring, pin some more, cut the fabric, fold and pin.

Once you have sewn the second suspenders you should now have an adorable and perfect Birthday Shirt!!!

Now he should be ready for the party!

Now Get your Applique On,
Sarah
First, you will need your typical sewing items.
1. Fabric
2. Heat N Bond (its the kind thats iron on, and double sided.)
3. Scissors, pencil, cutting board, iron, ironing board, pins, etc.
4. A shirt
5. Belt loops, silver D rings (1 Inch)
6. Matching thread.
7. Freezer paper
8. Your sewing machine, and all the usual items to sew.
To start you want to pick out fabric you like. I chose this red old classic like mickey and friends fabric as the tie. I then used the yellow in this fabric to match and purchased a small quarter of fabric. I also had black and white polka dot fabric on hand.
You will need to purchase these rings for the suspender piece, if you are advanced enough. If you are unsure you can sew these in, then skip this step. (in the photo it says 2inches, but I purchased a 1 inch ring).
Now using your freezer paper, cut out a long piece of it to fit where the tie would go. I ironed the shirt first to help get a smooth surface to use.
Start drawing out the tie. I started by tracing the neck line, and working from their. Mark where the middle is and that will help you trace the tie in the center of the shirt. (Use the tag on the back if the shirt to help find the center).
I then fold the freezer paper at the center and cut the tie out on the lines that I liked.
Once cut out, you should have something like this.
Unfold it and place it in the center of the neck.
Double check to make sure it fits, but don't iron it down yet.
Use another freezer paper and trace the bottom of the tie. This freezer paper will give you the idea of how big your number needs to be.
Using that template I traced out this two.
I then double checked it with the tie.
Now I have all my pieces ready for their fabric.
I use the 2 and place it onto my yellow fabric. I then iron it down.
I back it with the heat and bond, iron that down and then cut all the pieces around the 2.
Carefully pull off the freezer paper from the front.
Move to the red fabric and using your freezer paper tie cut out, iron it down onto the red fabric.
Again back it with the heat n bond.
This is what you should now have after you cut it all out.
Pull the freezer paper off, again carefully.
Place the two where you want it and or like it. Take the backing off the 2 (heat n bond backing) and iron it into place.
Place all of it on the shirt, to double check placement, and trim anything that might need some trimming.
Move over to your sewing machine, set the stitch to a zig zag and decrease to width so the stitches are closer together. You will now have an applique stitch. If you have a hard time judging this, use a spare piece of fabric to test the widths and lengths. Once you stitch around the 2 your tie should look like this:
Iron your shirt if needed, I did this before hand and it was already flat.
Take the backing off the tie (heat n bond backing), careful when doing this as you have now stitched the 2 into place. Try not to pull any of those threads. Place the tie into place and iron it down.
Take your shirt over to the machine and again using your zig zag stitch with a smaller width, applique the tie down. Be careful and watch the back of your shirt, you don't want to accidentally sew it to the front. Reminder: Don't forget to change thread and bobbin to match the fabric. I used red for this, and yellow thread for the two.
Ta-da! You now have most of the work done!
Cut out your straps for the suspenders. I cut mine at 2 inches in width.
I then ironed the two sides in a half an inch. This gave the suspenders a clean edge to sew down.
You now need to sew the suspenders and belt rings into place.
I folded my bottom (fabric) pinned that at the hem of the shirt. I then pinned up half way, placed the D ring at that point and pinned the rest of the fabric. I cut the fabric about a half an inch from the top of the shirt. I then folded it down and pinned it into place.
When sewing the suspenders, start at the bottom of the shirt, stitch the bottom and then go up the shirt. Get as close to the D ring as possible. Carefully sew along the bottom of the D ring and then back down the other side of the suspenders. Continue sewing from the D ring and the top part of the suspenders. Make sure you sew both sides.
Do the same thing to the other side. Iron the hem, fold the fabric, pin onto the shirt, add the D ring, pin some more, cut the fabric, fold and pin.
Once you have sewn the second suspenders you should now have an adorable and perfect Birthday Shirt!!!
Now he should be ready for the party!
Now Get your Applique On,
Sarah
Subscribe to:
Posts (Atom)