Pages

Friday, August 22, 2014

Nautical Themed Birthday Outfit

I always loved those birthday kids that have the matching themed outfit for their special birthday party. I also know how to sew... of course I made my little boys birthday outfit!

The theme was nautical, and I loved the idea of blue, white and orange. I had purchased some nautical fabric awhile back and never used it. I kept it in the "I want to use for Jared" pile, but never found anything to make for him with that fabric. I then decided it would be perfect for his birthday outfit. I purchased some coordinating orange chevron fabric to go with his navy blue shirt and bib material.

To make the bib:
1) I printed out the letter J and the #1 from a font I liked on my word document.
2) I then traced them onto freezer paper, and cut those out.
3) I ironed the freezer paper cut outs onto the fabric, and traced with a washable pen.
4) I then carefully cut out the letter and number
5) I used double sided fusible interface (heat n bond makes one), ironed that onto the wrong side of the letter and number and cut that out.
6) I then removed the paper backing from the double sided interface, and ironed the J and 1 into place.
7) I appliqued with coordinating thread, and appliqued the "is" on the front of the bib.
8) I then sewed the front of the bib, to the back of the bib (right sides together), left a small hole, flipped the bib inside out, ironed it, top stitched and finished it off with a snap.


To make the shirt:
1) Using the same stencils as I used for the bib, but I enlarged them a little more.
2) I traced them onto freezer paper and cut them out.
3) I ironed the freezer paper cut outs onto the fabric of choice, and traced them onto the fabric with a washable pen.
4) I then cut out the J, anchor and 1 carefully.
5) I used double sided fusible interface and ironed it onto the wrong side of the fabric cut outs.
6) I then cut out the interface, took the paper backing off and ironed the J, anchor and 1 all into place.
7) With coordinating thread I appliqued the anchor first, stopping where it over laps.
8) I then appliqued with coordinating thread, around the J and 1.
9) I finished the shirt off with the "is" applique.


I then used the orange chevron fabric to make shorts for his outfit. You can see a tutorial on how to make pants HERE, just cut them shorter for shorts.


The finished outfit was soooo perfect, I loved it so much. He will be wearing this outfit for months, until I can't get him in them anymore.

The shorts are not that tight, he is sliding down my moms knee.
Please pin, or share this link.

Applique On,
Sarah

Tuesday, August 19, 2014

Nautical Themed Banners

For Jared's 1st Birthday this past June, we decided on a nautical theme. However, I didn't want to do a bunch of blue, white and red. I mean, we are in the military and we are always seeing blue, white and red. Instead I wanted to do something with more color; so we went with navy blue, white and orange. I know, its not far from blue, white, and red, but I liked how much it went with our monthly photo stickers, and the other ideas, and fabric I had.

With all that being said, I needed to start working on the decorations and banners in order to find a real theme to the party and something to give me a better guide lines. I headed out to Micheals one day, spent about 30 minutes going up and down and up and down the scrapbook paper. I was looking for the perfect paper to use for the banners. I found a few and was so excited when they all started to really pull together. Once I purchased the scrapbook paper, I then needed templates to cut out my themed items.

I just did a simple google search for the anchor, sail boat and wheel. I then printed, and enlarged them into the sizes I wanted and was going to use. I also made extra copies, just in case one of the kids got a hold of one, or if I accidentally cut one... you know, back ups; JUST IN CASE!!!

I then took all the paper, a pencil and my trusty busy bee scissors and got to work. I first cut out my template and then spend, however many hours, tracing them onto the paper. Then I spend an extra, however many hours, cutting those out.

First set cut out.

First set of each color cut out.

Different sizes for different banners.
Once I had a few hundred of these, I then began cutting the triangles out for the triangle "Happy Birthday" banner.

Heres all those super cute scrapbooking paper I got.
I have a stencil for the letters, and I just trace them onto white paper, and again cut them out, using my busy bees. Yes, I do all this by hand, no I do NOT have a cricut. Anyone want to get me one for Christmas?

I then purchased twine; the ugly, rough, cheap kind you find at the home depot or lowes kind of store; and used that with a lot of hot glue and ta-da:


The end result looked great. Excuse the painters tape, we were on a small budget.

I also wanted a fun high chair banner for when Jared smashed his cake. Just something simple and nothing crazy.

I used the same blue, orange and white paper to cut out circles (as this banner needed to be small, to fit on the front of a high chair.) I used my stencils to cut out the letters, and just used bowls to make the circles. I then cut, and glued them all together.


I again used the cheap twine and a little hot glue to put the banner together.

Again, ignore the painters tape.

The sign was so perfect.

His feet loved it... see?

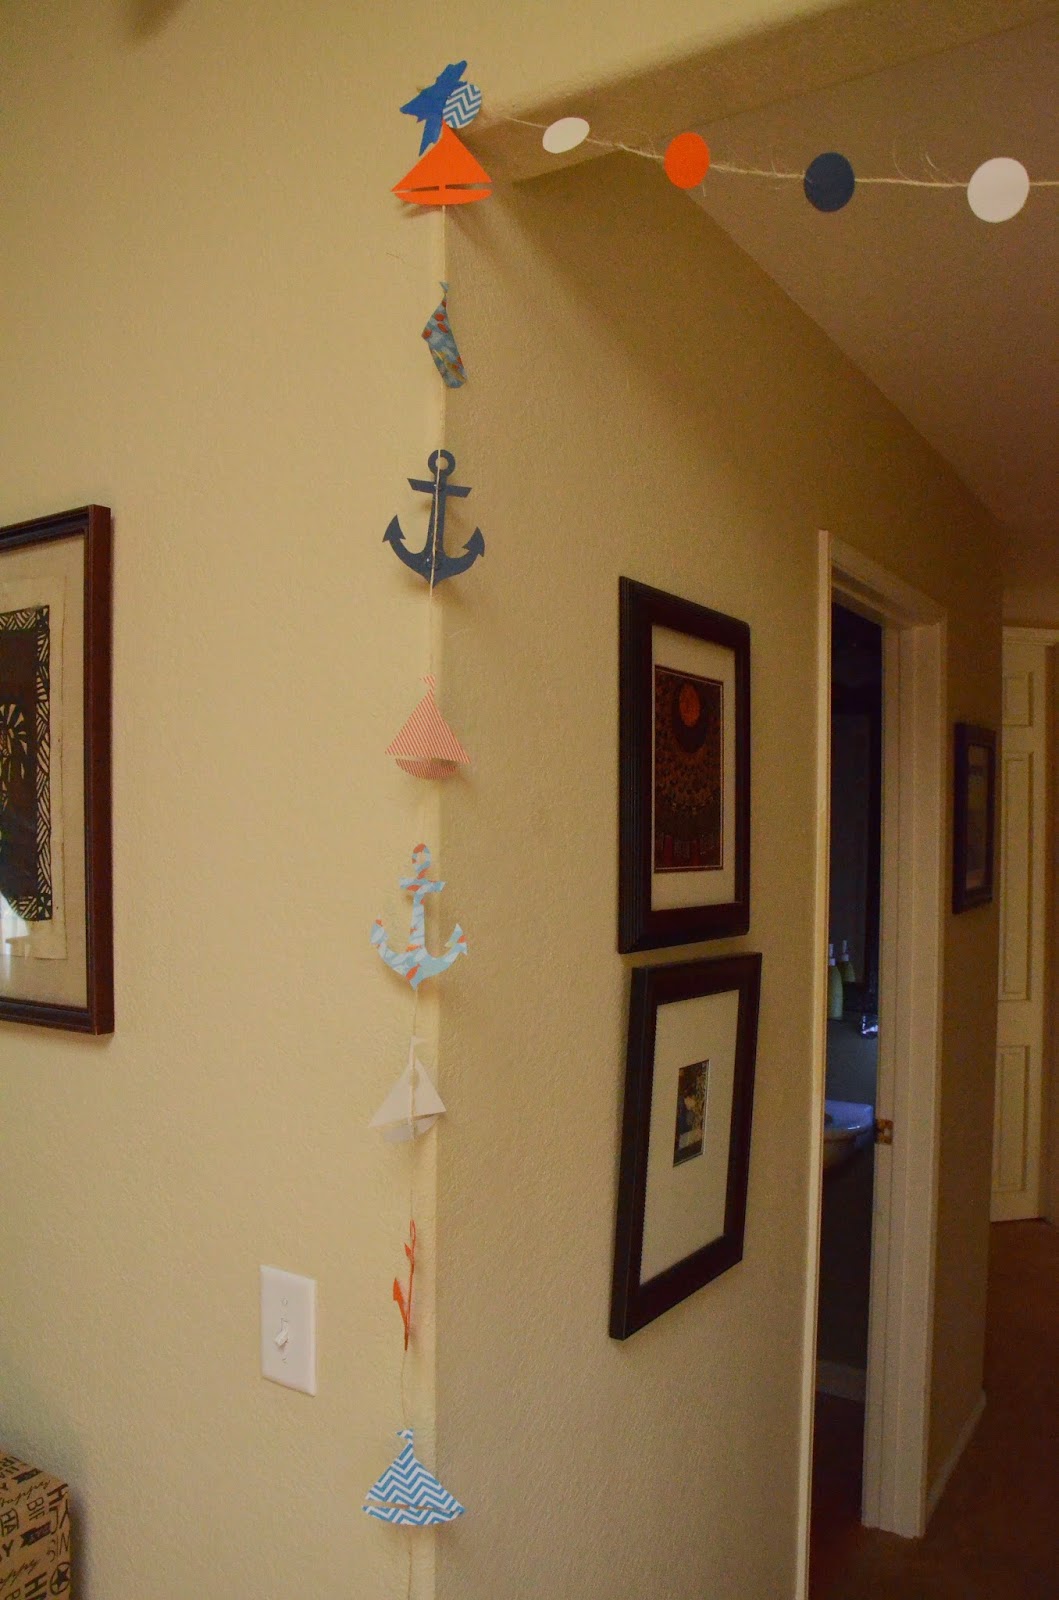
Lastly, I used ever inch of scrap paper to cut out circles and smaller anchors, wheels and sail boats. I then hot glued them to the twine and used them as "streamers" around the house. I also used the left over anchors, wheels, and sail boats to make individual dangling banners. I used those to hang from lights and areas outside. They blew in the wind, and looked great.

Notice the strand of circles and the anchor and boats in the background.

These are the circles cut out from the scrap paper, and hot glued on to the twine.

You could do a ton of these and hang them in a door way, or use them to block off a room or stairs. So cute, and it looked great.

This was a great addition to the inside decorations. Made the arch ways fun.

The decorations were a great hit, and everyone kept asking where I got the banners. I always love that feeling of fulfillment when I know I made something extra special on my son's big day.

Thanks for checking out the nautical themed birthday party, be sure to pin this, and share with your friends and family.


Now Sail-Away,
Sarah

Sunday, August 17, 2014

Jared's 1st Birthday Party

In June, we had a small week vacation down to southern California, to celebrate our little guys 1st birthday. I seriously can not believe this year went by so fast. Why do they have to grow up?

It was an exhausting trip, and I was struggling with: doing everything or just let some stuff go. So, I did what the new me would do, I let some stuff go. The end result was a wonderful party, and I enjoyed every second of it, and I hope everyone else did too!

Heres a few pictures from the party, and don't worry the tutorials and more photos will follow this post later this month! Keep an eye out for some tutorials and fun ideas.


I made a front door "wreath" and loved how it turned out!


up close
 While I spent a lot of time cutting out these pieces of paper, I really feel like they made the decorations come together.


Of course I have to do his photos through out the year...


His Birthday Boy chair!


The cake and goody table... yum!!


Heres where I decided to let it go. I made the decorations, but bought the cake. I just was so exhausted and did not want to be up all night making a cake; thanks to my mother in law we had a wonderful store bought cake, with my pre-made decorations!! (I also made the candle... well decorated it to match).


The individual large cupcake was for his "smash cake".

Mints (or life savers, to go with the theme), sugar cookies with royal frosting and chocolate stars which were all made by me!


Cookies!!!

I will more then likely post a tutorial on how I made these fun buckets, so keep an eye out for them. Total I believe I spent about 15 bucks for everything inside!!


I made the traditional Happy Birthday banner.


Heres those hand cut out anchors, sail boats and ship wheels:


 Of course we had to do cake time:

Such a happy birthday boy!

Blowing out the candle!


Getting his hands dirty.


Family photos, we had small kids pools set up; so excuse the wet 2 year old.


After a costume change, we got to the presents.

Which Jared LOVED opening.


Of course no birthday is complete without mommy dealing with two kids and their complete meltdown at the same time!


Best gift ever... I had something very similar when I was a kid, and thanks to Grandma Leonard, Jared now has one too.


Lastly, here is Jared in his shirt and shorts that I made. The outfit worked great with the theme, and all the colors worked so well together. Thank you to my mom, Grandma Leonard, who purchased all the wonderful balloons and helped me out so much.


 In the end, the day was perfect. Not super big, not super small, but just right. We literally had enough cake for everyone, and had tons of cookies and candy left over. It was a great party and I really have to thank everyone who helped, came to the party, and shared in on our celebration for Jared's 1st Birthday!

Thank you to my Mother and Father in law, who let us use their house and made all the wonderful food and had all the drinks and alcohol to share. Thank you to my entire family for helping me pull this off from afar, and purchasing items here and there for us. Thank you to my wonderful husband who helped watched the kids from time to time, to let me get stuff done for this party. Thank you for agreeing with your mother that I should just enjoy the day instead of bake all day! It was a great idea, and I seriously enjoyed myself, and I know Jared LOVED every second of it.

Another Successful Birthday,
 Sarah

Friday, August 15, 2014

August Give Thanks, Week 2

August 8:
     Thankful for wonderful neighbors who will come over and ask if we want to hangout, have dinner with them, and also who care and are genuinely wonderful kind caring friends.

August 9:
     Thankful for quick easy simple microwave/oven meals that all you do is punch in a number and bam, its ready! I can not tell you how much I did not want to cook tonight.

August 10:
     I am by far and forever thankful for my wonderful husband and kids. It was a wonderful day of family time and a little shopping as well, but the memories we are making will hopefully last a life time.

August 11:
     Thankful for my husband spoiling me with starbucks coffee! He is the best, and really knows how to make a bad day better with starbucks. He is such a keeper.

August 12:
     Today I am so thankful for adult conversation. You do not understand how nice it is to talk to another adult about absolutely nothing and everything; instead of a 2 year old and 1 year old! Best day ever.

August 13:
     Today I am thankful for my Mother in law. She has been an amazing MIL to me, and a wonderful grandma to my kids. I really lucked out when I married my husband. Happy Birthday Corinne!

August 14:
     Thankful for all my wonderful friends and family who helped lift my spirits today. I appreciated every single one.

Give Thanks,
Sarah

MUG RUGS!!!!

Who out there has any clue what a Mug Rug is? Anyone?

Ok so I was so clueless on what these were, and honestly thought they were a carpet rug of some sort that everyone was going crazy over. Well, I was soooo wrong!

What are mug rugs?
     They are small, rectangular quilts, or hand sewn designs, simply made for your morning (or evening) coffee/tea and or snack. I see them as large coasters.

Why would they be so popular?
     I think they are popular because people are obsessed with having personalized items, small whimsical items, and hand made products. I also think they are popular because everyone loves to work on an instantly satisfying project that you can make with in a day or two, or even a few hours.

How do I get one/make one?
     They are all over Etsy, and other shops. They also are tons of ideas and tutorials on pinterest, that are easy to find. If you are one to make your own, kind of person, then think of these little guys as a quilt block. You basically make one block, and then quilt and bind it. Done!

Ok so where do I get inspiration to make one (or buy one)?
     Look no further, here you go:

Found this Halloween themed one over here on Flickr.


and heres another Halloween one, also on Flickr.


Another holiday one, except for Christmas. I am always a sucker for vintage Christmas.


and yet another more simple Christmas themed mug rug.


and just a few that I like:

Check this out over here:


and this one is so adorable, here:


and can't leave this one out:


Ill wait while you pick your jaw up off the ground.....

.......

.......


OK, you ok now?

Great so back to what I was saying.... Now its time for us all to sew! I am so ready to make one like the little camper, ahhh, its just so cute. I also love the idea of using everyones hobby, and making a mug rug for each person I can think of. That way I can make mug rugs for days!

So, have you made any mug rugs? If so what?

Leave a comment and let me know.

Get Inspired,
Sarah


Tuesday, August 12, 2014

Quilt Inspiration 365

This week I found inspiration in the most unique place ever. My husband needed to find a part for his bike, yes, his bike. We have been hitting up all the local shops. We checked Vans Bicycle Center in Yuba, Ca; sadly they did not have the parts or the tools. We then checked The Hub in Roseville, Ca; and what do you know, they have the tools and my husband can bring them the parts they need.

Ok, so what does this have to do with quilting... I know, I know. While my husband was chatting up all the staff members I was looking at all the bikes. I then saw the latest Trek bike, from Katie Compton. The colors were amazing, bold, complimented each other, and of course all I could think was: "this would be a perfect color scheme for a quilt!!!"

Kona Camellia, Kona Copen, Kona Coal, Kona Charcoal, Kona Cactus, and Kona Wasabi.

I mean, come on; how do you not love those colors?

So a few ideas:

block 1

 block 2

block 1 and block 2
Even Just doing a 5 inch block in all the colors would be amazing. This definitely is making me feel extremely inspired, and I'm thinking I should get back to those pillow shams sitting on my quilting desk!

With that being said, I hope you all feel that Quilt Inspiration 365,
Sarah