To get started you will need enough fabric for the pillow size you want to make. I made TWO: 18 inch by 18 inch pillows. Thats 4: 18 x 18 pieces of fabric. If your fabric is 36 inches wide, then you will only need a yard of fabric. if your fabric is shorter than 36 then you might need more, or you can change the size of the pillows according to the fabric you want to use.
Once you have the fabric and your pillow fronts and backs cut out, then find your hexagon fabric or buy pre-cuts. I had pre-cuts sitting around, so I grabbed a few from the pile. (I used these PRE-CUT hexagons).
Once you have the hexagons cut out, take a piece of Heat N Bond and make a template for slightly smaller then the hexagon. Then cut out and make however many more you need. I had 11 hexagons, so I made 11 cut outs of hexagons from the Heat N Bond.
 |
| This is one of my hexagons with my Heat N Bond cut out. |
The next thing you will do is read the instructions carefully. The Heat N Bond has two adhesive sides, and you'll want to make sure you do this correctly. (If not you can gunk up your iron or ironing board). Take the Heat N Bond and place the non paper side onto the wrong side of your hexagon fabric. Carefully iron the paper down onto the hexagon. I start in one corner and move across and out slowly.

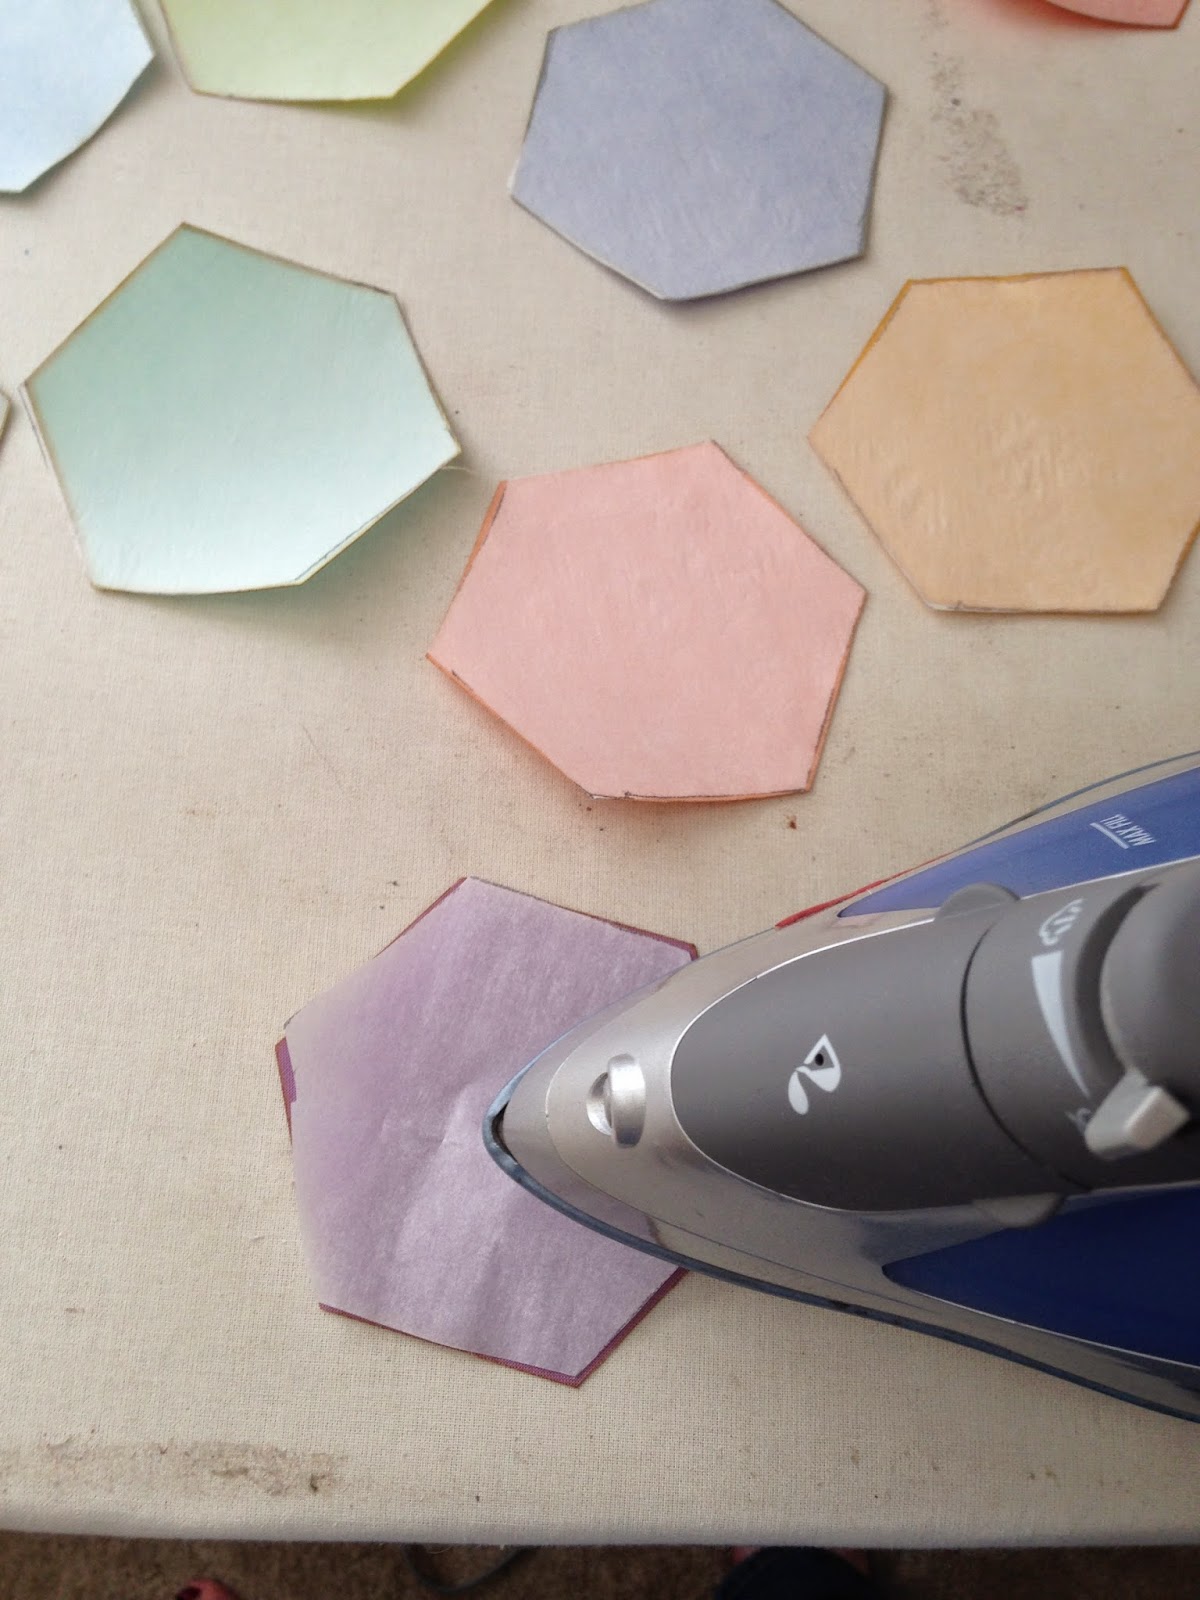 |
| Ironing on the Heat N Bond. |

Now carefully peel off the paper backing of the Heat N Bond. Be careful you do not take the sticky webbing with it. I peeled one or two and actually had to stop and re-iron because some areas just didn't adhere as well.

Once I had the backs pulled off, I decided on which hexagons I wanted to use on which pillow fronts, and laid out my pattern.
 |
| Pillow #1 |
Now again, be sure the weird waxy side is down, and the right side of your fabric is up. Carefully iron on your hexagons where you want them to go.

Once your done ironing them all in place, it should be a nice smooth pillow front.

Do the same thing for your other pillow front or fronts.
 |
| Pillow #2 |
 |
| Pillow #2, ironed on. Yes I changed the design. |
Now head over to your machine and find an applique stitch you like or want to use. I typically take my zig zag stitch and make it smaller and tighter.

I then find a corner to start in and use my lock in stitch (or you can back stitch) and then carefully stitch around your hexagon. Be sure to double check where your needle is when you come to a corner. Needle needs to be on the right side of your fabric if you are turning that direction, and your needle will need to be on the left if you are turning that direction. If you are unsure, use a piece of scrap fabric and practice first. Be sure when you are turning to have your needle in the DOWN position.

 |
| This is a finished hexagon. |
 |
| Pillow #2 Done |
 |
| Pillow #1 done. |
Now time to assemble the pillow; grab the back panel for your pillow (in my case I used a solid white 18in x 18in square. Place both fabrics right side together. In other words, place the back of the pillow with right side of the fabric facing towards you and place the pillow front with the hexagons on it facing down.

Next pin the two pieces of fabric together. I like to start in the corners, and then pin about every 4 inches or so.

I have a serger, so I serged the edges of my pillow. If you do not have a serger, you can do this with a straight stitch and then add a zig zag around that to help make the pillow stronger. I have kids so the serger is my lifesaver!

Start in the middle of one side of the pillow, sew around the entire pillow, leaving about a 3-4inch hole. Notice the hole I am marking between my pinky and thumb.

This is the hole, now carefully flip the pillow inside out. I start with the corner and slowly move from one corner to the next.

Keep pushing all the fabric through and be sure to push the corners out so they are a nice rounded corner.

You now should have a pillow that is wrinkled and still has a hole in it!

Take your pillow cover over to the iron, fold the pieces of fabric (where the hole is) in towards the inside (of your pillow) and iron that down, making a nice sharp line where your seam is. This will help you when you hand sew the pillow closed. Finish ironing the rest of the pillow so its not all wrinkled.
 |
| Folding the seams inward, and ironing them down. |

Now you should have two pretty pillow covers!

Time to stuff them!! I use a cheap poly-fill. You can purchased pre-made pillows, or the more expensive poly-fil. I don't mind the cheaper stuff since I have kids.
 |
| Start stuffing those pillows. |

Now you will need matching thread, pins, a hand sewing needle, and some scissors. Pin the hole shut, and thread your needle. I like to thread my needle and use the two strands with the knot at the end. Two is better then one right!
I then place the knotted end on the INSIDE of the pillow. Then carefully use an invisible stitch to close the pillow. Remember how you ironed this part, thats where those iron marks come in handy. Follow the ironed edges to make your invisible stitch perfect.
 |
| Pinned. |
 |
| Invisible stitch. |
 |
| Hole done. |
 |
| Pillow #2 DONE!!!! |
 |
| Pillow #1 DONE!!! |

Hope this tutorial helped bring some color to your room, or gave you a wonderful idea for your next project.
Now go lay down and enjoy those pillows,
Sarah
1 comment:
I really love the way these turned out! Love the colors, simplicity and yet the modern style of them! You can always make a matching type quilt to lay over on the couch to take the eyes away from the couch and to the quilt to "lighten" things up. :o) Love these!
Post a Comment