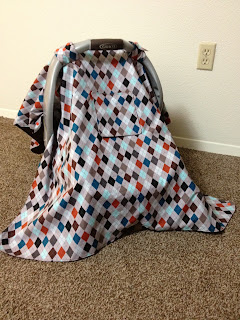
Now, whats wrong with it, well let me tell you. One, the straps are too long, so it hung real low into the car seat and in my sons way. Two, I used velcro and it sucked. After one wash it was all full of fuzz and just didnt work well after that. Third, the fabric wasnt very heavy, and so the wind or rain would blow it off the actual car seat and you would be fighting with it, instead of it doing its job! Fourth, It was only one side of fabric, I did not add a lining or inside fabric, so again when I washed it the fabric frayed and little strings were hanging off it. That drove me nuts, so I ended up just taking it off.
This time, I researched a few more designs, thought about what I wanted in the new car seat cover, and went from their. With my old one it hung real low in the front. Which I loved when he was at parties or out running errands and I could tuck the extra under the car seat to keep people from lifting it. I definitely wanted to keep the length. However, i did not want to be stepping on it, or it getting stuck on stuff, like the old one did. So, I needed to make a few changes. Also, we had toys on the car seat handle, and when the cover is on the car seat you cant really put toys on the handle. So I wanted to add hooks or something to inside of this one to provide a place to put the toys!
In the end this is the awesome car seat cover I came up with. I removed the velcro from the equation, put in place snaps, fixed the window design slightly, and added a piece of fabric on the inside for toys.
 |
| With the front loose. |
 |
| Front view again. |
 |
| Front/Side with Snaps in use. |
 |
| Upclose look at the side snaps to hold the front material in place. |
 |
| A single snap in the back to keep the back from flying up as well. |
 |
| Upclose. Note: you can still use the handle to unlock the car seat from its base. |
 |
| I added hooks on the inside for toys! |
I used a simple solid cotton fabric for the inside and a bold, boy themed fabric on the outside. I made mine about 45in from front to back and about 38in from side to side. I purchased a yard and a half of both fabrics, to give me the extra material for handles and window covering!
I would recommend measuring out your carseat (as each brand is slightly different) and base the amount of fabric off that. I also put a curved corner and a curved center to my cover to help leave room for grabbing the actual seat, and handles (for release). If anyone would like a tutorial please let me know and Ill be sure to get one down as soon as I can.
Hope your carseat cover is super cute,
Sarah

No comments:
Post a Comment