Now that we know for sure that we are having a second boy, we have decided to just add baby #2 into Brian's current room! With that being said, we needed a theme and we eventually decided on Monsters! Heidi Klum has a new line at Babies R Us, called Truly Scrumptious! Its a great line with tons of cute clothing, and room decor items. She has a monster themed toddler room set. However, she only made it in twin, and full size bed sets. I needed two crib size bed sets. So, I purchased two twin sized bed sets, and then altered them to make two crib sets. I used
this tutorial and it worked out perfectly.
Before I get to the crib sheet. Lets start at the beginning. We emptied Brians room out, took the entire animal themed design off the wall and began with a fresh coat of paint! So, in order to do that we needed colors. Heres a picture of the sheet with the paint chip colors.
Next we got the room ready, primed, and painted in the main color of grey!
The next step, was to add the stripes to the main wall where we were going to "feature" the boys names and add some art work, photos, etc. In time, that is! So we taped it out, painted it, and then the finished painted room!
I really wanted to add some of the artwork from the sheets to the wall! I loved the free flowing, non-perfected monsters that are on the sheets. Sooooo, of course I hand painted those little guys on 3 of the remaining walls! The end result was awesome!
The finished and complete room looks amazing! But first, before i show you that; lets go back to the crib sheets that I was telling you about.
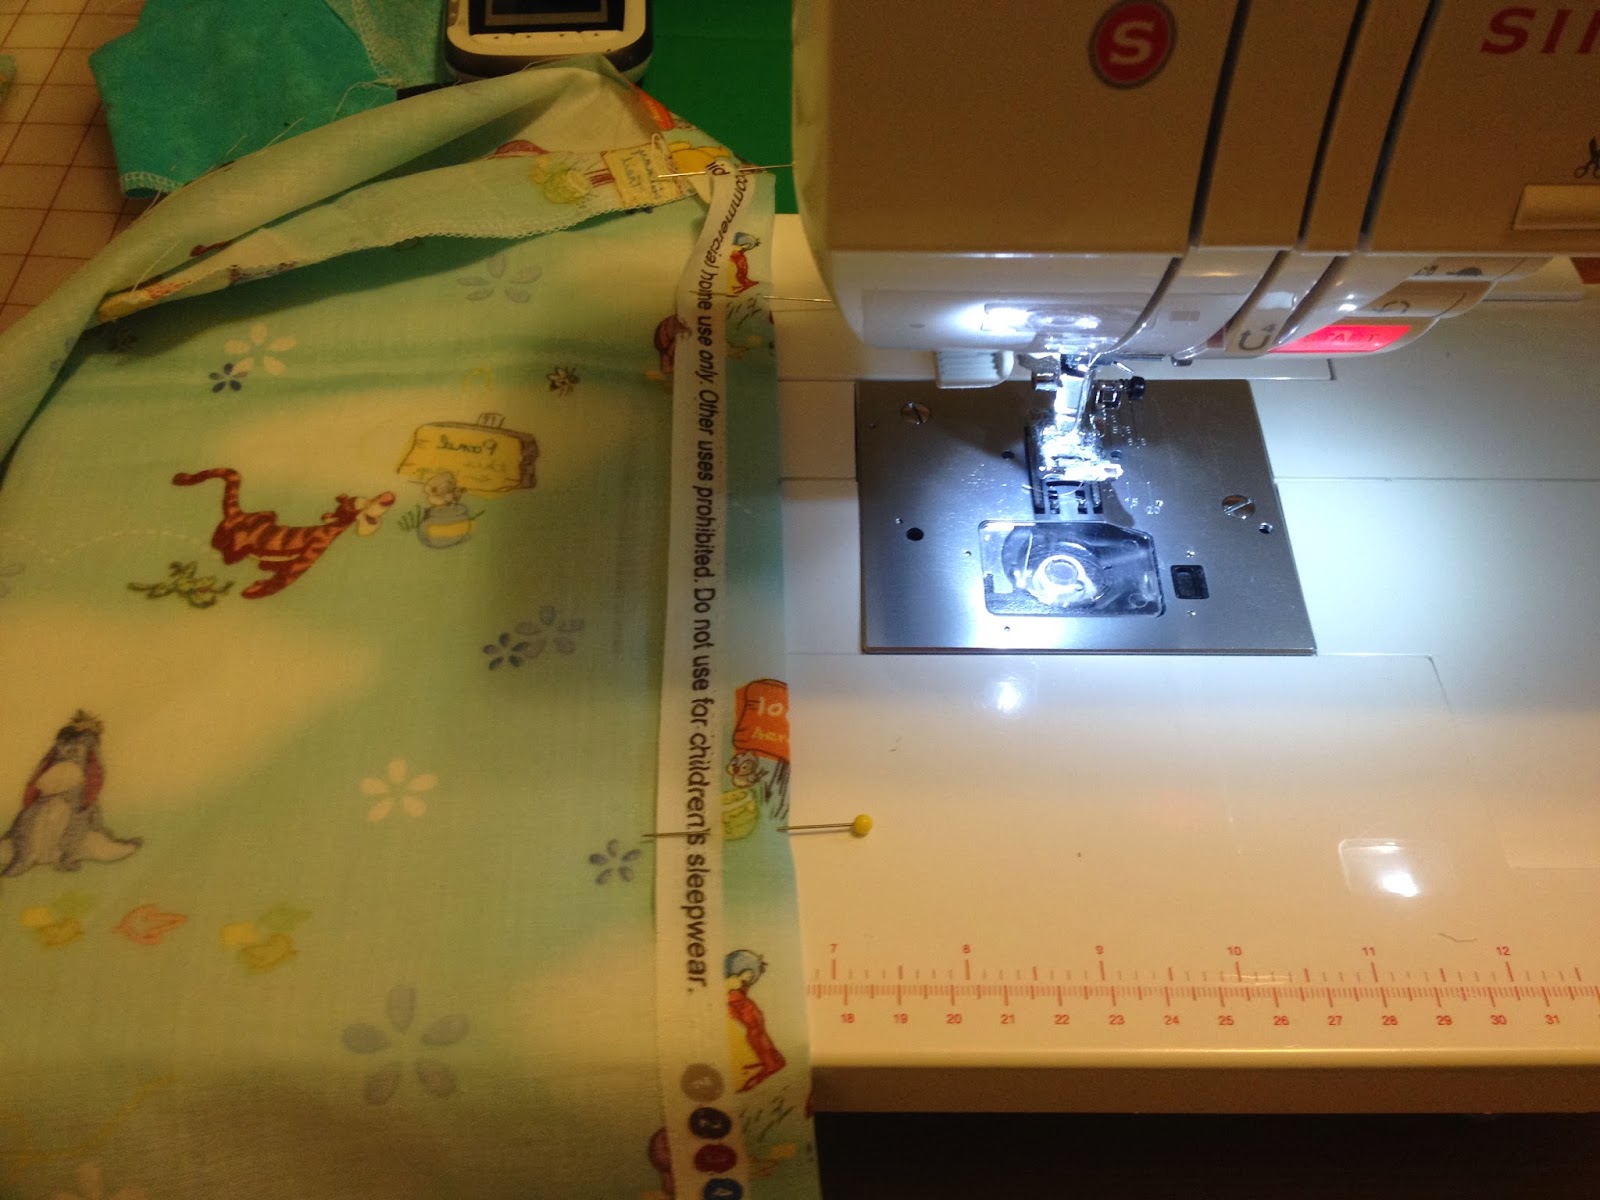
Heres how I did it using the twin sets:
The twin bed set came with a fitted sheet, so I took the elastic out of the fitted sheet, opened the sheet up and made it flat again. I then used the measurements in the tutorial and and cut out crib sheets from the fitted sheets. The end results were awesome! Took about an hour or two to cut open the fitted sheet, pull the elastic out, and about 5 minutes to cut the crib sheet out of the fitted sheet. Then sewing the fitted crib sheet took about 10-15 minutes, and then 5 minutes to put the elastic through. Note: I used the elastic from the fitted sheet, but I cut it down in size to make it work for the crib sheet.
.JPG)
.JPG)
.JPG)
.JPG)
Once the sheets were done, I need crib skirts for the bottom. I like the look the crib skirt gives the bed, it really finishes the look. Now, the sheet set had a flat sheet that was grey and blue with chevrons on it. I loved the chevron look and thought that would be perfect for the crib skirt. I simply cut in the direction of the chevron, in the size I needed, cut out a white piece of fabric the size of the crib frame (including a 1/2in seem allowance), and added on the chevron fabric.
Now, when you are making the skirt, its as simple as measuring! I made the skirts both the same size (fitting the crib with the higher mattress, so if and when we sell this set, they can use it for the baby size as well as the toddler size). Anyways, I measured with the mattress at the highest point. I then cut the fabric with al extra inch, so I could fold and put a hem on it. I also added ONE simple pleat in the front. I did not add one to the sides, as I like how clean it looked without it. Remember, I am having another boy, so I wanted to keep it less "decorative" and more manly!
Here is the crib skirt:
Notice how clean the sides look and how just that simple pleat in the front gives it enough movement, but still masculine! Also, a note, when buying the white fabric, you can go cheap, but be sure to wash it before you sew on it! It will shrink!!!
Next up was the window! Now in this house we only have one long window, thankfully! I had purchased TWO bedding sets, so I had another flat sheet witht he chevrons on it. I didnt even have to do much sewing for this one. Now, flat sheets come with a "top" that has a fold over piece. That piece just tells you it goes near the pillows, right!? So, I simply seem ripped the sides and the sides only To create holes for the pole to pass through. Seriously, NO SEWING!!! Just used that fold as my hole where the curtain bar slides through! Now, the only sewing I did was shortening the sheet to fit the window. The sheet was hitting the floor, and my husband and I liked the idea of keeping the curtain the size of the window. So I simply marked a few inches below the windows end, folded and sewed a nice edge. NOTE: I tried to match the thread as closely as possible, so that you couldnt see the difference! The results were perfect!


Now, the last thing I made for the boys cribs were their teething rails! My son now, Brian, is teething and loves to chew on anything, including his crib. I made a few in the past and when i made them with Velcro he got clever and pulled the padding off. Then I made them with store bought ribbon, and one morning I woke up to my son wrapped; in the small thread that he had unraveled from the ribbon, all around his arms, lets, body and yes NECK!!!! I freaked out and decided I need to come up with plan C as to something he couldn't UNDO! The final option was snaps. Heres an okay, not the best tutorial on how to make them with ribbon,
here. I however, did NOT add the ribbon. I also added fleece to one side, used up the left over chevron fabric from the skirt and curtains project, as well as added a small amount of batting between the two pieces. I measured for the snaps, made straps out of the fleece/flannel material for just the ends to anker the teether covers, and the finished look is exactly what I wanted. Also, my son is YET to get them off!
Those are the finished product! They came out great, and the wood will, hopefully, stay in tacked and not get destroyed!
With that being said here is the final photo of the boys new room design:
Hope you feel inspired,
Sarah


.JPG)
.JPG)
.JPG)
.JPG)


.JPG)
.JPG)