Pages

Showing posts with label easy. Show all posts

Sunday, September 28, 2014

Portable DIY Mini Ironing Board

I was having a friend come over and we were about to do A LOT of ironing (as I was going to show her how to make a quilt top). We both have 2 kids and they play great with each other but, they are 2 1/2, 2 1/2, 1, and almost 1. So the older ones need to be monitored as they sometimes like to pick on the little ones. In which case, we needed to be down stairs with them and not in my sewing room where I have the ironing board. I didn't want to bring the ironing board down, because I know our kids would knock it over real quick. Instead, I thought "I'll make a small mini portable ironing board and just place it on the table". That way the kids can't knock it over, pull on it, or do anything to hurt anyone or themselves!

I grabbed a long piece of wood about 3 feet long, and about a foot wide. You will need batting, a staple gun, cotton fabric, and elastic.

Heres the board I used (left over from my cutting table, my husband made).

It can be any board, just nothing real flimsy. You need something thick, so it won't bend.
 Grab a few layers of batting. I was using scrap batting from the leftovers of quilts, hence the variations of batting. When you cut them, make sure they are long enough to go over the edge and wrap to the back of the board.


Batting is long enough to wrap over the sides and onto the back (about 4-6 inches extra).
 I then start with all the corners and pull the batting over the edge and staple, with my staple gun.


Then stable to smaller ends, and remember to pull the batting at taunt as possible.


Once you have the two small ends done, work the long sides. I did the center, then the ends and then moved back and forth from left to right, until all of it was stapled down.


The back should look something like this.


I then lay my fabric choice on the ground, right side face down. I place the board top side down. I then cut the fabric with about 4-6 inches on all sides.


Make a mark where the corner of the board meets the fabric. Use a ruler to mark a two lines out to the sides. Then cut that square out of each corner. Like the picture below.


 Place the two cut sides (of ONE corner) RIGHT sides together and sew.


Do that for each corner.


Then make a hem for the elastic. My elastic was about 3/4 of an inch so I needed to make about an inch or larger of a hem.

Fold the fabric over and pin.
 Then sew the hem along the farthest point on the left side. Leave a small hole about 2 inches wide at the start/finish.


Use a safety pin to pin the end of the elastic, and slip it through the opening in the fabric you left.


Push the elastic all the way around until it comes back to where you started. Put the fabric on your board, and pull the elastic taunt. Make sure you can remove and put the fabric on and off the board. Then pin the two pieces of elastic together. Stitch with a zig zag and or several straight stitches along the area where the two elastic pieces meet. Pull the elastic into the fabric, and sew up the hole!


Slip the cover over your board, and get to work!


Ironing away...


Now I have a mini portable ironing board for when I need to iron something down stairs, or work on small projects! Its perfect to use at my sewing table when I just have a lot of little pieces, or small hems I need to iron down. I love this project, and the best part is the cover comes off and you can wash it on gentle and clean off any gunk!

Project Time,
Sarah

Friday, August 15, 2014

August Give Thanks, Week 2

August 8:
     Thankful for wonderful neighbors who will come over and ask if we want to hangout, have dinner with them, and also who care and are genuinely wonderful kind caring friends.

August 9:
     Thankful for quick easy simple microwave/oven meals that all you do is punch in a number and bam, its ready! I can not tell you how much I did not want to cook tonight.

August 10:
     I am by far and forever thankful for my wonderful husband and kids. It was a wonderful day of family time and a little shopping as well, but the memories we are making will hopefully last a life time.

August 11:
     Thankful for my husband spoiling me with starbucks coffee! He is the best, and really knows how to make a bad day better with starbucks. He is such a keeper.

August 12:
     Today I am so thankful for adult conversation. You do not understand how nice it is to talk to another adult about absolutely nothing and everything; instead of a 2 year old and 1 year old! Best day ever.

August 13:
     Today I am thankful for my Mother in law. She has been an amazing MIL to me, and a wonderful grandma to my kids. I really lucked out when I married my husband. Happy Birthday Corinne!

August 14:
     Thankful for all my wonderful friends and family who helped lift my spirits today. I appreciated every single one.

Give Thanks,
Sarah

Tuesday, March 25, 2014

Baby Shower Banner #1

For my sisters baby shower, way back in February this year; I made almost all the decorations. The theme was Classic Storybook. I wanted to make a few banners, as I knew her house has multiple walls to cover. I wanted the banner to be colorful, and pop. However, I stayed within the color scheme, and kept it super simple. You can do the same, just change the colors, and match it to your theme. (An example would be: for a nautical party get nautical scrapbook paper, cut the large circles from that, solid colors like orange, blue, and white for the small circles and a navy dark blue for the letters.)

To do this small project you will need colored paper (I used scrapbook paper I had on hand), paper from an old book that you don't mind ripping up, scissors, glue, ribbon, and a letter cutter/stencil/or you can free hand them.

1. Cut out a small circle from all the colored paper. Then cut a circle out of the book paper, making it slightly larger then the colored circle. I used two bowls from a collection, so the bowls were perfect in sizes. Cut those all out. If you have a machine that can do this, even better!


2. Find a ribbon you like and get enough for your banner size. I used one roll and some.


3. Glue all the colored circles to the book circles and then glue the letters on top of the colored circles.

4. You can either glue the ribbon onto the circles, or do as I did, and sew it on for a stronger hold. I just used a straight stitch and placed the ribbon on the circle, stitched, and continued to the next circle.


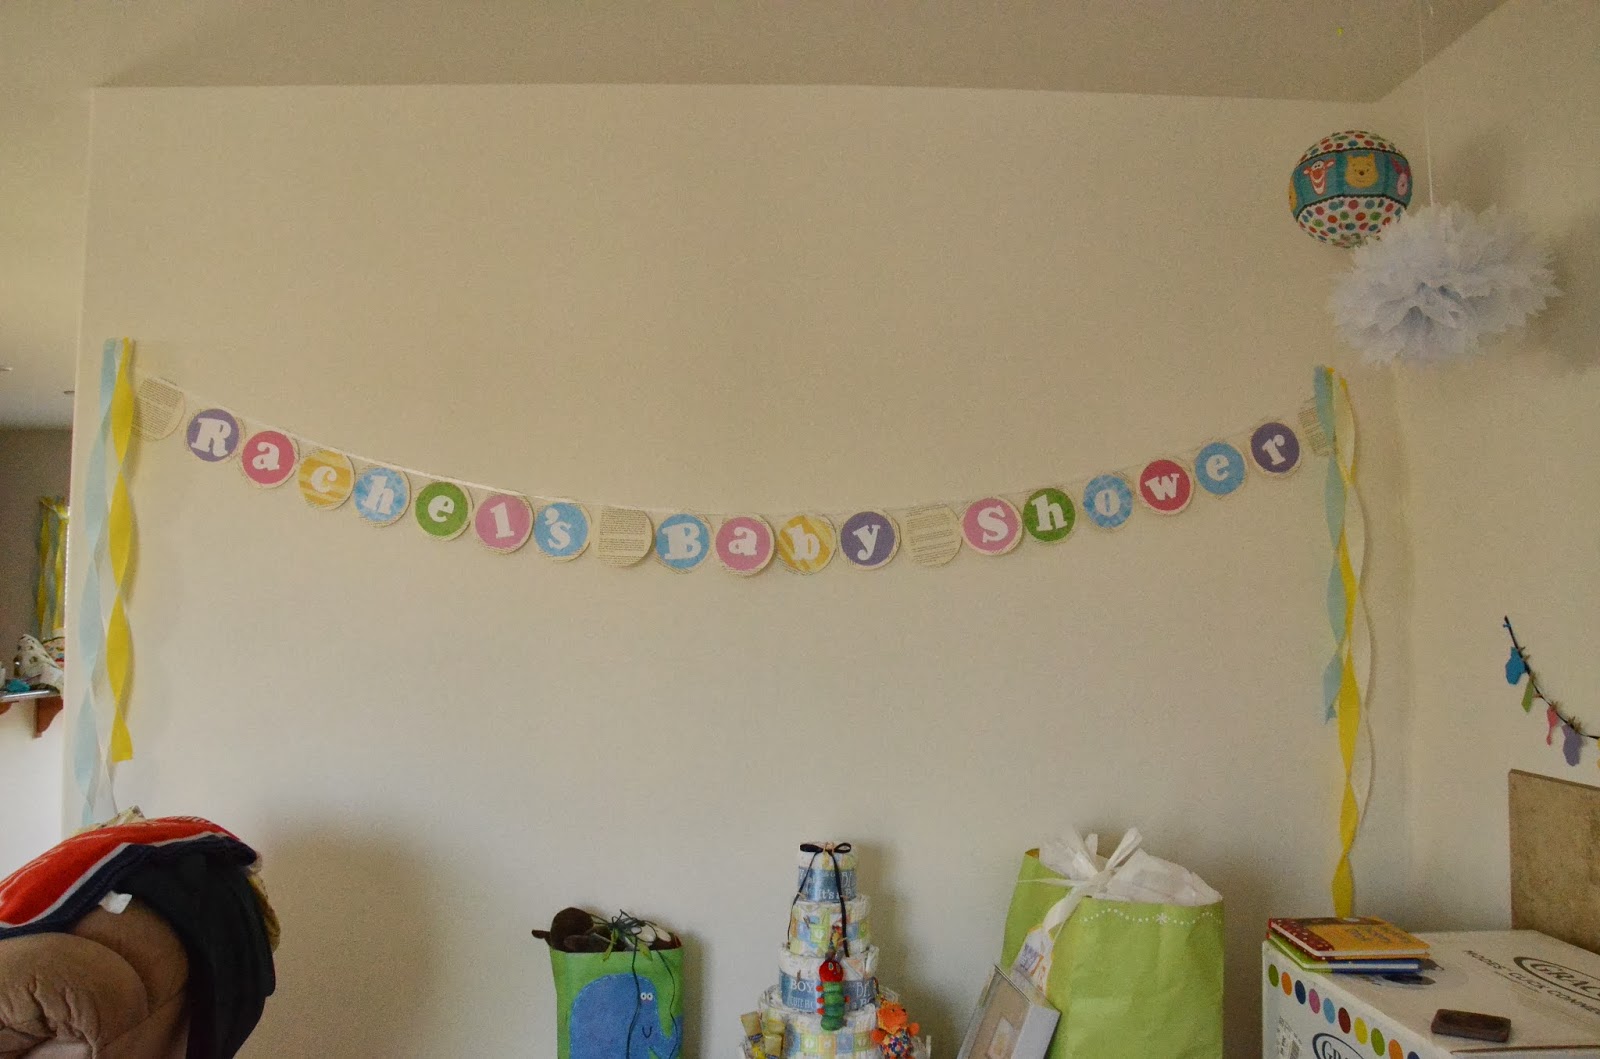
5. Your finished product should look a lot like this:


and at the party with the other decorations:


I enjoyed the small light pop of colors, but the beautiful personalized banner that I knew would fit PERFECTLY into the theme. Its just that simple.

Have Fun,
Sarah

Monday, January 27, 2014

NEW Boys Bedroom!!

Well, the boys had an amazingly cute and adorable bedroom back in New Mexico, but we are here in California now and so its time I finish their room, right? I mean we have only been here 4 months or so! This past weekend the husband and I, with crazy kids under our feet, were finally able to get the boys names up on the wall, and I was able to get the wall decals up. I finished the room... for now.

These are the BEFORE photos:

This is where Brians bed is now.

Dresser/closet area.

This is where Jareds bed is now.
Work in progress.

Work in progress.

Work in progress.
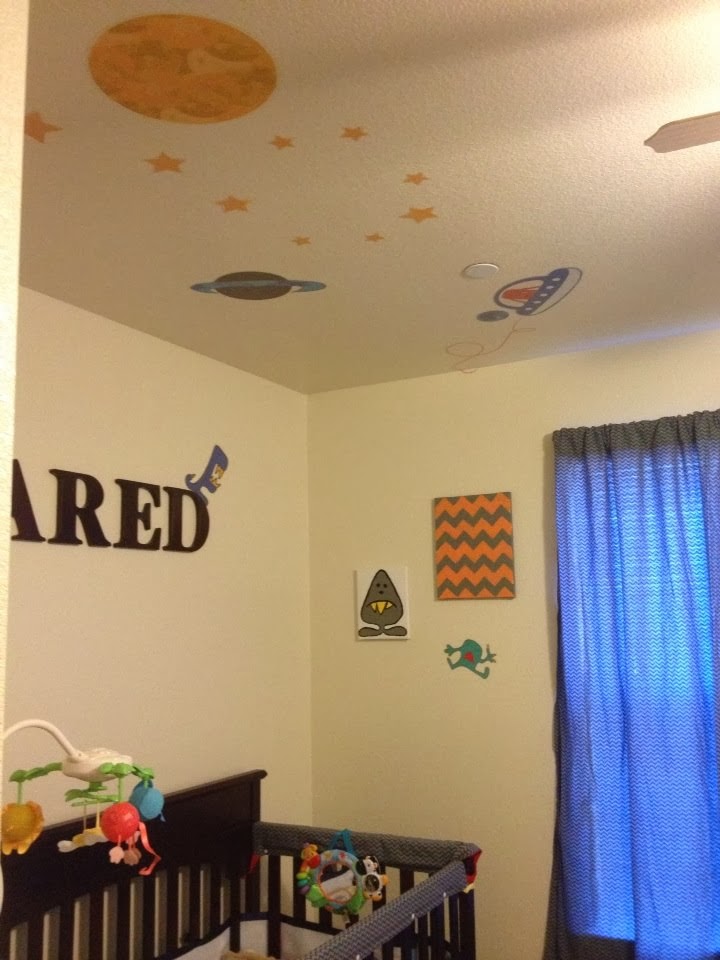
 Here are the updated photos:


Thats sort of from floor to ceiling.


Ok thats a horrible floor to ceiling on the other side of the room. Sorry its not the best photos.

Heres some up close shots.


Best part about this entire room, the wall decals GLOW IN THE DARK!!!! Isn't that awesome! My son for the past two nights, "Mama, lights, lights, look all de lights". Lights, as in glowing stars, spaceships, monsters and planets. This room is so cool, even I want to sleep in it!

Now remember I made the crib sheets from twin bed sets, and the curtain from the flat sheet. The teether rails are still intact and in use, and everything is just perfect!

Here is where you can see the old room, and some of the details on how I made the items. This house is brand new and we were told we couldn't paint for the first year, but honestly I just don't think either myself or my husband want to waste the money or time right now. With both boys, we just have so much other stuff going on! Anyways, I will be working on a few other tutorials coming up soon, so keep an eye for those.

Thanks for visiting, and be sure to leave a comment below.

Monsters, grrr
Sarah

Friday, August 23, 2013

Travel Changing Pad

Almost all diaper bags come with changing pads and if they don't you can always purchase them for about $10 and up. The one that came with my diaper bag has finally started to fall apart, but I loved how it had the clear vinyl on it. The vinyl was super thick and made for easy cleaning. I am not fond of the all fabric ones as your washing them all the time. Not to mention if you have a little one who pees and poops with perfect timing, like right after you pull the diaper away, then your stuck with a fabric changing pad that needs to be washed. What if you need to run a few more errands?

My solution was to make one just like the pad I had but I wanted to add pockets. The pockets would be for diapers and wipes of course. I didn't want it to have any ties or snaps for closing, I just wanted it to fold up and be easy to use.

To start I needed two fabrics, the vinyl and some batting for the pad. I purchase two yards of each fabric, and only needed a piece of vinyl and batting about 22in by 16in.

Fabric for front and back, as well as pockets.
 I then scratched out real quick what I wanted the travel pad to look like.


Once I had my design I cut the fabric I needed. For the pad (16in x 22in) I needed the back fabric, the front fabric, the batting and the vinyl. For the base piece (12in x28in) I needed just the back and front fabric. The pockets (6 1/2in x 9 1/2in) I needed two fronts and two backs.


Once the fabric is all cut out, I started putting the pockets together. I took the front and back of both pockets and ironed them together. Make sure the right sides are together (one of my fabrics is just a solid color so it really doesn't have a right side).


Once the pieces were together, I pinned them and serged the edges. Leave a small hole on one side to flip the pocket.


Once you have the edges serged you will need to flip the pockets inside out through the hole.


Then iron the pockets flat, and fold the holes so all the seams line up. Pin the holes so you know where you will need to stitch.


Once the pockets are pinned you will need to top stitch around the edges. I start near the hole, place a lock in stitch and continue around the entire pocket. I use 1/8in spacing for my stitch from the edge.

Once the pockets are done move on to the large piece that the pockets will be attached to. The 28in x 12in pieces. Again, I ironed the two piece right sides together. I pinned the pieces together leaving a 16in hole at the top. (NOTE: if you have fabric like mine that has a direction make sure you are cutting and placing the holes where your fabric will be going the right direction.)

right sides together

16 inch gap marked by the pins (leave this open/do not sew).
On to the serger again, stitch around the entire edges, leaving that 16in hole.


Once the sides are sewn, flip the fabric inside out, just like you did with the pockets. Iron the sides flat.


Now fold the pieces along the hole inside, just like you did with the pockets. Iron the fold down, make sure the two pieces of fabric meet at the same point.


Now place your pockets on the front side of the large piece (make sure you don't get anywhere near the 16in hole you left).


Pin the pockets, and stitch them in place. Start on one of the sides then down to the bottom, along the bottom, and back up the side. Remember its a pocket so leave the top open. I also back stitch along the top two sides.


test it to make sure its big enough.
Now onto the pad. You will need to layer the pieces and again you will serge the edges, so pin this real well.

Layer with the batting on the bottom, then one of your fabrics, then the vinyl and then the other fabric on top.
Now serge the two long edges and one short edge. Leaving one of the short edges open. (NOTE: I left one of the LONG sides open and definitely recommend you do NOT do that.)


Now flip the fabric inside out. You will need to flip between the vinyl and your back fabric.

Because I flipped between the LONG side I had to fold the sides in and top stitch around the entire edge. Now if you flipped on one of the short sides, you wont need to fold the fabric inside and top stitch all the way around. You can just top stitch on the 3 sides and leave the 4th side unstitched.

I had to fold the fabric in because I flipped on a long side.
Pin the hole real well, then top stitch.

Once I was done this is what it would look like.
If you are doing the 3 sides stitched and the one short side open you will have something a little different then the photo above. Don't worry that open side will disappear soon.

NOTE: When sewing with vinyl it will stick to the plastic sewing machine, so take painters tape and tape the base of the sewing machine and the underside of the presser foot.


Now you will slide the short side that you left open into the top of the 16in hole you left open on the large piece.


Pin the pieces together as best you can. Then top stitch along the two pieces and continue all around the large piece of fabric (28in x 12in).


Now go back over in a zig-zag stitch where the two pieces connect.


Now fold the pieces up and you are done!
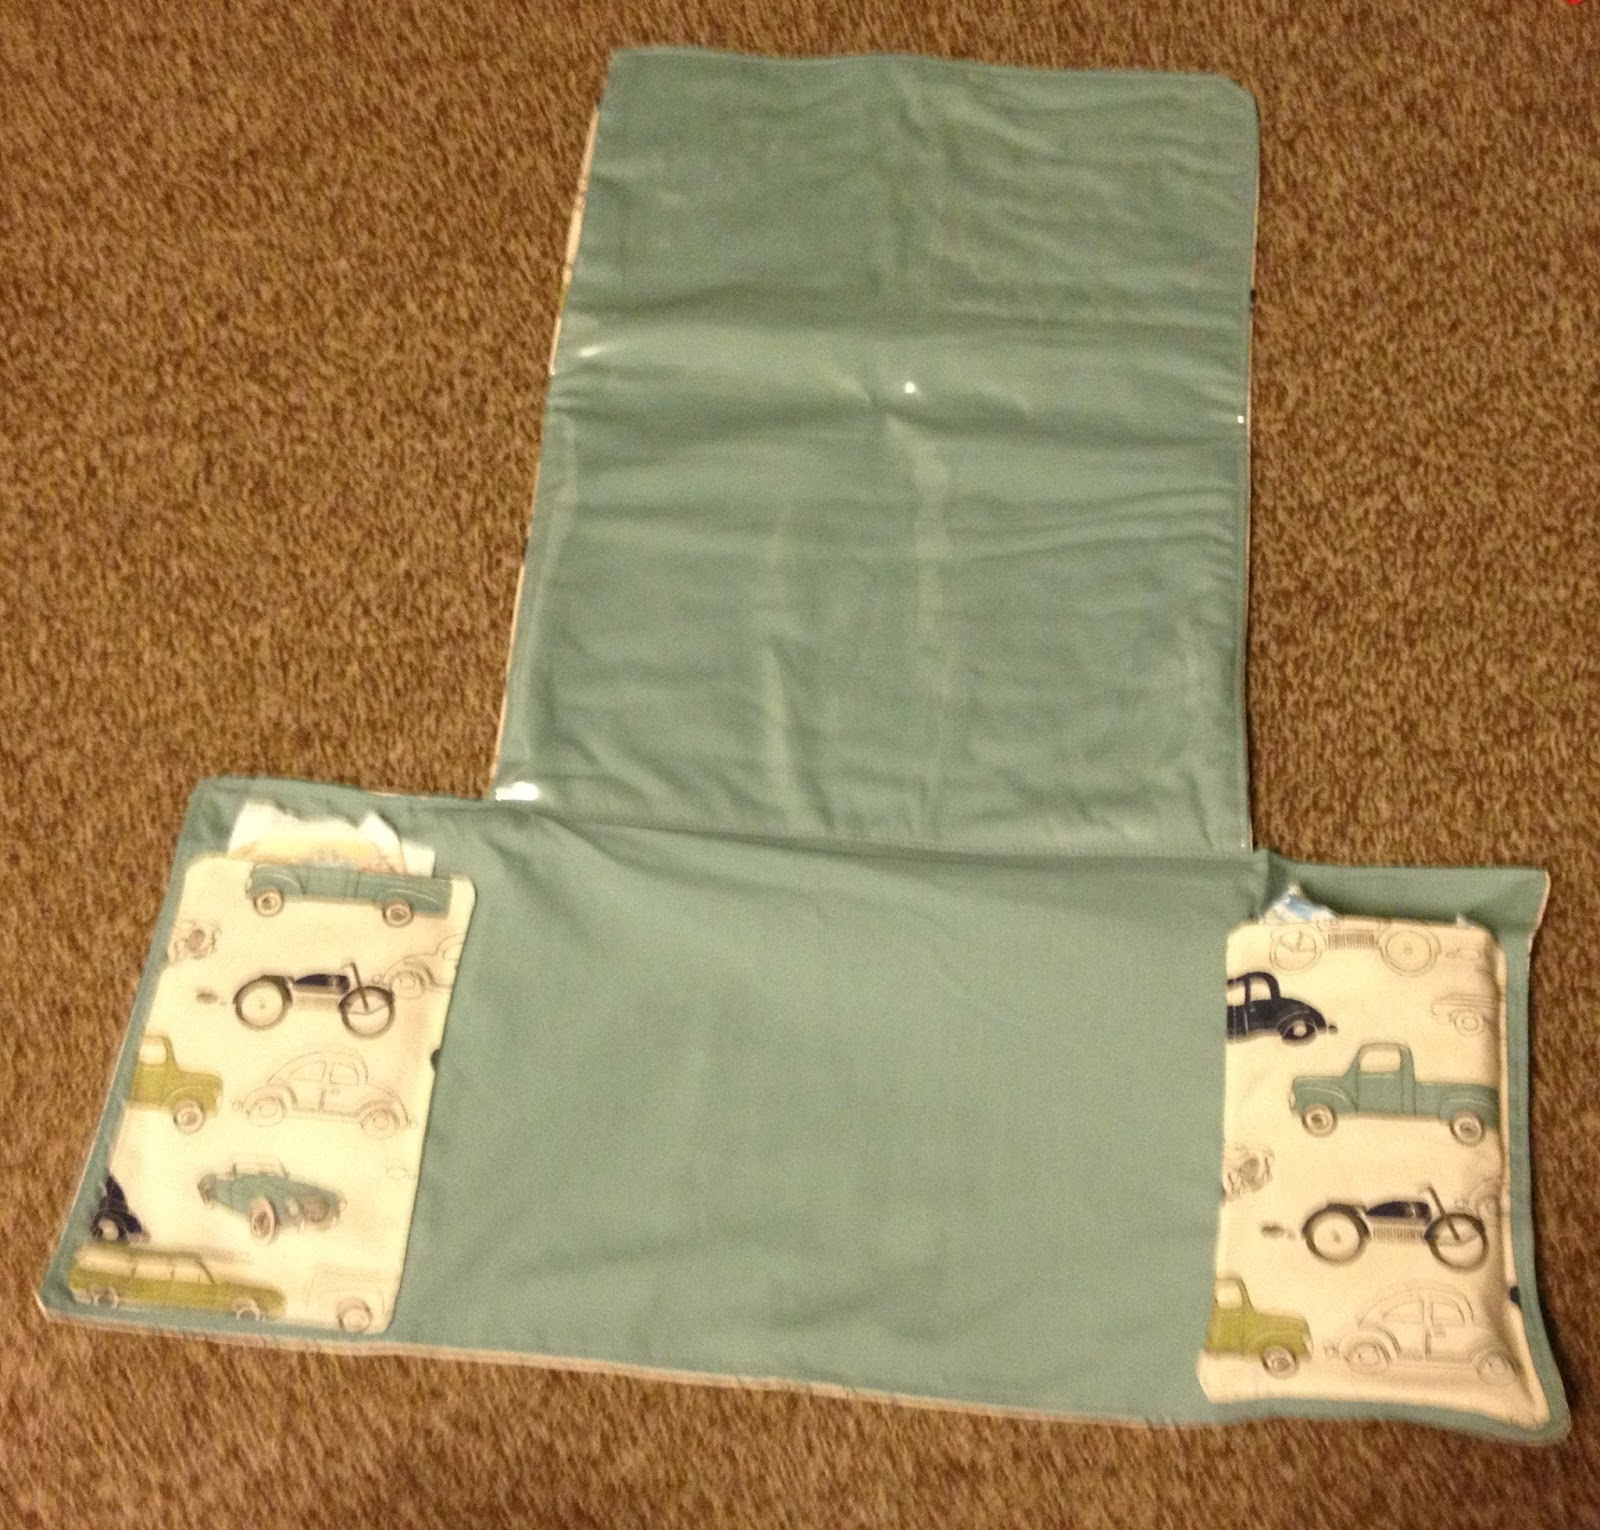
How to fold it up.

Fold the sides with the pockets in.

Then fold the bottom up into the pad area.

Fold the top of the pad down on top of the pockets.

Then fold the entire thing in half (from left to right).
Now you have a travel changing pad! Its going to last you forever, and its super cute in the fabric you want! I have two boys so the car fabric is just perfect, plus its in beautiful blues and teals which is pretty for me too!

Now you are ready to change a few diapers,
Sarah