Pages

Showing posts with label fun. Show all posts

Saturday, January 10, 2015

Baby Shower Gift

One of our close family friends was having a baby, and a baby girl, at that! By now, you should all know I enjoy making anything having to do with girls. I just can't get enough because I have such true, rough and tough boys.

I wanted to make her the traditional "Sarah" gift, which is usually burp cloths. However, I didn't want to make a ton, and only give her those. So, instead I made each burp cloth extra special, and even added in some adorable bibs as well.

Here are the burp cloths. I added a few "scallops" or half circles to the rows of different colored pinks. I did a raw edge finish on them, so they would fray and have even more detail, and texture.


I just love all the girl colors, and yet still has a little blue/teal.


The bibs I made with strips of the same fabric, and just simply made a large panel of the strips and then cut out the bibs.


I added terry cloth to the back, to make them extra absorbent, and help keep the wetness away from the skin.


I, of course, added fun pink snaps, with just that extra detail on them.


Heres how I finished packaging them all up:


Lastly, heres the items with the handmade card:


I hope the wonderful mother and baby girl love them all.

Burp That Baby,
Sarah

Saturday, August 9, 2014

Mother's Day and Aerospace Museum


Mother's Day this year, I wanted to go to the zoo and hangout in Sacramento. However, while driving down the 70/99 highway towards Sacramento, we came to a traffic stop. Absolutely no cars were moving in either direction and it was almost impossible to get around, as everyone was trying to. Later that day I found a small snippet about a semi that over turned and smashed into a bridge and broke apart on both sides of the highway. It looked like a horrible mess, but thankfully everyone survived.

When we started to try and head around the traffic jam, we ended up heading inland towards Roseville/Lincoln area. Before we knew it we were in the area. We decided that we wasted too much time trying to get around the mess that it would be pointless to go to the zoo. Instead we traveled over to the Aerospace Museum in McClellan, Ca area. It is free for kids under 5 and military ID holders are free as well. I was excited because this meant we still could get out and enjoy our day, but we wouldn't have to pay for anything.

We had not been yet, and so we were shocked with how much of a variety of airplanes and other internal parts. I was blown away with how much hands on and educational items their were for the kids. They also had a great room upstairs for the kids to color, and play with toys. It was a nice break after running around to all the different airplanes.

Take a look and see:


Sitting in a real pilots seat!


This was outside, look at all the airplanes!

You could walk through a few.

A small T-bird just right for the kids.
This is the play room/coloring area.

Overall, it wasn't the day I had in mind, but it turned out great. I really enjoyed the museum and it feels great to know that I can add one more unique place to see, to our list.

If you are in the area and want something fun to do, you should definitely check out the Aerospace Museum.

Discover Away,
Sarah


Sunday, March 2, 2014

St Patty's Day Ideas

Alright, its almost that time of the year, where we celebrate the Irish, luck, green everything, and four leaf clovers. I need some fun ideas for the kids (2 years old and an 8 month old), so the hunting begins. I wanted to find things we could do during the day, and things I could put together with very little money and give to the kids as gifts. Heres my list of ideas:

Rolos are a great idea! They are gold, not a huge amount of chocolate with caramel, and small in size. This idea is brilliant, small cup (painted gold/or wrap some paper around a cup), add tissue paper, a hand full of Rolos and a hand made rainbow!


Next up is gold coins. I usually find these at a party store or even some times at a craft store. You can purchase these cute banners, or just make (use something around the house) to put them in. If I did this, I might grab a mason  jar (which I have tons of) and place some in that. I can make a small sign myself, cut out some construction paper and ta-da, you have a cute gift!


Licorice is another great option. You can purchase these, slide them in a small bag, or jar, or even a clear cup and, oh look, you can add Rolos or even gold coins to top it off! You know, the gold at the end of a rainbow!


This is probably what Ill do for my oldest, for breakfast. I saw you can get these small personalized sized cereals at Target for a buck or two, and of course just make a small sign! Super easy, and super cute!


Unless you want to go all out, and make a cool breakfast. You can always make these:


Just add some food coloring to the batter and you have these magical pancakes!


Sticking with breakfast items, you can also use these great Fruit Loops for a small fun activity and snack:

Great for my 8 month old and using his little hands to practice grabbing!

Or a healthier snack with lots of color can be as simple as a few pieces of fruit.


I like this idea and just doing a few for the older kids!
I always love a great project to do with the kids, and a fun one I know both kids could enjoy is some colored marshmallow fun.

They even glued them down, but just laying them out is fun enough!

If you like to do fun activities with the kids (I love to bake), then heres a few great ideas.

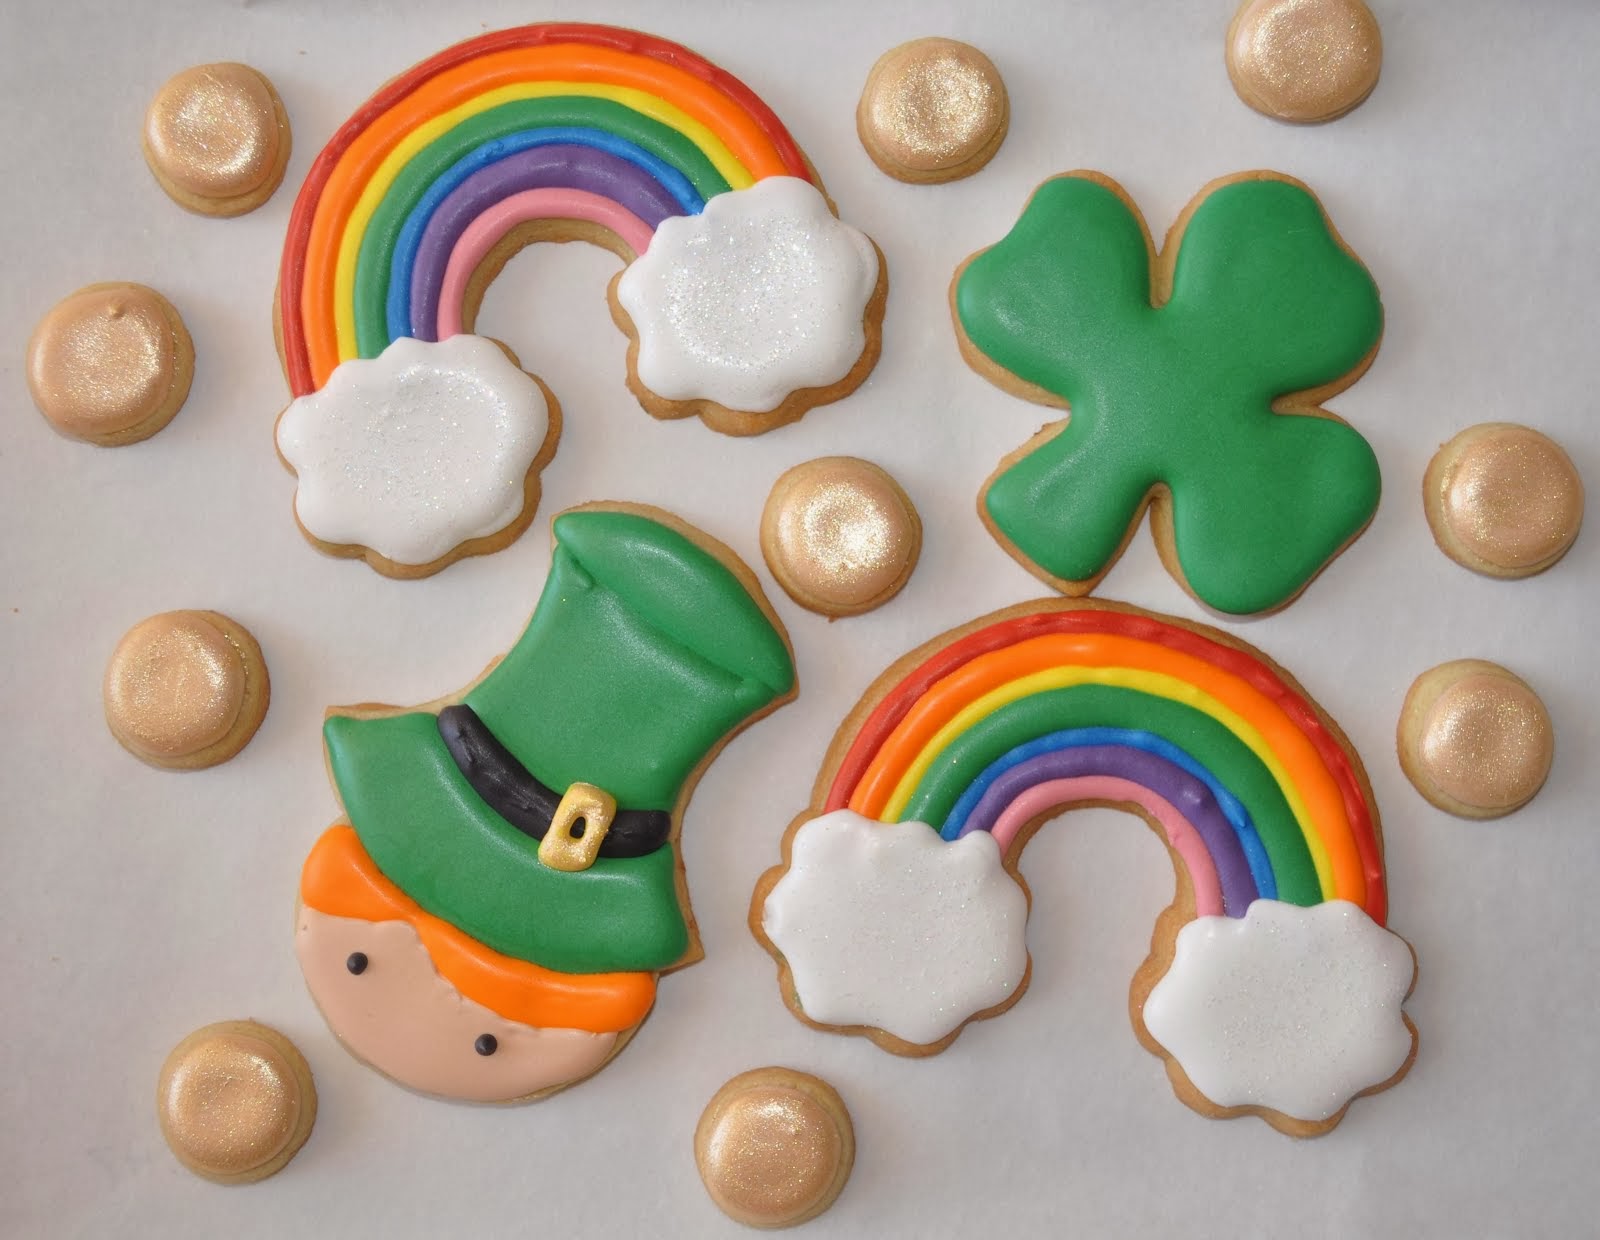
Cookies can be fun to make, these are really well, professionally done, cookies. However, they can always help roll the dough and use the cookie cutters.

The icing is royal icing, just look up an easy recipe online.

See, the kids can always do the gold cookies!
 Or an even simpler idea, take your favorite chocolate chip cookie recipe and have the kids add green food coloring to the dough!


Ok, so we all know I am a sucker for cupcakes. These cupcakes would be a ton of fun. Make vanilla cake batter, separate it out in to different bowls, have the kids add food coloring to the different batters, and add a small spoon full into each cupcake tin. Once they are done cooling, make some frosting (or buy it), and add some colored sprinkles. You can even make gold icing, green icing, or get gold sprinkles, or green sprinkles. They even have the St Patty's Day cupcake toppers (usually in the holiday section of your store, or the baked goods section) and you can top them with those!


This is the same idea, just individually colored cupcakes!


If you are more the crafty type and like to do a small basket or bucket for the kids; I love the idea of using these candies to add color and excitement! (Skittles or even M n Ms).

Next time you make spaghetti or use a jar, save it and wash it out for a fun gift like this!

Great use of the cake push up pops. You can buy these at any local craft store (Micheals or Joanns).
 Keeping with a colored theme, you can use Nerds, which are my favorite candy!


These are rope nerds. Glued down to a licorice rope, and easy to bend or manipulate for other projects (like a rainbow on a cupcake!)
At the end of the day, a little dessert for dinner might be just the cherry on top! So head out and grab some Rainbow Sherbet and keep your eye out for some gold!


Well, thats all the food fun ideas I could come up with. Thanks to all the blogs, webpages, and other such internet sites that helped me out! Be sure to leave a comment below if you have any other brilliant or fun ideas for this years St Patty's Day!

Happy St Patty's Day Everyone,
Sarah


Monday, January 27, 2014

NEW Boys Bedroom!!

Well, the boys had an amazingly cute and adorable bedroom back in New Mexico, but we are here in California now and so its time I finish their room, right? I mean we have only been here 4 months or so! This past weekend the husband and I, with crazy kids under our feet, were finally able to get the boys names up on the wall, and I was able to get the wall decals up. I finished the room... for now.

These are the BEFORE photos:

This is where Brians bed is now.

Dresser/closet area.

This is where Jareds bed is now.
Work in progress.

Work in progress.

Work in progress.
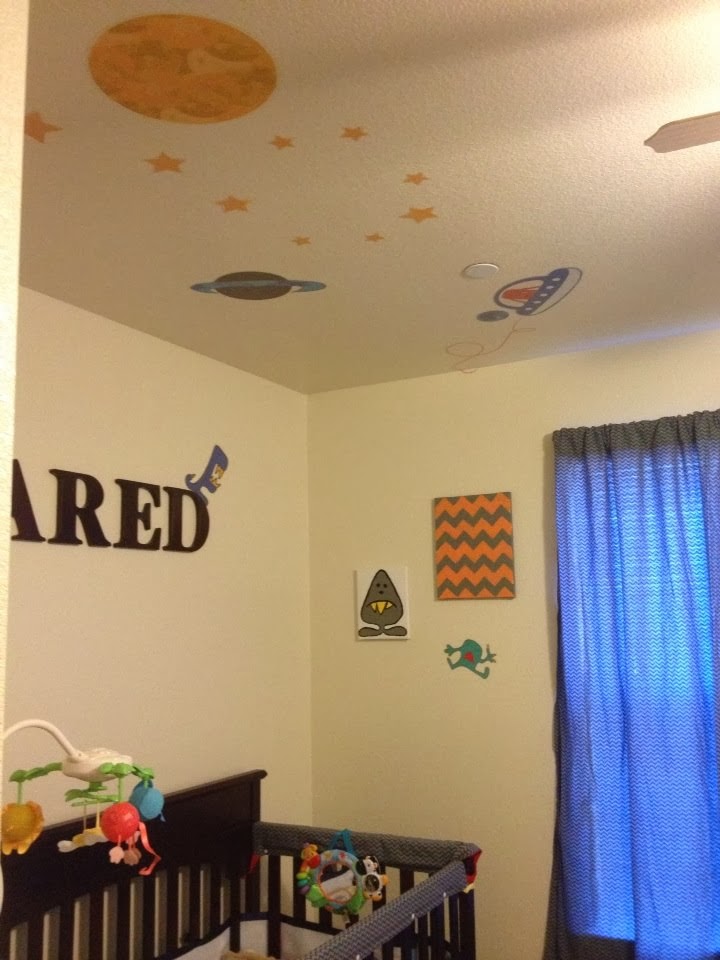
 Here are the updated photos:


Thats sort of from floor to ceiling.


Ok thats a horrible floor to ceiling on the other side of the room. Sorry its not the best photos.

Heres some up close shots.


Best part about this entire room, the wall decals GLOW IN THE DARK!!!! Isn't that awesome! My son for the past two nights, "Mama, lights, lights, look all de lights". Lights, as in glowing stars, spaceships, monsters and planets. This room is so cool, even I want to sleep in it!

Now remember I made the crib sheets from twin bed sets, and the curtain from the flat sheet. The teether rails are still intact and in use, and everything is just perfect!

Here is where you can see the old room, and some of the details on how I made the items. This house is brand new and we were told we couldn't paint for the first year, but honestly I just don't think either myself or my husband want to waste the money or time right now. With both boys, we just have so much other stuff going on! Anyways, I will be working on a few other tutorials coming up soon, so keep an eye for those.

Thanks for visiting, and be sure to leave a comment below.

Monsters, grrr
Sarah