All our babywearing mamas wanted a quick tutorial on how to cover a tula with unique, different or stylish fabric. Brita offered to make a quick tutorial, with a few photos along the way, for all of us to enjoy. If you end up using this tutorial, be sure to show off your before and after photos, as we love to see all our other mamas DIY projects.
Now time to get to that awesome tutorial we promised you... enjoy!
Step 1: Trace out your tula onto a piece of paper. Making sure you mark where the straps come out of.
Step 2: Lay
the trace out over one piece of lining and the piece you want on the
reverse (so your second choice fabric as this will be reversible). Pin together and cut out leaving enough around room around for the seam and to turn out (what I left seemed perfect)
Step 3: Now
do the same for your main fabric and lining but this time you need to
add extra for the tabs on the side and bottom where you will apply the
Velcro to join the two pieces together. I have folded the tabs over to
show the lining so you can see what I mean. I just guessed this bit.
Wide enough to put a piece of Velcro and the length of the gaps between
where the straps join.
Step 4: Now sew the pieces together. The main piece with
its lining, and the reverse side with its lining. Make sure the right sides
are together. Then turn them inside out and stitch around the edge to
keep in place.
Step 5: Join the top of your pieces together along the top.
Make sure you mark where to stop sewing so it isn't joined where the
shoulder straps come out. Put the two right sides facing each other to
sew.
Check how the size is before adding anything else.
Step 6: Now line the two pieces together to put the Velcro on. Pin in place and check it over the tula and with a child in if you can. This picture shows where the Velcro is in the lining of the reverse
fabric and the Velcro goes on the tabs on the good side of your main
fabric and folds in to attach.
Here it is finished.
No you can't
access the pocket or hood but you could add a hood to go on top. I
didn't bother as my toddler never naps.
This covers all parts of the
tula except a tiny bit at he buckles on the waist and I also made
suck pads, twice the normal length, to cover most of the shoulder straps.
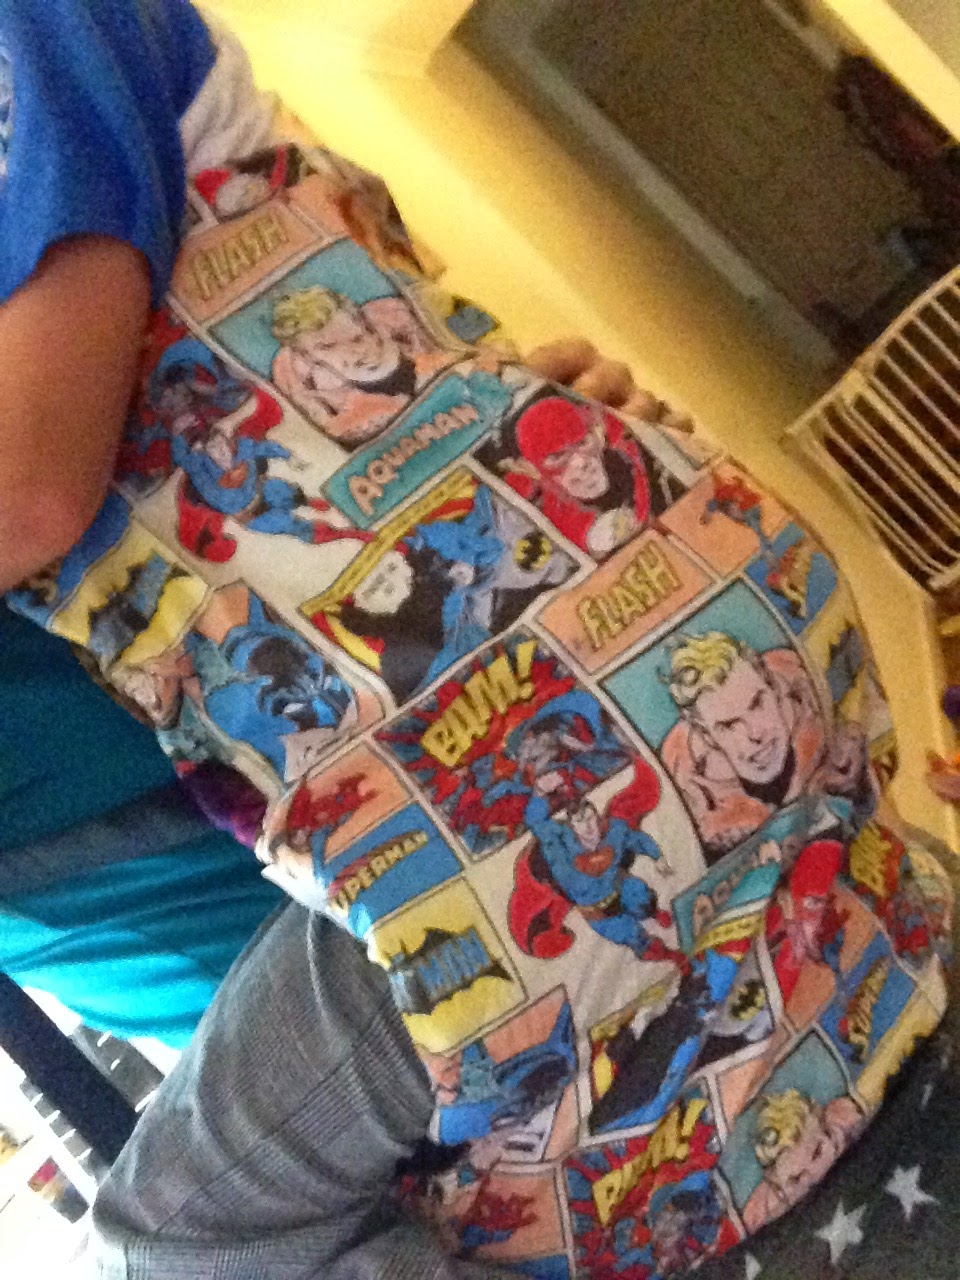
Excuse the 7 year old model. My usual model was out with daddy.
Thank you to Brita for sharing this quick tutorial. I hope all our babywearing mamas love it!
Babywear In Style (or a New Style),
Sarah (and Brita)
Showing posts with label DIY. Show all posts
Wednesday, November 5, 2014
Friday, September 26, 2014
DIY Ironing Board Cover
I needed a new ironing board cover, as the one I had was a hot mess. I was tired of getting my iron stuck on it and it sticking to my fabric, etc. It was one that was clamped on by metal, so I couldn't wash it. I decided I would just make one to match my new room decor. I then cut off the strings from the old iron cover and used the cover as a guide.
I then cut a bunch of strips and large squares of fabric, and sewed them together to make one long piece. I then laid the old top on the fabric and cut it out.
I then used the pad that was on the ironing board to cut out extra batting. This batting was getting really thinned out and I needed a little more padding to help with all the pressing I do with quilting.
I then cut out 4 extra layers of batting. This has helped out so much. I no longer get the grates through the ironing board!
I then iron/pin the edge a half in over. This is where I am going to slide the string to tie the ironing board cover on. Be sure to leave a hole about an in or two.
Stitch as far to the left as you can.
Take a safety pin and pin the string or rope that you are using.
Using the hole you have in the fold you just sewed on, slide the safety pin into the side, and push it all the way around until it comes back out through the hole.
Then pull the string or rope, leave a decent amount on the ends.
Place the padding you have and the extra you cut out on the grates of the ironing board. Then add the cover and slowly and carefully pull both ends of the string. I had to sit under the ironing board and kind of shimmy the cover and strings around. Finish it up with a knot or two, or 5!
Stand back and love on your work...
Or your fabric!
I also covered a piece of cardboard with some of the matching fabric, so I could use the wire shelf that was below the ironing board. It works well!
Its just that easy! If you have like 2 or 3 yards of fabric, and are only using one piece of fabric, all you have to do is use the old cover to make the new one, and add the hem and put your string through it. That would be even faster.
This is a great weekend or an hour or two kind of project. I think it took me about an hour and a half or so, as I was sewing a bunch of strips together, and wanted it to be cute.
Time to Press Some Fabric,
Sarah
![]() |
| The old ironing board cover. |
![]() |
| All the fabric sewn together. |
![]() |
| Be sure to cut the fabric with a little extra on each side (about an inch or two). |
I then cut out 4 extra layers of batting. This has helped out so much. I no longer get the grates through the ironing board!
I then iron/pin the edge a half in over. This is where I am going to slide the string to tie the ironing board cover on. Be sure to leave a hole about an in or two.
Stitch as far to the left as you can.
Take a safety pin and pin the string or rope that you are using.
Using the hole you have in the fold you just sewed on, slide the safety pin into the side, and push it all the way around until it comes back out through the hole.
Then pull the string or rope, leave a decent amount on the ends.
Place the padding you have and the extra you cut out on the grates of the ironing board. Then add the cover and slowly and carefully pull both ends of the string. I had to sit under the ironing board and kind of shimmy the cover and strings around. Finish it up with a knot or two, or 5!
Stand back and love on your work...
Or your fabric!
I also covered a piece of cardboard with some of the matching fabric, so I could use the wire shelf that was below the ironing board. It works well!
Its just that easy! If you have like 2 or 3 yards of fabric, and are only using one piece of fabric, all you have to do is use the old cover to make the new one, and add the hem and put your string through it. That would be even faster.
This is a great weekend or an hour or two kind of project. I think it took me about an hour and a half or so, as I was sewing a bunch of strips together, and wanted it to be cute.
Time to Press Some Fabric,
Sarah
Thursday, September 18, 2014
Mitered Corners Tutorial
I made a quilt top a few weeks ago and had a ton of quilters ask me how I made my mitered corners in my sashing. I figured I would make a video so all those wonderful quilters could see how simple it really is.
The things that you will need is a ruler, 1/4 inch sewing machine foot (or a mark on your machine), a washable fabric pen, and scissors.
To get started cut your strips but make sure to add the extra on both ends. I explain the math in the video, so watch it and you will understand. Another way, is to cut the sashing, sew them together in one long line and then just sew it on, and cut it when you come to the end of each side.
Please feel free to share this video, and link back here. Leave a comment and spread the word!!
Thanks For Watching,
Sarah
The things that you will need is a ruler, 1/4 inch sewing machine foot (or a mark on your machine), a washable fabric pen, and scissors.
To get started cut your strips but make sure to add the extra on both ends. I explain the math in the video, so watch it and you will understand. Another way, is to cut the sashing, sew them together in one long line and then just sew it on, and cut it when you come to the end of each side.
Please feel free to share this video, and link back here. Leave a comment and spread the word!!
Thanks For Watching,
Sarah
Labels:
corners,
DIY,
easy mitered corners,
easy steps,
help,
mitered corners,
quilt,
quilting,
sew,
tutorial,
video
Wednesday, September 3, 2014
Mini iPad Case
My husband recently purchased an iPad mini and has already gone through two cases for it. Both being high end, great quality cases. However, I was not about to let him go purchase another. Instead I thought, why not make him a case COVER/HOLDER. This way when its not in use, in a backpack, or on a trip; he can protect it better.
I liked the idea of using his uniform fabric, so that way he can use it while at work or when he is deployed. For the inside fabric I used a t-shirt material. I wanted something soft and thinner, as the ABU (military) fabric is already really thick. I did add batting to give it that extra padding as well. The buttons I used are from his uniform, so they match the ones he wears every day.
I started out by using two rectangular pieces for the front and back. The front already had the pocket on it. I then cut a half circle and added a few inches to the back of the half circle, to make the opening.
Again, I used grey t-shirt material for the inside. I added batting in the to main rectangular piece, but not in the opening (half circle) piece. I also made the button hole and sewed the button on to hold the opening closed. I again, took this button from an old uniform to make sure it matched.
The smaller pocket is great for pens or pencils, an ID, wallet, etc.
I made his Father's Day card as well, which is a mans shirt with tie. Which is funny because I couldn't tell you the last time I saw him wear a tie.
Or oldest son helped Daddy open his Father's Day gift, and everyone loved it (by everyone I mean the husband and two sons).
Thats all. It was super easy and the only tricky part is trying to sew everything with the batting, and getting all the seams just right. I loved the finished product and hopefully my husband uses it more often then not (which I hope he does, because it will save us money in the long run).
Protect Those iPads,
Sarah
I liked the idea of using his uniform fabric, so that way he can use it while at work or when he is deployed. For the inside fabric I used a t-shirt material. I wanted something soft and thinner, as the ABU (military) fabric is already really thick. I did add batting to give it that extra padding as well. The buttons I used are from his uniform, so they match the ones he wears every day.
I started out by using two rectangular pieces for the front and back. The front already had the pocket on it. I then cut a half circle and added a few inches to the back of the half circle, to make the opening.
Again, I used grey t-shirt material for the inside. I added batting in the to main rectangular piece, but not in the opening (half circle) piece. I also made the button hole and sewed the button on to hold the opening closed. I again, took this button from an old uniform to make sure it matched.
The smaller pocket is great for pens or pencils, an ID, wallet, etc.
I made his Father's Day card as well, which is a mans shirt with tie. Which is funny because I couldn't tell you the last time I saw him wear a tie.
Or oldest son helped Daddy open his Father's Day gift, and everyone loved it (by everyone I mean the husband and two sons).
Thats all. It was super easy and the only tricky part is trying to sew everything with the batting, and getting all the seams just right. I loved the finished product and hopefully my husband uses it more often then not (which I hope he does, because it will save us money in the long run).
Protect Those iPads,
Sarah
Monday, September 1, 2014
Nautical Birthday Cake
This year was a long and exhausting year. With two kids and both being under 2 most of the time; I struggled to sleep and struggled to stay awake. For Jared's first birthday I had planned to make his birthday cake, and a small smash cake as well. When we finally arrived at my in-laws house, we were chatting with my Mother-in-law and she said I should just purchase the cake and that she would pay for it. I agreed with some hesitation, but after the party was over and done with, I was so happy I did. I wasn't completely tired from being up all day and night, I wasn't dealing with two kids while watching cakes bake, and I wasn't stressing over a cake meltdown or disaster.
I had made some decorations for the cake, before I decided to not make the cake. I also had redecorated a #1 candle, as I could not find anything that matched our colors or theme. I used puff paint and painted zig zags on the candle. It was super easy and only took about 2 full days to really dry.
NOTE: We did not light this candle. I do not know how the puff paint will react to fire. Please know that this candle was for decoration ONLY!
I purchased the 1/4 sheet cake with whipped frosting and a extra large cupcake for the smash cake. I then placed all the decorations on the cake (the ones I made before we even drove down to southern California).
This is the large cupcake, also with whip frosting, and I just purchased the blue candle last minute when I thought I forgot the one I made. When I didn't forget it, I just used the light blue candle for his smash cake, and we light that candle.
He had no idea how to blow out the candle but he sure was cute about the entire thing.
He wasn't to excited about smashing the cupcake, but once he got the hang of it he loved it.
A family photo of my happy birthday boy and wet brother. Best day ever.
In the end, I am so glad I made those cake decorations before we left, that way I already had something to put on it. I also was happier during the party, more relaxed because I got sleep and I wasn't stressed out. I am so glad my Mother-in-law paid for it and was nice enough to do so.
If I can help save at least one mom from doing what I did for so many parties, stressing out over all the baking, then I hope it was worth it. I know for myself, I felt like I captured so much more joy during the party, instead of being stressed out and freaked out. Remember, just because we order a cake doesn't mean we are being a bad mom, just means we wanted to have more time with our kids.
It Was A Beautiful Day,
Sarah
I had made some decorations for the cake, before I decided to not make the cake. I also had redecorated a #1 candle, as I could not find anything that matched our colors or theme. I used puff paint and painted zig zags on the candle. It was super easy and only took about 2 full days to really dry.
NOTE: We did not light this candle. I do not know how the puff paint will react to fire. Please know that this candle was for decoration ONLY!
I purchased the 1/4 sheet cake with whipped frosting and a extra large cupcake for the smash cake. I then placed all the decorations on the cake (the ones I made before we even drove down to southern California).
This is the large cupcake, also with whip frosting, and I just purchased the blue candle last minute when I thought I forgot the one I made. When I didn't forget it, I just used the light blue candle for his smash cake, and we light that candle.
He had no idea how to blow out the candle but he sure was cute about the entire thing.
He wasn't to excited about smashing the cupcake, but once he got the hang of it he loved it.
A family photo of my happy birthday boy and wet brother. Best day ever.
In the end, I am so glad I made those cake decorations before we left, that way I already had something to put on it. I also was happier during the party, more relaxed because I got sleep and I wasn't stressed out. I am so glad my Mother-in-law paid for it and was nice enough to do so.
If I can help save at least one mom from doing what I did for so many parties, stressing out over all the baking, then I hope it was worth it. I know for myself, I felt like I captured so much more joy during the party, instead of being stressed out and freaked out. Remember, just because we order a cake doesn't mean we are being a bad mom, just means we wanted to have more time with our kids.
It Was A Beautiful Day,
Sarah
Labels:
1st birthday,
anchor,
Birthday,
blue,
boy,
cake,
candle,
DIY,
nautical cake,
orange,
sailboat,
smash cake,
water,
wheel,
white
Thursday, August 28, 2014
Goody Buckets for Nautical Birthday
This is the second half of the goody buckets. I put baggies of goldfish and cookies in the goody buckets but I also added a few other items. Here are the other small items I added to the buckets and how I made them.
I used word document and made a cover page for the coloring book. I printed 10, as I had 10 buckets to fill.
I also used the same twine I purchased for the banners and used a hole puncher to tie the twine through all the pages.
I then used image search engine online and looked up free coloring pages. I then printed them and again made 10 copies of each.
My husband and I found these water guns at Party City (during summer) and they were like $7 for 12. Which is a great deal.
I printed small labels, again using word document, and just cut them out. I used matching orange and navy blue paper and cut out slightly larger pieces to go behind the labels.
I then used regular glue and glued one white label to one blue or orange piece of paper.
I punched a hole in the corner of the labels, added the twine, and then tied them onto the bucket handles.
The buckets I got at Walmart, again during the summer, and they were less then a $1 each.
The total run down of the buckets were as follows:
Bags (100 count, 3 x 4): 2.99 Micheals gives military discount, so they were cheaper for me.)
Water guns: 7.00
Goldfish: 11.00 (for 3 - 1 pound bags, I only used 1 bag)
Mints: 10.00 (walmart)
Color pages: free
Buckets: .80 (walmart)
Cookies: free, I had all the supplies on hand
Total: 10 buckets for under $35! I call that a deal. My mother in law was shopping at Target and found washable markers on clearance for less then $2. She purchased about 10 packages, so the kids could color and we didn't have to worry about it, as we could just wash it right off.
The buckets were a great hit, and we only had 3 left at the end of the day. It worked out well, as I had 2 for my kids and one for our neighbors daughter.
Splish Splash,
Sarah
I used word document and made a cover page for the coloring book. I printed 10, as I had 10 buckets to fill.
I also used the same twine I purchased for the banners and used a hole puncher to tie the twine through all the pages.
I then used image search engine online and looked up free coloring pages. I then printed them and again made 10 copies of each.
![]() |
| page 1 |
![]() |
| page 2 |
![]() |
| page 3 |
My husband and I found these water guns at Party City (during summer) and they were like $7 for 12. Which is a great deal.
I printed small labels, again using word document, and just cut them out. I used matching orange and navy blue paper and cut out slightly larger pieces to go behind the labels.
I then used regular glue and glued one white label to one blue or orange piece of paper.
I punched a hole in the corner of the labels, added the twine, and then tied them onto the bucket handles.
The buckets I got at Walmart, again during the summer, and they were less then a $1 each.
| I added a few lifesavers to the buckets as well. |
Bags (100 count, 3 x 4): 2.99 Micheals gives military discount, so they were cheaper for me.)
Water guns: 7.00
Goldfish: 11.00 (for 3 - 1 pound bags, I only used 1 bag)
Mints: 10.00 (walmart)
Color pages: free
Buckets: .80 (walmart)
Cookies: free, I had all the supplies on hand
Total: 10 buckets for under $35! I call that a deal. My mother in law was shopping at Target and found washable markers on clearance for less then $2. She purchased about 10 packages, so the kids could color and we didn't have to worry about it, as we could just wash it right off.
The buckets were a great hit, and we only had 3 left at the end of the day. It worked out well, as I had 2 for my kids and one for our neighbors daughter.
Splish Splash,
Sarah
Labels:
Birthday,
boy,
coloring pages,
cookies,
DIY,
goody bucket,
labels,
mints,
nautical,
party,
washable markers,
water guns
Sunday, August 24, 2014
Nautical Birthday Decorative Goody Bags (Cookies and Goldfish)
For my sons 1st birthday party this year, we did a nautical theme and I wanted to make some goody bagged items for the goody buckets. While shopping one day I was walking through the snack aisles, and saw goldfish! I thought, for sure I could use those. Not only are they perfect for the kids, but they are fish and go with the theme of nautical. It was perfect. I grabbed a HUGE box and headed home to start making some packages of them.
To start I purchased small snack sized bags from a craft store. I grabbed my cut outs that I made, my stapler and of course the goldfish.
I filled each bag using a measuring cup to make sure they all had about the same amount in them. I then folded the two corners of the bag in towards the center.
I then folded the pointed tip down.
Then folded that over once more.
Take one of the cut outs and place a large part of the cut out over the folded bag.
Use your stapler and staple the bag to the cut out. Make sure you go through the folds.
Now do that however many times you need to. I had 10 buckets and so I did a few of each color.
The finished product is awesome.
I also made sugar cookies, with chocolate star molds and colored royal icing. I then packaged them exactly the same way.
Don't they look great with the anchors?
I then added them to their goody buckets and the kids (and adults) loved them.
I hope you all find this as an easy DIY for any party. Thats what I love about this goody item, you can pretty much buy cut outs in any theme or color, or you can make and cut them out yourself. You can use any kind of food or candy, and you can buy these bags in pretty much any size, shape, or colors as well! If you have an odd shaped item, you can use cellophane rolls and cut off whatever amount you need, and just tie it closed with ribbon. Perfect for any goody or gift.
Anyone Want A Snack?
Sarah
To start I purchased small snack sized bags from a craft store. I grabbed my cut outs that I made, my stapler and of course the goldfish.
I filled each bag using a measuring cup to make sure they all had about the same amount in them. I then folded the two corners of the bag in towards the center.
I then folded the pointed tip down.
Then folded that over once more.
Take one of the cut outs and place a large part of the cut out over the folded bag.
Use your stapler and staple the bag to the cut out. Make sure you go through the folds.
Now do that however many times you need to. I had 10 buckets and so I did a few of each color.
The finished product is awesome.
I also made sugar cookies, with chocolate star molds and colored royal icing. I then packaged them exactly the same way.
Don't they look great with the anchors?
I then added them to their goody buckets and the kids (and adults) loved them.
| Buckets at the party. |
| I had extra cookies in a basket for the adults. Lifesavers too (sticking with the theme). |
![]() |
| The cake/goody table. |
| Basket with cookies in them. I did not add cut outs for these. |
| The goody buckets with all the items in them. |
Anyone Want A Snack?
Sarah
Labels:
anchor,
bags,
blue,
boy birthday,
cookies,
cut outs,
DIY,
goldfish,
goody bags,
nautical,
orange,
sail boat,
sugar cookies,
white
Subscribe to:
Posts (Atom)


