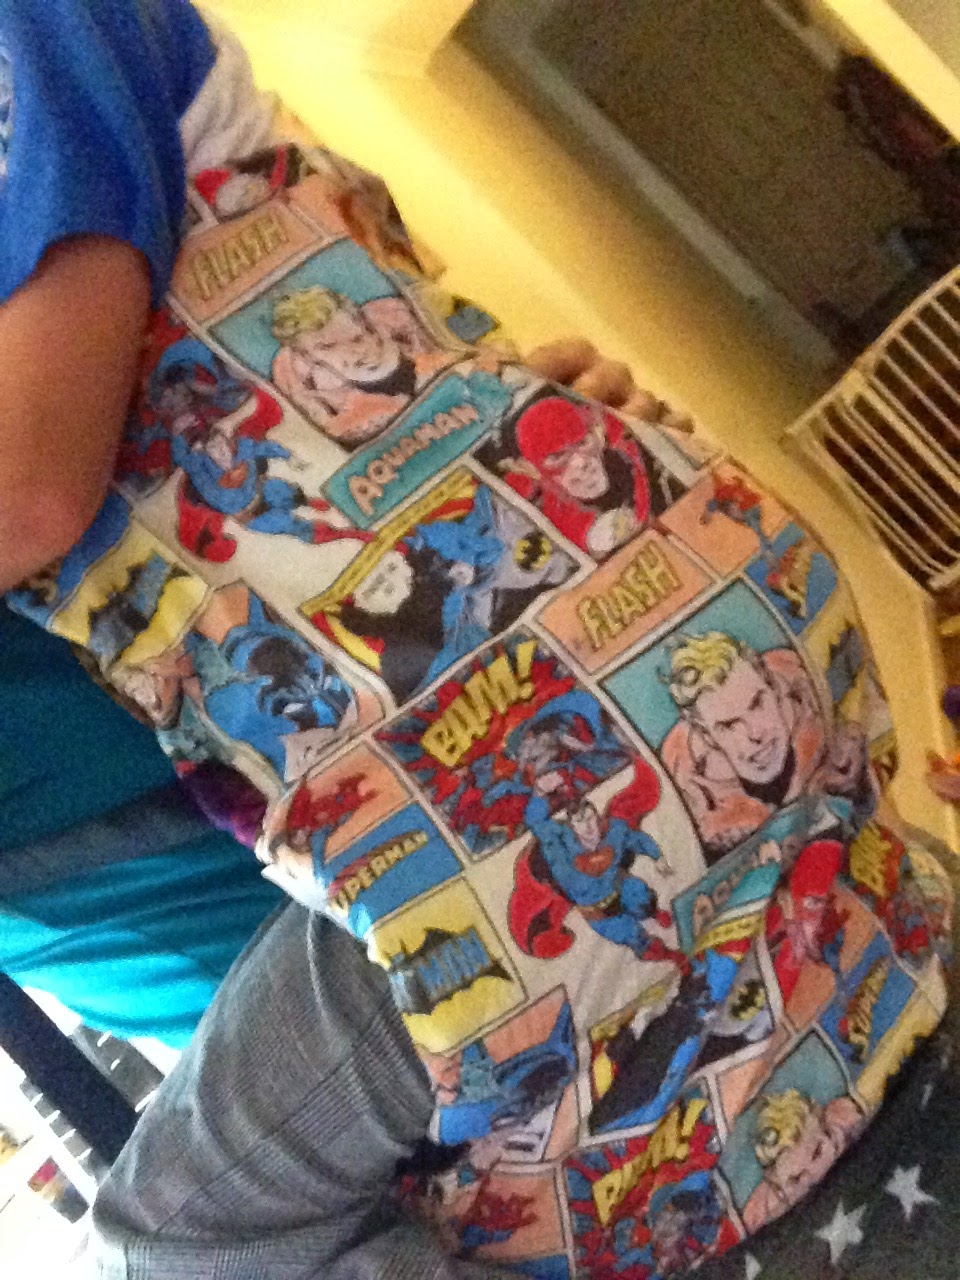
All our babywearing mamas wanted a quick tutorial on how to cover a tula with unique, different or stylish fabric. Brita offered to make a quick tutorial, with a few photos along the way, for all of us to enjoy. If you end up using this tutorial, be sure to show off your before and after photos, as we love to see all our other mamas DIY projects.
Now time to get to that awesome tutorial we promised you... enjoy!
Step 1: Trace out your tula onto a piece of paper. Making sure you mark where the straps come out of.
Step 2: Lay
the trace out over one piece of lining and the piece you want on the
reverse (so your second choice fabric as this will be reversible). Pin together and cut out leaving enough around room around for the seam and to turn out (what I left seemed perfect)
Step 3: Now
do the same for your main fabric and lining but this time you need to
add extra for the tabs on the side and bottom where you will apply the
Velcro to join the two pieces together. I have folded the tabs over to
show the lining so you can see what I mean. I just guessed this bit.
Wide enough to put a piece of Velcro and the length of the gaps between
where the straps join.
Step 4: Now sew the pieces together. The main piece with
its lining, and the reverse side with its lining. Make sure the right sides
are together. Then turn them inside out and stitch around the edge to
keep in place.
Step 5: Join the top of your pieces together along the top.
Make sure you mark where to stop sewing so it isn't joined where the
shoulder straps come out. Put the two right sides facing each other to
sew.
Check how the size is before adding anything else.
Step 6: Now line the two pieces together to put the Velcro on. Pin in place and check it over the tula and with a child in if you can. This picture shows where the Velcro is in the lining of the reverse
fabric and the Velcro goes on the tabs on the good side of your main
fabric and folds in to attach.
Here it is finished.
No you can't
access the pocket or hood but you could add a hood to go on top. I
didn't bother as my toddler never naps.
This covers all parts of the
tula except a tiny bit at he buckles on the waist and I also made
suck pads, twice the normal length, to cover most of the shoulder straps.
Excuse the 7 year old model. My usual model was out with daddy.
Thank you to Brita for sharing this quick tutorial. I hope all our babywearing mamas love it!
Babywear In Style (or a New Style),
Sarah (and Brita)
Showing posts with label cover. Show all posts
Wednesday, November 5, 2014
Friday, September 26, 2014
DIY Ironing Board Cover
I needed a new ironing board cover, as the one I had was a hot mess. I was tired of getting my iron stuck on it and it sticking to my fabric, etc. It was one that was clamped on by metal, so I couldn't wash it. I decided I would just make one to match my new room decor. I then cut off the strings from the old iron cover and used the cover as a guide.
I then cut a bunch of strips and large squares of fabric, and sewed them together to make one long piece. I then laid the old top on the fabric and cut it out.
I then used the pad that was on the ironing board to cut out extra batting. This batting was getting really thinned out and I needed a little more padding to help with all the pressing I do with quilting.
I then cut out 4 extra layers of batting. This has helped out so much. I no longer get the grates through the ironing board!
I then iron/pin the edge a half in over. This is where I am going to slide the string to tie the ironing board cover on. Be sure to leave a hole about an in or two.
Stitch as far to the left as you can.
Take a safety pin and pin the string or rope that you are using.
Using the hole you have in the fold you just sewed on, slide the safety pin into the side, and push it all the way around until it comes back out through the hole.
Then pull the string or rope, leave a decent amount on the ends.
Place the padding you have and the extra you cut out on the grates of the ironing board. Then add the cover and slowly and carefully pull both ends of the string. I had to sit under the ironing board and kind of shimmy the cover and strings around. Finish it up with a knot or two, or 5!
Stand back and love on your work...
Or your fabric!
I also covered a piece of cardboard with some of the matching fabric, so I could use the wire shelf that was below the ironing board. It works well!
Its just that easy! If you have like 2 or 3 yards of fabric, and are only using one piece of fabric, all you have to do is use the old cover to make the new one, and add the hem and put your string through it. That would be even faster.
This is a great weekend or an hour or two kind of project. I think it took me about an hour and a half or so, as I was sewing a bunch of strips together, and wanted it to be cute.
Time to Press Some Fabric,
Sarah
![]() |
| The old ironing board cover. |
![]() |
| All the fabric sewn together. |
![]() |
| Be sure to cut the fabric with a little extra on each side (about an inch or two). |
I then cut out 4 extra layers of batting. This has helped out so much. I no longer get the grates through the ironing board!
I then iron/pin the edge a half in over. This is where I am going to slide the string to tie the ironing board cover on. Be sure to leave a hole about an in or two.
Stitch as far to the left as you can.
Take a safety pin and pin the string or rope that you are using.
Using the hole you have in the fold you just sewed on, slide the safety pin into the side, and push it all the way around until it comes back out through the hole.
Then pull the string or rope, leave a decent amount on the ends.
Place the padding you have and the extra you cut out on the grates of the ironing board. Then add the cover and slowly and carefully pull both ends of the string. I had to sit under the ironing board and kind of shimmy the cover and strings around. Finish it up with a knot or two, or 5!
Stand back and love on your work...
Or your fabric!
I also covered a piece of cardboard with some of the matching fabric, so I could use the wire shelf that was below the ironing board. It works well!
Its just that easy! If you have like 2 or 3 yards of fabric, and are only using one piece of fabric, all you have to do is use the old cover to make the new one, and add the hem and put your string through it. That would be even faster.
This is a great weekend or an hour or two kind of project. I think it took me about an hour and a half or so, as I was sewing a bunch of strips together, and wanted it to be cute.
Time to Press Some Fabric,
Sarah
Wednesday, September 24, 2014
Serger Cover
I have a cat, and she is not a helpful cat. She pulls thread, and unwinds bobbins. I needed something to cover up my serger because she keeps pulling the threads (all 4 of them) and I have re-threaded my machine too many times! I got tired of it, and decided Ill just use some of the fabric I have and some that I used for the sewing machine mat, and make a cover. Simple, easy solution!
Its a really easy layout. I cut out two large squares for the sides that were big enough to cover the machine. I then cut ONE long strip that was as wide as the machine, and long enough to go from the front of the machine, over the top, to the back. (In other words, long enough for 3 sides of the square, with a little extra).
I then sew the squares on, stopping 1/4 of an inch from each corner, so I can turn the to fabrics and continue sewing. If you want to see something closer to what I did, check out the appliance covers I made awhile back (just take out the piping).
It was done with in an hour and I added some interface to give it some stiffness. My cat has not touched my threads!! Problem is now solved. Yahoo.
Make a Cover,
Sarah
Its a really easy layout. I cut out two large squares for the sides that were big enough to cover the machine. I then cut ONE long strip that was as wide as the machine, and long enough to go from the front of the machine, over the top, to the back. (In other words, long enough for 3 sides of the square, with a little extra).
I then sew the squares on, stopping 1/4 of an inch from each corner, so I can turn the to fabrics and continue sewing. If you want to see something closer to what I did, check out the appliance covers I made awhile back (just take out the piping).
It was done with in an hour and I added some interface to give it some stiffness. My cat has not touched my threads!! Problem is now solved. Yahoo.
Make a Cover,
Sarah
Labels:
cover,
easy sewing,
machine,
quick project,
quilt,
quilting,
serger,
sewing,
sewing machine,
simple sewing project
Friday, August 16, 2013
Smock for My Son
When I was a little girl I remember my mom had these really cute aprons that were almost like tank top dresses, but in the style of an apron. It was a fabric material, with old 70s fabric that tied in the back, and one on the side (if I remember correctly). I use to love putting them on, because it made me feel like I was a chef or a baker! I believe they were called smocks, not aprons.
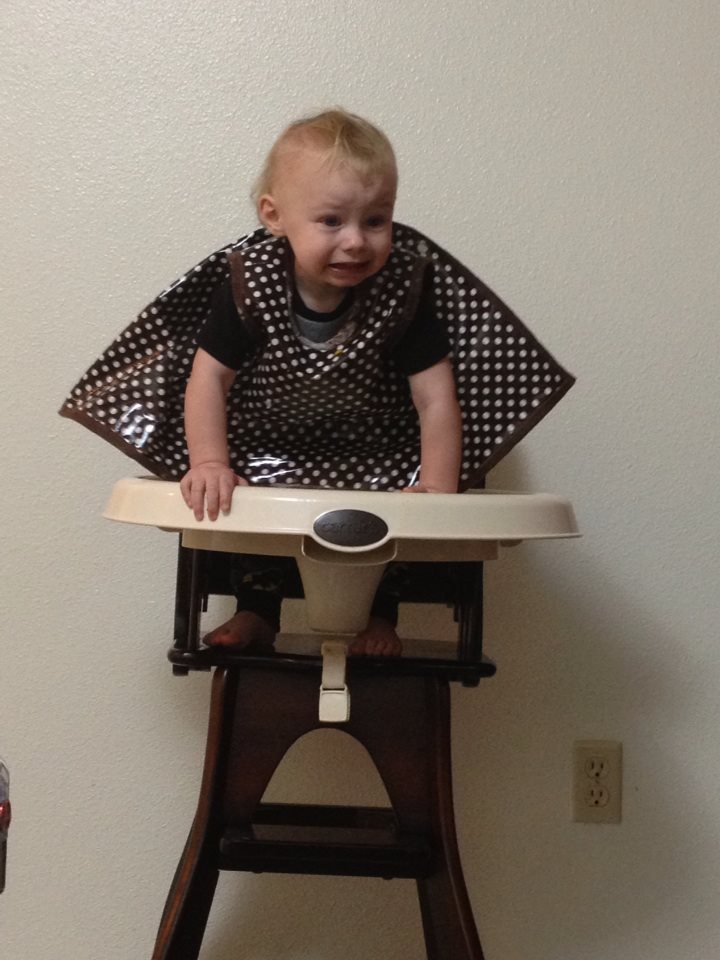
My son is a very messy eater. He loves a lot of fruits, and veggies but usually enjoys wearing them as well. I got tired of undressing him and dressing him before and after EVERY meal or snack. I finally thought, those cute smocks when I was young would be a great idea for my son to wear while he eats. That way I don't have to keep undressing him and dressing him, and he can just eat in the smock. Then I could just wipe it down, and he will be clean (or cleaner then without it).
I looked at my local craft store for a pattern, even checked online and at walmart. In the end I was not willing to spend $15 bucks for a pattern. I thought about it and decided I would just use a t-shirt out of my sons closet and use that as a pattern. I grabbed some paper, a shirt that is a little large on my son, and started tracing.
Now, I wanted the back to be where the snaps go. I also wanted to make it expand over time so when he starts getting bigger I wont have to keep making a new one. So, the design will have the front as a solid panel, and the back would be two separate panels where the snaps will go. I used the front of the shirt and traced slightly larger then the shirt (to allow for seam allowances). I then flipped the shirt over and traced the back of the shirt to the center of it for the two back panels. I made one of the panels a little larger then the other (adding about an extra inch to the center of the shirt). The extra inch of fabric down the center will be where the extra snaps will go for the expansion for later on when he gets bigger.
Once I have the pattern made, I cut them out and trace them onto the wrong side of the fabric. Remember that you traced the pattern with the shirt facing towards you, but you now have the fabric facing down and away from you, so you will have to flip the pattern so the "right" sides are all facing the same way. Once you have your pattern traced onto your fabric, cut it out.
Now, I used vinyl as its easier to clean up, but a pain in the butt to sew! I found/read a trick online that when your sewing vinyl you just need to place painters tap on your machine and bottom of the foot. This way the vinyl will slip through your foot and the bottom of your machine, instead of sticking like its glue.
Once you have the pieces all cut you can begin to sew. I sewed the shoulder piece first. After those are attached I pinned the sides together, then sewed those together.
Now you can add binding like I did or you can fold the fabric in a 1/4 of an inch or 1/2 inch and sew that down. I made binding and then attached that. I would say if your a seasoned sewer you could do the binding, if your not then you might want to stick to just folding all the exposed edges (and sewing those with a straight stitch).
This is the final product:
This is the front, note the entire front is one piece of fabric.
Heres the back. One side has the extra inch in the center where the snaps are. The other side stops at the center (of the shirt I traced for the pattern).
These are the snaps I added. The one on the left is the female snap, the three on the right are all male snaps. This way when you put it on you can choose the size you need, and snap into which ever one is closes.
I put it on my son and he was in love with it! Sorry the pictures are kind of blurry, he was running and dancing in it.
Also, you can use these for painting, or any "dirty" crafts you may want to do!
He was being a super hero!
In action, enjoying a snack!
So now go get dirty or get crafty with your little ones,
Sarah
My son is a very messy eater. He loves a lot of fruits, and veggies but usually enjoys wearing them as well. I got tired of undressing him and dressing him before and after EVERY meal or snack. I finally thought, those cute smocks when I was young would be a great idea for my son to wear while he eats. That way I don't have to keep undressing him and dressing him, and he can just eat in the smock. Then I could just wipe it down, and he will be clean (or cleaner then without it).
I looked at my local craft store for a pattern, even checked online and at walmart. In the end I was not willing to spend $15 bucks for a pattern. I thought about it and decided I would just use a t-shirt out of my sons closet and use that as a pattern. I grabbed some paper, a shirt that is a little large on my son, and started tracing.
Now, I wanted the back to be where the snaps go. I also wanted to make it expand over time so when he starts getting bigger I wont have to keep making a new one. So, the design will have the front as a solid panel, and the back would be two separate panels where the snaps will go. I used the front of the shirt and traced slightly larger then the shirt (to allow for seam allowances). I then flipped the shirt over and traced the back of the shirt to the center of it for the two back panels. I made one of the panels a little larger then the other (adding about an extra inch to the center of the shirt). The extra inch of fabric down the center will be where the extra snaps will go for the expansion for later on when he gets bigger.
Once I have the pattern made, I cut them out and trace them onto the wrong side of the fabric. Remember that you traced the pattern with the shirt facing towards you, but you now have the fabric facing down and away from you, so you will have to flip the pattern so the "right" sides are all facing the same way. Once you have your pattern traced onto your fabric, cut it out.
Now, I used vinyl as its easier to clean up, but a pain in the butt to sew! I found/read a trick online that when your sewing vinyl you just need to place painters tap on your machine and bottom of the foot. This way the vinyl will slip through your foot and the bottom of your machine, instead of sticking like its glue.
Once you have the pieces all cut you can begin to sew. I sewed the shoulder piece first. After those are attached I pinned the sides together, then sewed those together.
Now you can add binding like I did or you can fold the fabric in a 1/4 of an inch or 1/2 inch and sew that down. I made binding and then attached that. I would say if your a seasoned sewer you could do the binding, if your not then you might want to stick to just folding all the exposed edges (and sewing those with a straight stitch).
This is the final product:
This is the front, note the entire front is one piece of fabric.
These are the snaps I added. The one on the left is the female snap, the three on the right are all male snaps. This way when you put it on you can choose the size you need, and snap into which ever one is closes.
I put it on my son and he was in love with it! Sorry the pictures are kind of blurry, he was running and dancing in it.
Also, you can use these for painting, or any "dirty" crafts you may want to do!
He was being a super hero!
In action, enjoying a snack!
So now go get dirty or get crafty with your little ones,
Sarah
Monday, August 5, 2013
Appliance Covers
I am one of those woman who has a ton of different kitchen appliances sitting out on my counter. I love the convenience of having my juicer, my coffee machine, my toaster, and so many other appliances all over my counters. I end up putting a lot of them in cupboards and in the pantry to save on kitchen counter space, but I love having the kitchen counter looking clean. Sometimes having the appliances out makes the counters look cluttered and dirty. My simple solution was to make covers and just let the pretty fabric distract your eye from the cluttered appliances on the counter. On top of that, the cover keeps my appliances clean and free of dust while I am not using them. (Here in New Mexico we get a lot of dust storms, and even with double windows, we still get dirt inside the house).
When I was a little girl my mother had a fabric cover for our toaster. I always thought it was so dated and just silly to have such a thing over an appliance you use often. I personally did not get it. Now, as an adult I look back at that cover and it brings back so many childhood memories. The kitchen where I grew up and spent many hours cooking, baking and even crafting with my mother and friends. I hope my children have such memories as I did, and such a small thing (like an appliance cover) that triggers those memories. The cover just brings back so much more for me then it just being an appliance cover. So with that I give you the appliance tutorial:
What you will need for this project:
*fabric (I purchased enough for my 3 appliance covers, and a little extra just in case. Be sure to measure before you purchase.)
*measurements of your appliance(s) (add seam allowance)
*cording (optional)
*interface (thick and iron on)
*your essentials (machine, cutting board, scissors, thread....)
To start I measured all sides of the appliance, and added the seam allowance I needed. I also added about an inch to the bottom of all the fabric pieces that go around the sides (for the hem).
I then cute all 5 pieces with the seam allowance added on.
Once you have them cut out, cut the original sizes (with out the seam allowance) out of the interface.
Then iron the interface onto each fabric piece, remember it goes onto the back/wrong side of the fabric. Follow the directions on the interface for iron on.
Once thats done, you will need to cut strips of fabric for the cording. I cut 2 inches of a matching brown fabric.
You will need to sew all those strips together to make one long strip. First lay the two strips one on top of the other making an L shape.
Then sew them together going from the top right corner to the bottom left corner.
Then cut the extra off the square you just sewed. Then open the seam and iron out the seams so they are flat.
I then folded the 2 inch brown fabric around the cording and using your needle setting as far to the left as possible (a zipper foot works well for this as well).
Then stitch as close to the cording as you can, sealing the cording into the folded inside of the fabric.
Once your cording is done, you can begin to put the box together. I stitched the three center pieces together, leaving the left and right panels unattached.
I then pinned the cording to the three panels that are already sewed together and then added the side panel along with the cording.
Once its pinned, I slowly and carefully stitch all three pieces together. Note: you are now creating a box shape, so the corners will be slightly challenging. When I got to the corners I stopped stitching about 1/4 of an inch from the end, then folded the corners and replaced my needle where I needed to start up again. Continue on and do the same for the other corner.
Once you have one side panel on, do the same thing to the other side panel, until you have your cover assembled.
If you added that extra inch to the bottom of your fabric, this is when you will fold a half inch around the bottom. I ironed mine to help keep it in place.
I then pinned it, and sewed around the entire bottom at 1/4 inch.
Now you have a cover and you appliance will look super cute!
This is the toaster cover!
Heres my other finished appliance covers:
This is for my juicer. (Above)
This is for my coffee maker. (Below)
Now your kitchen can be cute and colorful!
Happy sewing,
Sarah
When I was a little girl my mother had a fabric cover for our toaster. I always thought it was so dated and just silly to have such a thing over an appliance you use often. I personally did not get it. Now, as an adult I look back at that cover and it brings back so many childhood memories. The kitchen where I grew up and spent many hours cooking, baking and even crafting with my mother and friends. I hope my children have such memories as I did, and such a small thing (like an appliance cover) that triggers those memories. The cover just brings back so much more for me then it just being an appliance cover. So with that I give you the appliance tutorial:
What you will need for this project:
*fabric (I purchased enough for my 3 appliance covers, and a little extra just in case. Be sure to measure before you purchase.)
*measurements of your appliance(s) (add seam allowance)
*cording (optional)
*interface (thick and iron on)
*your essentials (machine, cutting board, scissors, thread....)
To start I measured all sides of the appliance, and added the seam allowance I needed. I also added about an inch to the bottom of all the fabric pieces that go around the sides (for the hem).
I then cute all 5 pieces with the seam allowance added on.
Once you have them cut out, cut the original sizes (with out the seam allowance) out of the interface.
Then iron the interface onto each fabric piece, remember it goes onto the back/wrong side of the fabric. Follow the directions on the interface for iron on.
Once thats done, you will need to cut strips of fabric for the cording. I cut 2 inches of a matching brown fabric.
You will need to sew all those strips together to make one long strip. First lay the two strips one on top of the other making an L shape.
Then sew them together going from the top right corner to the bottom left corner.
Then cut the extra off the square you just sewed. Then open the seam and iron out the seams so they are flat.
I then folded the 2 inch brown fabric around the cording and using your needle setting as far to the left as possible (a zipper foot works well for this as well).
Once your cording is done, you can begin to put the box together. I stitched the three center pieces together, leaving the left and right panels unattached.
I then pinned the cording to the three panels that are already sewed together and then added the side panel along with the cording.
Once its pinned, I slowly and carefully stitch all three pieces together. Note: you are now creating a box shape, so the corners will be slightly challenging. When I got to the corners I stopped stitching about 1/4 of an inch from the end, then folded the corners and replaced my needle where I needed to start up again. Continue on and do the same for the other corner.
Once you have one side panel on, do the same thing to the other side panel, until you have your cover assembled.
If you added that extra inch to the bottom of your fabric, this is when you will fold a half inch around the bottom. I ironed mine to help keep it in place.
I then pinned it, and sewed around the entire bottom at 1/4 inch.
Now you have a cover and you appliance will look super cute!
This is the toaster cover!
Heres my other finished appliance covers:
This is for my juicer. (Above)
This is for my coffee maker. (Below)
Now your kitchen can be cute and colorful!
Happy sewing,
Sarah
Subscribe to:
Posts (Atom)