Pages

Showing posts with label paint. Show all posts

Thursday, July 17, 2014

DIY Kids Stove

As we all know, I am a huge DIY mom! If I can use something I have on hand, add a little elbow grease and a little bit of crafty paint, I will make it happen.With that being said, I was in love with all those cute kid stoves. Lets be honest though, I am not about to pay $100-$300 for some piece of plastic to just get beat up and have the stickers fall off. No thank you! I started doing some research, and clicked away for weeks. I finally decided I would use our old microwave stand and convert that into a mini stove/oven/refrigerator unit for our boys!

Heres the original stand:

It had doors on the front and a shelf in the middle, but my husband removed those as he was going to create a half door and more shelving units.


This is the unit with the hardware (purchased at ikea) and the new doors and hinges. My husband used piano/cabinet hinges that were pretty cheap. We used the old hardware for the "refrigerator" door (on the right), and used the old doors closing hardware (the black looking thing) to keep the "oven" door closed.


Step 1: If you have a unit that has a silky smooth fake varnish like feel then you will want to sand that sucker down. Get it rough and pull as much smooth surface off. Once thats done prime the entire thing. I used a primer that was for laminated furniture. It worked out perfect! Its pretty sticky so make sure you get extra rollers and brushes, as this was a prime and toss the brushes kind of primer. 


Step two: Start painting the unit the way you want it to be! I did some 2nd priming in certain areas that needed it, so be sure to let your unit sit over night before you try to paint. I wanted the top left unit to be the oven. I used a flat black paint (purchased at a local craft store) and painted the inside and door, as well as a small window on the front (later on).


I then used painters tape to tape off the unwanted areas, and painted certain pieces of the unit in one color. I then let that dry over night and did a second coat. If you are going to paint the entire thing in one color then don't worry about the painters tape!


I then used the second color (orange) and painted the rest of the unit. I again waited over night and did some touch up spots to give it a nice thick layer of paint.


This is after the 2nd orange paint, and the black window for the oven.


For the hardware I used just small wood circles and Popsicle sticks that you can purchase at your local craft shop.  I cut the Popsicle sticks to fit a small circle on the big circle (for the stove pieces). I then took one of the smaller circles and cut it in half for the dials (for the oven).

I then painted everything black. Waited a few hours, used wood glue and glued everything together.


Stove top. Small circle, glued onto a large circle, with Popsicle sticks as the burners.

These are the oven knobs. Small circle, with half a small circle glued on top.

I added some silver paint pen to the window and burners, as well as put the numbers on the oven knobs.

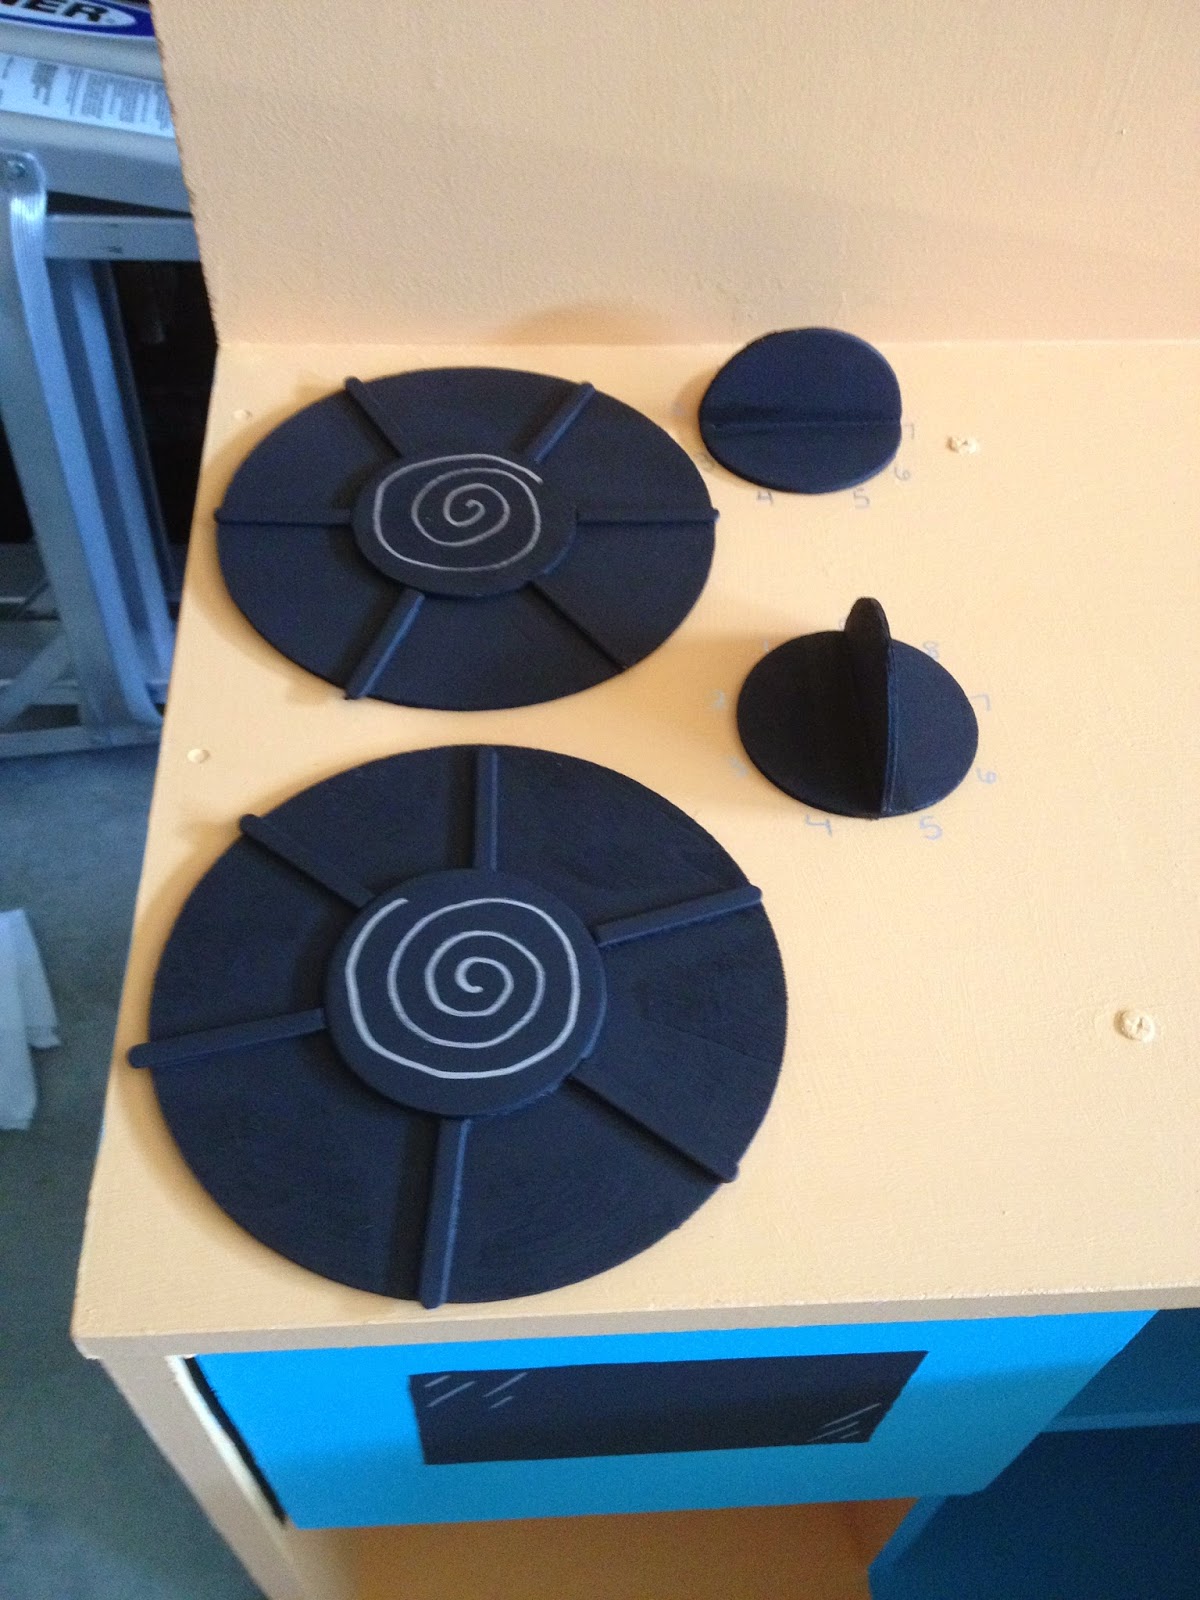

I then had my husband help me place the hardware (again purchased at ikea) and screw those in place. Super easy and simple. Its now done!!! I will more then likely add new things as I go, but for now they can play away!


I have not put a sealant on the paint, but plan to when I add the rest of the small projects to it. If I ever get around to it. With two kids, who knows when that will be.

In the end we bought the hardware, paint and primer, a few brushes and tape. I believe the grand total was under $50!!! I had the black paint, I had the a few brushes and the unit. It was a nice week long project that turned into a month long project because I slacked a little, but hey it got done and its now being used daily!!!

A Win For This DIY MOM,
Sarah

Sunday, May 11, 2014

May Give Thanks, Week 1

May 1:
     Thankful for all the "new" things my little guy has done today. He clapped for the first time, took several steps in a row on his own, and even walked from the couch to the coffee table on his own. He is just picking up on everything these days. Even when we say something to him, like "Say, Hi Dada" he will mimic it so well! Its the best feeling ever.

May 2:
     Thankful that I was able to sit down and prep all the blocks for the next section of the Halloween quilt. The prepping on the freezer paper takes a lot of time (probably because I am OCD), but I finished all of it for the next section! Its nice to have that time where absolutely no little hands are grabbing at everything you are doing. Happy dance!

May 3:
     My oldest son tried his hand at painting for the first time today. I am thankful that he enjoyed it a ton (even threw a fit when he had to stop for dinner), thankful he didn't eat any of the paint, and lastly I am thankful for such beautiful artwork now hanging on my fridge! Best way to keep a kid busy for an hour.

May 4:
     For awhile, after the holidays, my mother and I kind of got into a routine of calling each other whenever we could find the time, and just take a moment to catch up. She often called on her way home once a week, and if I missed her call I would try calling sometimes on the weekend while I had a hubby to help keep the kids out of my hair. Today, I called my mother and we were able to chat for some time, so thankful for such a wonderful mother, and as I get older I realize how much it calms me to have someone to chit chat about life with. Its a beautiful thing, that as we age we grow closer to those we often pushed away while we were kids. Love you Mother Elizabeth!

May 5:
     Working on little projects here and there for my sons 1st birthday next month. Thankful today I was able to finish up cutting some of the pages for the banner. I am excited to see this party come together, but at the same time its too soon.


May 6:
     Thankful for an hour or two, during the boys nap, to put one coat of orange paint on the boys stove/oven unit. I can't wait to finish it up.


May 7:
     Today is a hard day to find something to be thankful for, but after a long day in an ER for my oldest son, I am thankful for all the family and friends who have supported us.


Give Thanks,
Sarah

Thursday, May 1, 2014

April Give Thanks, Week 5

April 29:
     Thankful for the 90 degree weather today, our walk around the block, and being able to enjoy the kiddy pool in the back yard! It was a great day.

April 30:
     The best, random, last minute BBQ; thrown together by our housing company here on base, and the kids loved it too! Thankful to my neighbor for letting me know, and giving us the info and invite. Its exactly how the end to a long day should be; free cupcake decorating, free flowers, free bounce house, free bubbles, free hot dogs, and free painting station. We even won some tickets to a family fun center! It was great.

Decorating and snacking on his cupcake.

Give Thanks,
Sarah

Friday, August 16, 2013

Smock for My Son

When I was a little girl I remember my mom had these really cute aprons that were almost like tank top dresses, but in the style of an apron. It was a fabric material, with old 70s fabric that tied in the back, and one on the side (if I remember correctly). I use to love putting them on, because it made me feel like I was a chef or a baker! I believe they were called smocks, not aprons.

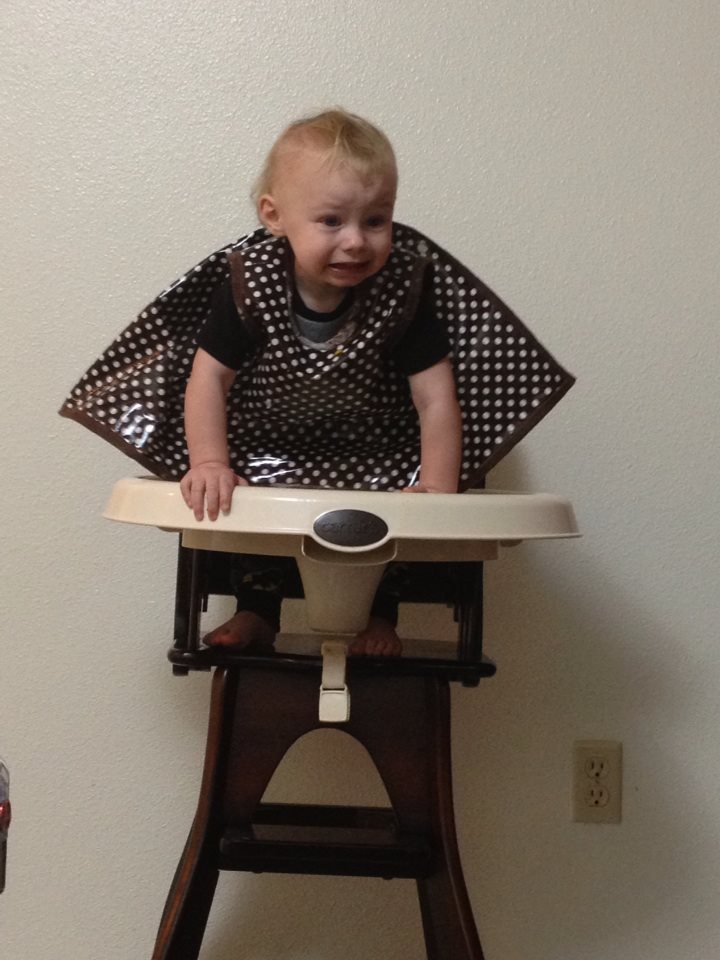
My son is a very messy eater. He loves a lot of fruits, and veggies but usually enjoys wearing them as well. I got tired of undressing him and dressing him before and after EVERY meal or snack. I finally thought, those cute smocks when I was young would be a great idea for my son to wear while he eats. That way I don't have to keep undressing him and dressing him, and he can just eat in the smock. Then I could just wipe it down, and he will be clean (or cleaner then without it). 

I looked at my local craft store for a pattern, even checked online and at walmart. In the end I was not willing to spend $15 bucks for a pattern. I thought about it and decided I would just use a t-shirt out of my sons closet and use that as a pattern. I grabbed some paper, a shirt that is a little large on my son, and started tracing.

Now, I wanted the back to be where the snaps go. I also wanted to make it expand over time so when he starts getting bigger I wont have to keep making a new one. So, the design will have the front as a solid panel, and the back would be two separate panels where the snaps will go. I used the front of the shirt and traced slightly larger then the shirt (to allow for seam allowances). I then flipped the shirt over and traced the back of the shirt to the center of it for the two back panels. I made one of the panels a little larger then the other (adding about an extra inch to the center of the shirt). The extra inch of fabric down the center will be where the extra snaps will go for the expansion for later on when he gets bigger.

Once I have the pattern made, I cut them out and trace them onto the wrong side of the fabric. Remember that you traced the pattern with the shirt facing towards you, but you now have the fabric facing down and away from you, so you will have to flip the pattern so the "right" sides are all facing the same way. Once you have your pattern traced onto your fabric, cut it out.

Now, I used vinyl as its easier to clean up, but a pain in the butt to sew! I found/read a trick online that when your sewing vinyl you just need to place painters tap on your machine and bottom of the foot. This way the vinyl will slip through your foot and the bottom of your machine, instead of sticking like its glue.

Once you have the pieces all cut you can begin to sew. I sewed the shoulder piece first. After those are attached I pinned the sides together, then sewed those together.

Now you can add binding like I did or you can fold the fabric in a 1/4 of an inch or 1/2 inch and sew that down. I made binding and then attached that. I would say if your a seasoned sewer you could do the binding, if your not then you might want to stick to just folding all the exposed edges (and sewing those with a straight stitch).

This is the final product:

This is the front, note the entire front is one piece of fabric.


Heres the back. One side has the extra inch in the center where the snaps are. The other side stops at the center (of the shirt I traced for the pattern).


These are the snaps I added. The one on the left is the female snap, the three on the right are all male snaps. This way when you put it on you can choose the size you need, and snap into which ever one is closes.

I put it on my son and he was in love with it! Sorry the pictures are kind of blurry, he was running and dancing in it.


Also, you can use these for painting, or any "dirty" crafts you may want to do!

 He was being a super hero!

In action, enjoying a snack!

So now go get dirty or get crafty with your little ones,
Sarah

Monday, July 29, 2013

Wall Art for the Boys Room

If you have followed my progress with my sons bedroom, over here on this post; then you might be excited to see some of the final touches I have done. I finished up the Wall Art that I wanted to hang in the boys room. However, with our move coming up in just a few short weeks, I wont be hanging them on the wall, but I will still show you the art.

I used the bed sheets (with the monsters on it) as my point of reference. Note: you can find those bed sheets photo in my other post-linked above. To start, I had small and large paint brushes, several different sized canvases (which I bought on sale at Hobby Lobby), painters tape, different colored paint, and my pencil to draw out the monsters. I decided I wanted both the zigzags and monsters. That way it isn't too much of one thing. I started out with the monsters first. I used my pencil and drew out the monster on the canvas, making sure it was as close to the design on the sheets as possible. Once I liked what I had drawn I began painting the main body color. I then outlined it with the black, and then the yellow for the teeth, and nails.

The final product is this:


I also added in the zigzags. I did one in orange and one in blue. I kept the grey from the wall color as the main color in the zigzag and I think it will look great on the wall. I used a stencil of a zigzag that I found online. I then blew it up to the size I wanted (I did this using my printer). I then printed several of them, cut them out and taped them down onto my canvas. I then painted one of the colors, and then took the stencil off. I let the one color dry; then painted, very carefully, the 2nd color.

The finished product:


All of the canvases together look great! I will probably put one large with one small monster and one zigzag canvas, and hang them in clusters of three. Once we re-paint the room and hang the boys names again at our new place in California, I will more then likely place one cluster either with their names or spread the clusters out on the other walls. If anyone has a great way to hang clusters of photos please let me know. I love any ideas!


Happy painting,
Sarah

Sunday, April 14, 2013

Boys Bedroom

     Now that we know for sure that we are having a second boy, we have decided to just add baby #2 into Brian's current room! With that being said, we needed a theme and we eventually decided on Monsters! Heidi Klum has a new line at Babies R Us, called Truly Scrumptious! Its a great line with tons of cute clothing, and room decor items. She has a monster themed toddler room set. However, she only made it in twin, and full size bed sets. I needed two crib size bed sets. So, I purchased two twin sized bed sets, and then altered them to make two crib sets. I used this tutorial and it worked out perfectly.

     Before I get to the crib sheet. Lets start at the beginning. We emptied Brians room out, took the entire animal themed design off the wall and began with a fresh coat of paint! So, in order to do that we needed colors. Heres a picture of the sheet with the paint chip colors.


      Next we got the room ready, primed, and painted in the main color of grey!


     The next step, was to add the stripes to the main wall where we were going to "feature" the boys names and add some art work, photos, etc. In time, that is! So we taped it out, painted it, and then the finished painted room!


     I really wanted to add some of the artwork from the sheets to the wall! I loved the free flowing, non-perfected monsters that are on the sheets. Sooooo, of course I hand painted those little guys on 3 of the remaining walls! The end result was awesome!


      The finished and complete room looks amazing! But first, before i show you that; lets go back to the crib sheets that I was telling you about.

     Heres how I did it using the twin sets:
     The twin bed set came with a fitted sheet, so I took the elastic out of the fitted sheet, opened the sheet up and made it flat again. I then used the measurements in the tutorial and and cut out crib sheets from the fitted sheets. The end results were awesome! Took about an hour or two to cut open the fitted sheet, pull the elastic out, and about 5 minutes to cut the crib sheet out of the fitted sheet. Then sewing the fitted crib sheet took about 10-15 minutes, and then 5 minutes to put the elastic through. Note: I used the elastic from the fitted sheet, but I cut it down in size to make it work for the crib sheet.


Once the sheets were done, I need crib skirts for the bottom. I like the look the crib skirt gives the bed, it really finishes the look. Now, the sheet set had a flat sheet that was grey and blue with chevrons on it. I loved the chevron look and thought that would be perfect for the crib skirt. I simply cut in the direction of the chevron, in the size I needed, cut out a white piece of fabric the size of the crib frame (including a 1/2in seem allowance), and added on the chevron fabric.

     Now, when you are making the skirt, its as simple as measuring! I made the skirts both the same size (fitting the crib with the higher mattress, so if and when we sell this set, they can use it for the baby size as well as the toddler size). Anyways, I measured with the mattress at the highest point. I then cut the fabric with al extra inch, so I could fold and put a hem on it. I also added ONE simple pleat in the front. I did not add one to the sides, as I like how clean it looked without it. Remember, I am having another boy, so I wanted to keep it less "decorative" and more manly!

Here is the crib skirt:

     Notice how clean the sides look and how just that simple pleat in the front gives it enough movement, but still masculine! Also, a note, when buying the white fabric, you can go cheap, but be sure to wash it before you sew on it! It will shrink!!!

     Next up was the window! Now in this house we only have one long window, thankfully! I had purchased TWO bedding sets, so I had another flat sheet witht he chevrons on it. I didnt even have to do much sewing for this one. Now, flat sheets come with a "top" that has a fold over piece. That piece just tells you it goes near the pillows, right!? So, I simply seem ripped the sides and the sides only To create holes for the pole to pass through. Seriously, NO SEWING!!! Just used that fold as my hole where the curtain bar slides through! Now, the only sewing I did was shortening the sheet to fit the window. The sheet was hitting the floor, and my husband and I liked the idea of keeping the curtain the size of the window. So I simply marked a few inches below the windows end, folded and sewed a nice edge. NOTE: I tried to match the thread as closely as possible, so that you couldnt see the difference! The results were perfect!


     Now, the last thing I made for the boys cribs were their teething rails! My son now, Brian, is teething and loves to chew on anything, including his crib. I made a few in the past and when i made them with Velcro he got clever and pulled the padding off. Then I made them with store bought ribbon, and one morning I woke up to my son wrapped; in the small thread that he had unraveled from the ribbon, all around his arms, lets, body and yes NECK!!!! I freaked out and decided I need to come up with plan C as to something he couldn't UNDO! The final option was snaps. Heres an okay, not the best tutorial on how to make them with ribbon, here. I however, did NOT add the ribbon. I also added fleece to one side, used up the left over chevron fabric from the skirt and curtains project, as well as added a small amount of batting between the two pieces. I measured for the snaps, made straps out of the fleece/flannel material for just the ends to anker the teether covers, and the finished look is exactly what I wanted. Also, my son is YET to get them off!


Those are the finished product! They came out great, and the wood will, hopefully, stay in tacked and not get destroyed!

With that being said here is the final photo of the boys new room design:


Hope you feel inspired,
Sarah