Almost all diaper bags come with changing pads and if they don't you can always purchase them for about $10 and up. The one that came with my diaper bag has finally started to fall apart, but I loved how it had the clear vinyl on it. The vinyl was super thick and made for easy cleaning. I am not fond of the all fabric ones as your washing them all the time. Not to mention if you have a little one who pees and poops with perfect timing, like right after you pull the diaper away, then your stuck with a fabric changing pad that needs to be washed. What if you need to run a few more errands?
My solution was to make one just like the pad I had but I wanted to add pockets. The pockets would be for diapers and wipes of course. I didn't want it to have any ties or snaps for closing, I just wanted it to fold up and be easy to use.
To start I needed two fabrics, the vinyl and some batting for the pad. I purchase two yards of each fabric, and only needed a piece of vinyl and batting about 22in by 16in.
 |
| Fabric for front and back, as well as pockets. |
I then scratched out real quick what I wanted the travel pad to look like.
Once I had my design I cut the fabric I needed. For the pad (16in x 22in) I needed the back fabric, the front fabric, the batting and the vinyl. For the base piece (12in x28in) I needed just the back and front fabric. The pockets (6 1/2in x 9 1/2in) I needed two fronts and two backs.
Once the fabric is all cut out, I started putting the pockets together. I took the front and back of both pockets and ironed them together. Make sure the right sides are together (one of my fabrics is just a solid color so it really doesn't have a right side).
Once the pieces were together, I pinned them and serged the edges. Leave a small hole on one side to flip the pocket.
Once you have the edges serged you will need to flip the pockets inside out through the hole.
Then iron the pockets flat, and fold the holes so all the seams line up. Pin the holes so you know where you will need to stitch.
Once the pockets are pinned you will need to top stitch around the edges. I start near the hole, place a lock in stitch and continue around the entire pocket. I use 1/8in spacing for my stitch from the edge.
Once the pockets are done move on to the large piece that the pockets will be attached to. The 28in x 12in pieces. Again, I ironed the two piece right sides together. I pinned the pieces together leaving a 16in hole at the top. (NOTE: if you have fabric like mine that has a direction make sure you are cutting and placing the holes where your fabric will be going the right direction.)
 |
| right sides together |
 |
| 16 inch gap marked by the pins (leave this open/do not sew). |
On to the serger again, stitch around the entire edges, leaving that 16in hole.
Once the sides are sewn, flip the fabric inside out, just like you did with the pockets. Iron the sides flat.
Now fold the pieces along the hole inside, just like you did with the pockets. Iron the fold down, make sure the two pieces of fabric meet at the same point.
Now place your pockets on the front side of the large piece (make sure you don't get anywhere near the 16in hole you left).
Pin the pockets, and stitch them in place. Start on one of the sides then down to the bottom, along the bottom, and back up the side. Remember its a pocket so leave the top open. I also back stitch along the top two sides.
 |
| test it to make sure its big enough. |
Now onto the pad. You will need to layer the pieces and again you will serge the edges, so pin this real well.
 |
| Layer with the batting on the bottom, then one of your fabrics, then the vinyl and then the other fabric on top. |
Now serge the two long edges and one short edge. Leaving one of the short edges open. (NOTE: I left one of the LONG sides open and definitely recommend you do NOT do that.)
Now flip the fabric inside out. You will need to flip between the vinyl and your back fabric.
Because I flipped between the LONG side I had to fold the sides in and top stitch around the entire edge. Now if you flipped on one of the short sides, you wont need to fold the fabric inside and top stitch all the way around. You can just top stitch on the 3 sides and leave the 4th side unstitched.
 |
| I had to fold the fabric in because I flipped on a long side. |
 |
| Pin the hole real well, then top stitch. |
 |
| Once I was done this is what it would look like. |
If you are doing the 3 sides stitched and the one short side open you will have something a little different then the photo above. Don't worry that open side will disappear soon.
NOTE: When sewing with vinyl it will stick to the plastic sewing machine, so take painters tape and tape the base of the sewing machine and the underside of the presser foot.
Now you will slide the short side that you left open into the top of the 16in hole you left open on the large piece.
Pin the pieces together as best you can. Then top stitch along the two pieces and continue all around the large piece of fabric (28in x 12in).
Now go back over in a zig-zag stitch where the two pieces connect.
Now fold the pieces up and you are done!
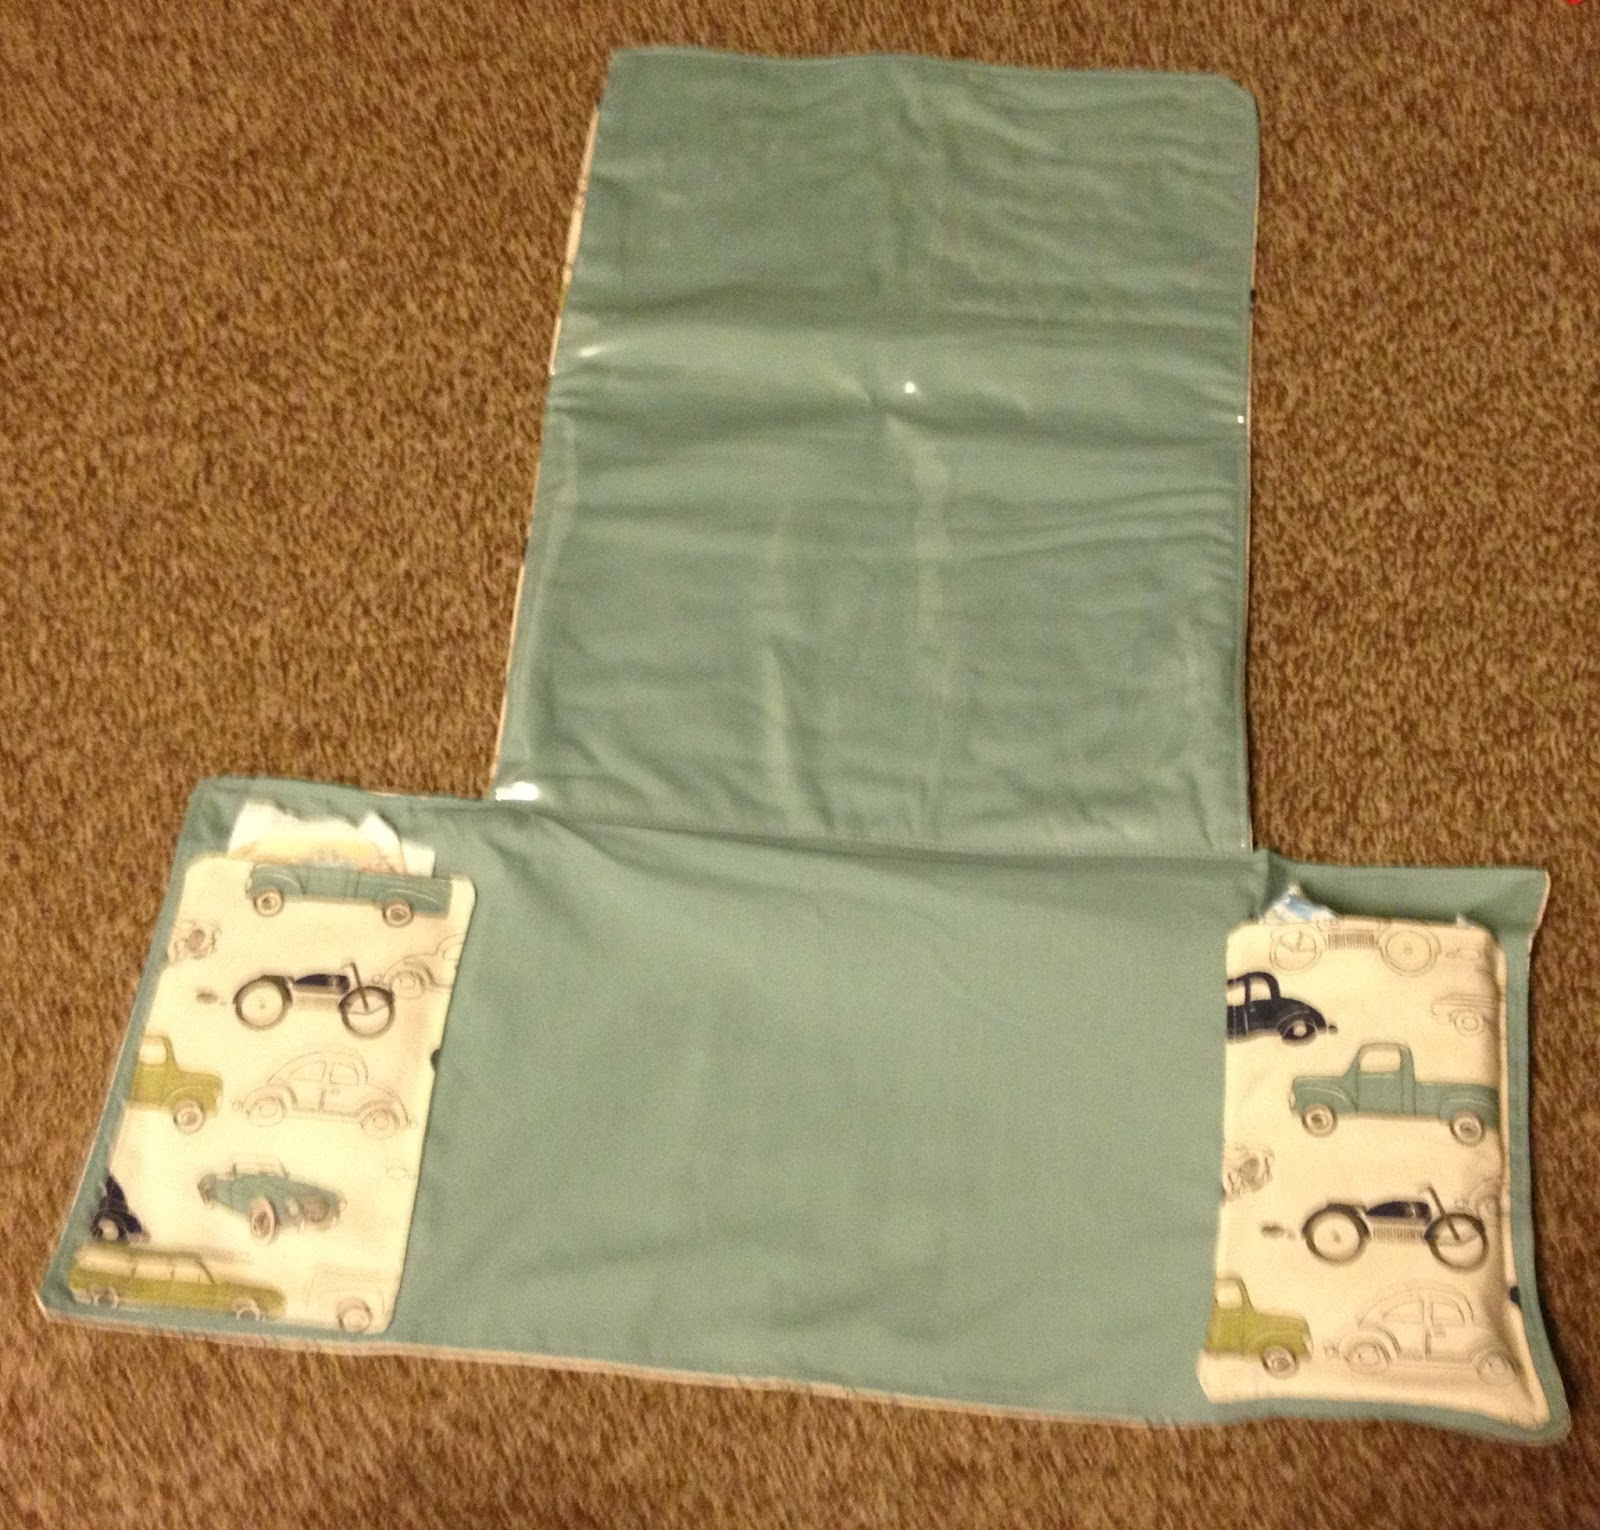 |
| How to fold it up. |
 |
| Fold the sides with the pockets in. |
 |
| Then fold the bottom up into the pad area. |
 |
| Fold the top of the pad down on top of the pockets. |
 |
| Then fold the entire thing in half (from left to right). |
Now you have a travel changing pad! Its going to last you forever, and its super cute in the fabric you want! I have two boys so the car fabric is just perfect, plus its in beautiful blues and teals which is pretty for me too!
Now you are ready to change a few diapers,
Sarah


