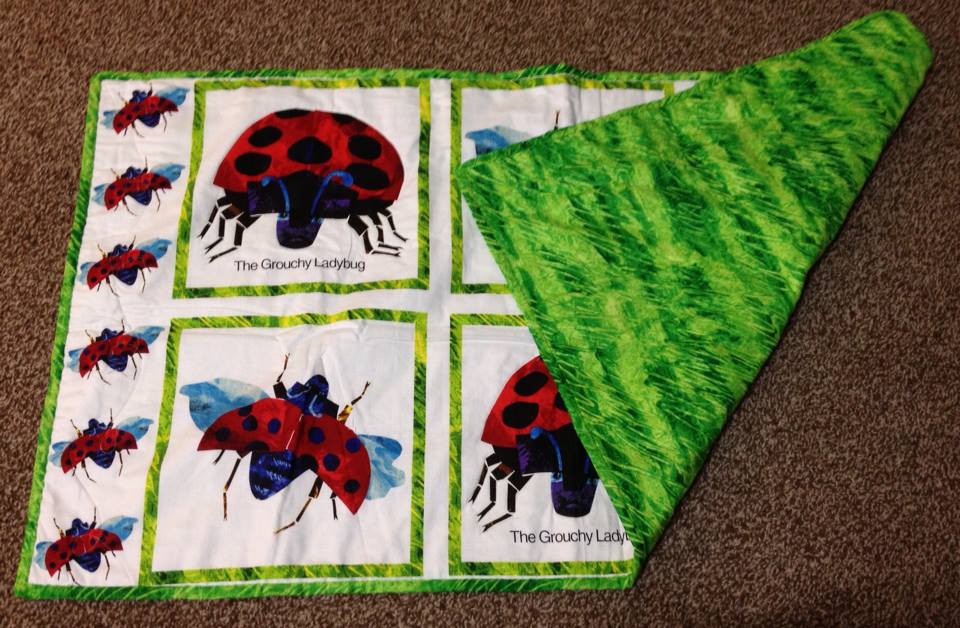
Once again I had this urge to finish up those old quilts sitting in a box waiting to be finished up. I pulled out the box, dusted it off and realized there were two quilts from back in July 2012! Yikes, its been a year since I have seen these quilt and since I had touched them! Ooopps!
The first quilt I bought; one, because I love the hungry ladybug book, and two, because my sister-in-law wanted to see how I machine bind. So, I just bought the material, busted out a small quilt for tummy time, or playing on here and there (for my newborn/baby), and then showed her how to put the binding on. I started the binding, she then put a few more stitches in to see how it worked and then eventually we both got busy with our little ones. The quilt came with us to NM, and got stuffed in a box when I got interested in other projects. I just never got around to finishing the binding.
 |
| Working on the quilt back in July 2012. |
 |
| Front stitched to the back. |
 |
| The free motion quilting swirls on the front. |
 |
| The quilting around the ladybug on the back. |
 |
| The free motion quilting on the back. |
When I pulled the quilt out I saw that the machine binding was not one I had on my machine here at the house, as we were using out Mother-in-laws machine. So, I sat down, seam ripped the machine binding out (it was only one side and a little on another). Once the thread was removed, about 40-45 minutes later, I began to hand sew the binding on. Something about hand sewing that my mother-in-law said was soothing. I didn't realize it until I started putting it on this quilt! I was finally understanding how calming it really was.
 |
| Hand sewing the binding on. |
The front is a panel. You purchase it as its seen. The back is part of the collection. Its a green grass like fabric. Its super cute. I also used it as the binding around the edge. I also stitched around the ladybug to keep the fabric from moving when it gets washed. I did a little motion free swirls along the left and right sides.
Along with the ladybug quilt, I found a pink/blue quilt that my mother-in-law made me. She was making it when her machine broke on her. She had finished the top, the back, and even started the the quilting. I took it in and all I had to do was trim off the extra material and batting and then put the binding on. I purchased some pink fabric for the binding and began stitching that on. I also hand sewed the binding on this quilt as well.
This is the front of the quilt (above), NOTE: I did not sew this top, my mother-in-law did! This is the front with the back (below).
The back of the quilt (below). I love this fabric!
I enjoyed putting the binding on this quilt, and now I have a quilt for myself! I make so many quilts and other items for everyone else and never for myself. Finally, a cute one for myself!
Now on to a quilt thats been sitting piled up in a bin for several years. This time its been several years because I have been collecting shirts from all my travels. From states, places, and countries I have visited and traveled to. I love the shirts because each one has a memory and each one will now be preserved in a t-shirt quilt! Yes, that right, I made a t-shirt quilt. I even took a few photos along the way, so you all can get a small tutorial of how to make one for yourself.
To start I cut all the shirts in squares and rectangles. I also ironed on interface to the back of the shirts once I had the sizes I liked. The interface will keep the shirt still and firm when sewing them. This way you don't have a lot of fabric bunching or shifting on you.
Once you have all the shirts cut out and the interface sewn on I then laid them all out in a pattern I liked. I measured and measured and measured to make sure that both the front and back were roughly the same (I still sucked at that... you will see later). Once I had rows, I started sewing each row together. I used a half inch seam to give the shirts a strong hold.
One row down, on to the others. Once the rows are done, then I moved on to sewing those rows together. Heres the first two rows sewn together. (Below)
Once I had the three rows sewn together, the front was done!
On to the back. Now I had several tank tops with made the back a little more challenging then the front. I had to fill in the arm areas that were missing. I simply used the backs and bottoms of the tanks to stitch into the holes. Once that was done I again added the interface to the backs of all the shirts.
Pinning all the rows together.
The back/rows are all sewn together (this was a more challenging side due to the tank tops).
I laid the front o the batting to cut out the size I needed.
The back was too short so I pinned the front to the batting, flipped the quilt over placed the back in the center and measured out what I needed to add to it. The grey fabric is all the extra material for the back to measure up to the front. I struggled to get this centered, but in the end I believe it came out ok!
Once I had everything measured correctly, I pinned the back to the batting and front and began to trim up the extra material around the edges. I then sewed with my machine the one side of the binding. In the image below, I am beginning the one day worth of hand sewing of the binding.I use to hate hand sewing the binding and I could never understand why anyone did it, but now that I am a mom of two I find the hand sewing so calming. I love it.
Heres the front after the binding was on but before I could decide how to quilt it. I know, I was working backwards.
After a day of sitting with the quilt I finally figured out which stitch I liked. I then decided how I wanted to place the stitch and finally I was quilting this quilt.
(Above) The stitch I decided on.
The photos above and below are the finished quilt! I loved how colorful and bright it is. Now I can enjoy those memories for a life time!
I hope to make another t-shirt quilt a few more years down the road. I still have several shirts and hope to add to the pile. I even would like to make a t-shirt/onesie/bibs quilt of my boys clothing. That way I can keep all my favorite baby clothing without it cluttering up my house. It will just simply be a quilt I can keep forever.
Hope you all have a few t-shirts to make a quilt,
Sarah