Pages

Showing posts with label outfit. Show all posts

Friday, February 28, 2014

Mickey Mouse Clubhouse Birthday Party

My son turned the big 2 this month. So of course we had to celebrate in style! I wanted to share all the ideas and decorations with everyone. Some of these ideas I found on pinterest, and others I just came up with on my own. I also made the cake and cupcakes. I did buy a lot more decorations then I normally do, because I threw my sister a baby shower the weekend before and all my decorating skills and cake making went into her party (as its her first child) and this was just my sons second birthday!

Enjoy!

Ill start with the decorations.

When you entered the door, I wanted to say "yes, the party is here"! I made this wreath by simply purchasing black and red ribbon (3inches in width), I hot glued at the starting point, wrapped around tightly, and hot glued at the end. I then cut out two yellow ovals, glued those on, and made a hanger for it with black ribbon. End result, a wreath that looks like Mickey Mouse!


I purchased this banner at Party City, as well as the streamers. I purchased these balloons at target, and blew them up myself. I did purchase balloons at Party City, which I will show you in a minute.


My son has a mickey in every size, and I borrowed this one for the day. We also purchased the hanging red plastic mickey streamer from Party City. They come in a package with several others, and I have to say I was shocked at how many actually came in the package! It was way more then I thought I would get.


Heres the rest of those steamer, plastic, Mickey themed items I purchased from Party City.


I have a horrible time actually sending out thank yous, so I made a small station (right next to the front door) and when everyone came in, I made them write their address on the card. This way all I have to do is write the thank you, add our address and send them off. (Now we wait and see how fast I get to them!) Oh and the party hats were purchased from target.


I purchased these balloons at Party City and placed them in the living room, behind the chairs and not in the way of the TV. My son is still playing with them even a week later!


Adding balloons to the presents table is a simple way to dress it up and it looks super cute when all the gifts are on it. Sorry I did not catch a photo of it with all the gifts. It looked cute though, will you just trust me?


This banner, over the kitchen was hand made. I personally cut out each letter, each mickey, and each circle. I then punched holes in the circles, glued on the mickey heads and glued on the letters. Once everything was dry I added the ribbon, and ta-da, its beautiful! Check out a quick and easy step by step tutorial HERE!


Note the letters are made to look like the writing from Disney/Disneyland.

This is a pinterest find. I used foam (from a craft store), cut out mickey heads, and purchased the clear bags. I headed over to Sams club, purchased an extremely large animal cracker container, tossed a few into the bags, folded them up and stapled the heads to the bags. The end result is awesome. You could add a note, saying thank you, or thanks for having toodles and oodles of fun! However, like I said before I just didn't have the time. I found these were a huge hit as even the adults liked them!


The dessert table is always the highlight at my kids parties! I purchased the balloons, the banners, and streamers all from Party City. I had the cupcake tiered stand on hand, and purchased the table cloth from Party City as well. The goody bags on the right I made from red bags (I believe I bought at target), cut out black construction paper, and yellow ovals, and then glued them all on. I only glued them on the front, and nothing on the back. You could spend the time and glue them on the back, but I just didn't have the time (or the construction paper). I purchased bubbles, candy, key chains, stickers, chalk, and pouched applesauce for the goodies. The kids loved them and I believe I only had one left for my son!


In the dining room, I put up streamers, balloons (some I blew up), and table cloths. It came out great, and this was by far my favorite room.


Once again the dessert table!


Lastly, my mother in law found the pinata at Party City and I have to say it was a huge HIT! (Get it, hit, haha). My son loved it! It took a ton of hits, and after I gave it three really strong hits it broke. These pinatas are made well, and I say totally worth the money!


Alright, now lets talk outfit.

I purchased the white long sleeve shirt from Walmart (practically the only place that sells blank shirts, anymore.) I then purchased some of the material for his shirt, as I had some of it at home. You can purchase fabric from Walmart, Joann's, or a fabric store in your local area. Once I had the material I cut everything out, and put it together. I will have a tutorial for it soon. So here he is in all his cuteness:

With Grandma.

Dirty and playing.

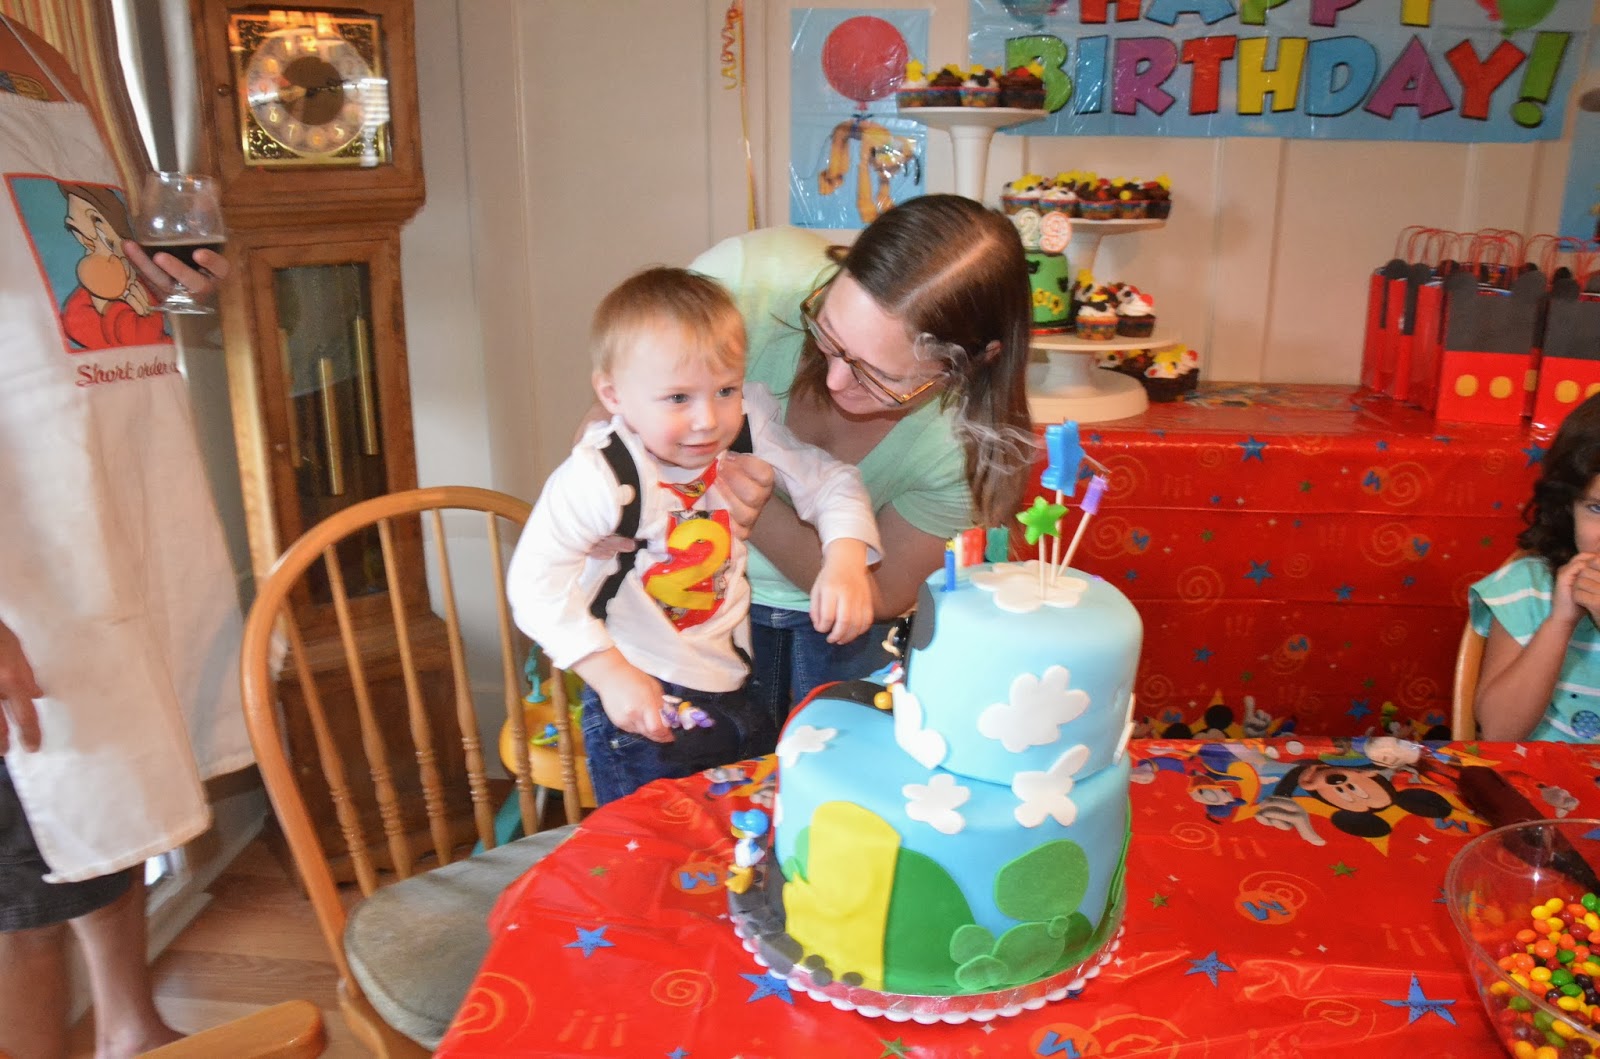
So excited to blow out his candles.
Lastly, I made his cake and cupcakes. I have been making cakes for awhile, and I seriously enjoy making them for my sons birthdays. I can not wait to make one for my youngest sons 1st birthday, this summer.

 Let me start with the cupcakes. I love to add cupcakes to all my parties. They are the perfect size for those small kid sizes mouths, or the mother/father/friend who wants something to eat, but doesn't want to over do it. I made both chocolate cupcakes with chocolate icing, and vanilla cupcakes with vanilla icing. I usually do some sort of collection of flavors, for those who prefer one over the other.


Note: Tiered stands help give the dessert (or food) table even more surface to add items to, as well as help give the table height and something visual to look at. I always recommend using a cupcake stand, or a tiered cake stand like this one.


I then made my brother in law a cake as well. His birthday was the day of my sons birthday party, so I made him a cute little personalized cake, just for him!


I kept his cake, still apart of the theme. This helps make it personal for him, but also keeps it from standing out too much! I even went over board and bought the 2 and 9 candles for kids, and used them side by side to say 29! It was a fun spin on it, and made it child like (to fit the theme)! I believe he liked it.


And of course, the main cake for the birthday boy. Its Mickey Mouse Clubhouse, like the actual clubhouse. We had purchased the figures as toys for my son about 2-5 months prior, as we just collected them as we saw them. Thankfully, by the party we had all 5 of the main characters. We still need Pluto, Claribel, and the Professor; so if anyone sees them, let me know!

 Side by side, you can see the clubhouse a little better.

The front of the cake, and hey look the goody bags too!

Right side.

Left side.

Well, thats it. That was the party, and we had a wonderful time. My son was extremely happy, and I think he enjoyed it a lot. I want to thank my Father in law, who cooked all morning long and made the best lunch (and dinner) ever! He also makes a great margarita! Yum! I want to say thank you to everyone who came out, it was a ton of fun, and I always love seeing the little ones!

Happy Birthday to my son,
Sarah

Friday, July 19, 2013

Brians 1st Birthday Party!

My first born, Brian, turned one in February 2013. I know I am way behind on posting this but I figured a lot of people love to see what others do for birthday parties to help get ideas. I decided I would post a few photos and explanations of what we did for his Big First Birthday!!

Like all birthdays you have to start with a theme! We chose MONSTERS!! Brian was a very cranky baby when he was a newborn, and so his nickname; monster, kind of stuck! Once we had the theme, I needed fabric and banners/printables to start picking colors and monsters from. I found this fabric:


over at fabric.com. I love the bright colors and the fact it has a dark background! Heres the printables we chose, sorry its a little hard to see, but the colors in the fabric and on the printables are all very similar!


Now that I had the theme and colors, I started working on the onesies for him, his crown, his bib, and pants. I found a tutorial on pinterest on how to make pants, and went from there. The tutorial used a pair of jeans from her son, traced them and then made the "pattern" just slightly larger then that. I loved how detailed her tutorial was. You can find it over at Growing Home, and while your over there check out all her other posts! I also made a bib and appliqued onto the bib. I have a tutorial that I made on how to make a bib, you can check it out over here at Bibs for Babies! I also appliqued onto two onesies, and made a banner out of fabric. The crown I made, I just drew out a crown that I liked, and then cut out 2 pieces of fabric, sewed them together (right sides together), then flipped it inside out and put a binding on the open side (the bottom), and then attached the monster, embroidered the ones on and finished it off with some cute stitching.

Brian wearing the crown and bib.

Heres one of the onesies I made.

Heres the other onesie I made. (Note: the monster was purchased).

The bib I made. (Note: the monster was purchased.)
This is the banner I made. (Note: The monster were purchased.)

The crown I made. (Note: The monster was purchased.)

Back of the pants, pockets on the back and on the side.

Front of the pants.
Now that I had all the clothing made, I needed to make goody bags and goody bag items. I purchased a few candies and coloring books to go in the bags, but I wanted the bags to be something the kids could have and keep. I made the bags from two rectangles, and then sewed the corners, so the bag had a flat bottom. The handles were just strips of fabric. I also made a few different monsters from felt.

The goody bags at the party and the monsters at the party!
The goody bags in progress.
Monsters in progress.
I loved the idea of showing pictures from the past year (of my birthday boy). The idea of seeing him in photos growing up was such a cute idea, and so I made frames from some scrapbooking paper I had on hand. I simply measured out a frame for a 4 x 6 picture and then used one as a stencil and cut a few out. I stuck to the same colors and used scrapbooking paper that didn't have a ton of detailed pattern on it.

The photos all framed up with the scrapbooking paper.
This is the photo chain, with the photos at the top starting at birth and the ones at the bottom being more recent.
For the entire house, we used streamers, a few balloons, and a few curled up ribbon to help give the tables some pop.

A friend and my sister-in-law helped make this wall!

A three headed monster to take pictures in!!

The gift table with balloons in the background.

The dessert table. (Check out the fabric banner I made hanging above)!
I have been making cakes for many years now, so of course I was super excited to make my sons birthday cake. Now, I was at my in-laws house and using some of their stuff and I brought a few of my tools with me, but its always difficult to bake and decorate in someone elses kitchen! It was a hot week too, in California, and the house wasn't too cool, and because of that I was struggling to get the icing just right. Anyways, I did a trial run of this cake at home (as seen in the first photo below), but hated everything about it. So, then when I arrived at the in-laws I decided to change almost everything about the cake. I also enjoyed making the cupcakes as they were simple but made a cute display!

Trial run cake- did not like this at all!

The table all set up!

The cake and cupcakes.

The cake up close.

Again.

The adorable monster cupcakes.

Just too cute, all the monster cupcakes are looking at me!
In the end I loved the cupcakes, and the cake! The top tier of the cake (the orange monster) ended up being the smash cake. The top tier was removed, and we gave it to our son as we sang happy birthday! He wasn't too sure what to do with it at first, but once he got a taste he was a happy little guy!

Singing Happy Birthday and waiting to blow out the candle!

Eating the cake!
He enoyed ripping the paper off the presents as well, and also enjoyed taking down all the decorations and playing with the balloons. I tell you the best toys are always the cheapest stuff!

Opening gifts!
Playing with the balloons!

Helping us take down the decorations!

Overall, the party was a huge success, and we had a blast planning and throwing it. We have to thank my father-in-law and mother-in-law for letting us use their house and for supplying the awesome food! We are very lucky to have such awesome friends and family members who came and showered Brian with such love and too many gifts to count! It was a great party and I am so thankful the entire thing went off without any issues!

Now time to plan Brians 2nd birthday party and our newest addition, Jareds 1st birthday! YIKES!!

Happy Planning,
Sarah